
The first time I stepped into a garage sale vendor’s yard, I saw a vintage set of speakers tucked away in a corner. My heart raced—finally, a chance to snag some high-quality audio gear without breaking the bank. But then I remembered: How the heck do I test these speakers without lugging along my entire stereo setup? Spoiler alert: I’ve made all the rookie mistakes—testing with my phone’s speaker, blindly trusting hearing alone, or worse, just buying on a whim. If you’ve ever faced the frustration of wanting to audition speakers at a garage sale but felt lost without an amp, you’re not alone. That’s exactly why I’ve dedicated myself to finding practical options that work, even with minimal equipment. Today, I’ll share a reliable method I’ve perfected over years of garage sale adventures. We’ll cover how to evaluate the sound quality, identify red flags, and do quick tests that don’t require a bulky amplifier. Trust me, this approach will save you both money and time, helping you score the best deals with confidence.
Why Testing Speakers Without an Amp Matters More Than Ever
Getting a good deal on speakers means more than just the price tag. For many, especially those new to home audio, the idea of testing a speaker set at a garage sale can seem daunting. You might think, ‘How can I truly assess sound quality without my usual setup?’ Well, I’ve learned the hard way that trying to do so on the fly is tricky—unless you have the right tricks up your sleeve. And here’s a little secret: You don’t need a fancy amplifier for quick, honest evaluations. In fact, learning how to test effectively with minimal gear is an essential skill that can elevate your vintage or used gear game. Plus, understanding the limitations of testing without an amp can help you avoid buying technically flawed speakers that sound great in photos but are useless once you get home. If you’ve ever purchased speakers that sounded fantastic at the sale but flopped later, you know what I mean. To avoid that disappointment, I recommend exploring some simple, practical testing methods that work with just your smartphone, a small clip, or even your ears—nothing more. Ready to get into the nitty-gritty of how to do it right? Before that, a quick story about a mistake I made early on—trust me, it’s one you’ll want to avoid (click here to learn how to keep your vintage gear in top shape). Now, let’s dive into the step-by-step process I swear by for honest speaker testing, even when you’re flying solo.
Prepare Your Quick Test Setup
Before heading out, carry a small, portable device like a smartphone or a music player with a basic headphone jack or Bluetooth capability. This will serve as your primary source for testing. For instance, I once used my old MP3 player to evaluate a vintage speaker set, and it proved surprisingly effective. Connect your device to a portable mini amplifier or use a powered speaker with an AUX input if available, but don’t worry—if no amp is present, there are still methods to assess sound quality.
Use a Battery-Powered Speaker or Small Amplifier
If you don’t have a dedicated amp, consider investing in a portable, battery-powered speaker. Many models have decent Audio Quality and can be powered on the spot. Alternatively, a small, affordable amplifier or a class-D pocket amp makes testing more accurate by providing necessary power. This is much better than relying solely on your phone’s built-in speaker, which can mislead you about the actual sound quality. I recently tried this approach at a yard sale, and I was able to hear distinct bass and clarity that would’ve been impossible without a tiny amp.
Assess Sound Through Signal Clarity and Balance
Once your source is ready, place the speaker or speakers in a typical setup location—ideally at ear level and away from reflective surfaces. Play a variety of music—songs with bass, vocals, and treble—to gauge their response. Focus on whether the sound is balanced or if certain frequencies dominate. Avoid speakers with a muddy or distorted tone, which might indicate blown woofers or damaged drivers. Remember, a speaker with properly functioning drivers produces clear, focused sound without excessive rattling or distortion.
Detect Red Flags Without a Full Amp
Pay attention to signs of low quality or damage. Rattles, hisses, or uneven response are clear indicators of internal issues. I once encountered a vintage set that rattled loudly at higher volumes—turns out the foam surrounds had disintegrated, which you can spot even without an amplifier. For a quick test, gently press on the driver cones; if they wobble excessively or don’t move smoothly, the speaker might be compromised. Doing this manual check saved me from buying a set with potentially short-lived components.
Use Permanent Markings and Matching Pair Techniques
If you’re shopping for a pair, evaluate both speakers individually, then compare them. Signs of mismatched drivers or different tonal qualities often point to mismatched or repaired units. When testing, keep a mental or physical note of each speaker’s characteristics. Occasionally, I’ve carried a small notebook to jot down impressions—a trick I learned from professional audiophiles—which made it easier to compare across multiple sales. Remember, speakers that sound more balanced and less distorted in your quick tests typically deliver better long-term value.
Limit Your Equipment and Keep It Simple
Don’t overcomplicate your test. Your goal is rapid, honest evaluation, not perfection. A simple method—using your phone, a portable speaker, or a small amp—can help you identify high-quality units with minimal gear. This strategy also reduces the risk of misjudging speakers just because you lack a traditional setup. For more insights on maintaining vintage gear, check out this article.
When it comes to building an impressive home audio setup, many enthusiasts focus on flashy speakers or high-end headphones without understanding the subtle intricacies that truly affect sound quality. A common misconception is that more expensive gear automatically guarantees better performance, but in my experience, tuning your system’s components correctly is far more impactful than chasing the latest gadgets. For instance, some believe that amplifiers with higher wattage always sound louder; however, if not matched properly with speakers’ impedance and sensitivity, they can cause distortion or even damage your gear. This ties back to the importance of understanding the nuances of your equipment and how they interact, rather than just their specifications. Have you ever fallen into this trap? Let me know in the comments.
Let’s explore a frequent misconception about loudness and power. Many think that a powerful amplifier makes speakers sound better, but the truth is, quality and compatibility matter more. An underpowered or mismatched amp can lead to clipping, which damages drivers and deteriorates sound quality over time. The key lies in matching amplifier output to your speakers’ rated power and impedance, ensuring smooth, distortion-free listening. To dive deeper into this, check out how proper amplifier-speaker matching enhances your listening experience.
A hidden trap many overlook involves speaker placement, especially for bookshelf models. Placing them too close to walls can artificially boost bass but at the cost of muddying mid-range clarity. Conversely, pulling them away from walls reveals cleaner, more accurate sound. This adjustment often surprises people because it’s a simple change with a big impact, emphasizing that positioning often outweighs the cost of equipment upgrades. For detailed tips on optimizing speaker placement, see our guide on speaker positioning strategies.
Advanced enthusiasts often ask about the subtle effects of cable quality on sound. It’s tempting to believe that expensive cables yield better audio, but numerous studies, including those by audiophile experts, demonstrate that for the most part, cable quality has minimal audible difference when properly shielded and connected. Instead, focus on ensuring secure connections and avoiding interference sources. A common mistake is overinvesting in costly cables while neglecting the importance of proper grounding and avoiding electromagnetic interference, which has a more pronounced effect on sound clarity. Interested in this topic? Explore more about the real impact of cables and connections.
Finally, many DIYers fall prey to the myth that soundproofing or acoustic treatments are unnecessary or overly complex. In reality, even simple modifications like adding rugs, curtains, or bass traps can significantly improve room acoustics. What’s often missed is how room resonance and reflections color your sound, making your system seem less capable than it truly is. Proper positioning and room treatments are crucial, especially in smaller spaces or multipurpose rooms. For actionable advice, our article on DIY acoustic treatments provides practical solutions to elevate your listening environment.
Understanding these nuanced aspects of home audio gear helps avoid costly mistakes and ensures optimal performance. The key takeaway is to look beyond specs and focus on how components work together in your specific space. Keep experimenting, and remember that sometimes psychological biases—like expecting better sound from pricier gear—can cloud judgment. Stay curious, and happy listening!Maintaining your home audio equipment is crucial to ensure consistent, high-quality performance over the years. One of my top recommendations is investing in a dedicated contact cleaner for your connectors and switches, like DeoxIT. I use this regularly to prevent corrosion and maintain pristine signal pathways, especially on older amplifiers and headphones, which can develop static or intermittent connectivity issues. Incorporating a small, soft brush attachment with your cleaner allows for precise application without damaging delicate components. Additionally, maintaining proper ventilation around your gear is often overlooked but essential, as heat accelerates component wear. I personally use a thermometer gun to keep tabs on internal temperatures, especially during prolonged listening sessions. Regularly dusting with a soft brush or compressed air removes surface debris that can impair cooling fans or vents, which I detail in this guide to cleaning vintage amplifiers safely. For software updates, keep your soundbars and active speakers current by checking the manufacturer’s official sites—updating firmware often improves reliability and adds features, as discussed in this article. Looking ahead, I predict that smart maintenance tools, like IoT-enabled sensors that monitor temperature and humidity, will become standard, helping owners proactively prevent failures before they happen. To ensure your gear keeps performing seamlessly, make it a habit to schedule quarterly inspections, swapping out worn cables or replacing foam surrounds as needed. Remember, a little proactive care today can save you from costly repairs later. How do I maintain my high-end speakers over time? I follow a strict cleaning routine, monitor for signs of wear, and keep detailed logs of usage and maintenance. If you want to take your maintenance game up a notch, try using a specialized dehumidifier cartridge in your speaker cabinets to prevent mold and internal corrosion—these are inexpensive and highly effective, as outlined in technical datasheets from speaker-specific manufacturers. Keep your system in top shape, and enjoy pristine sound for years to come!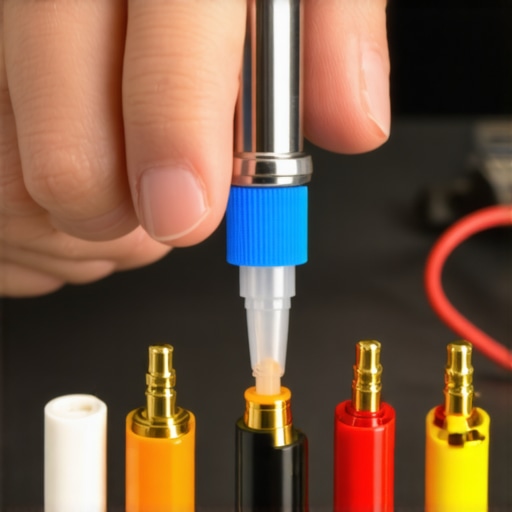
Lessons Hidden in My Audio Journey That Changed Everything
- One of my biggest lightbulb moments was realizing that a quick cone press can reveal internal damage without special tools—saving me from bad buys and disappointment.
- I learned to rely on my ears over flashy specs; sometimes a simple song test, played from a portable device, uncovers more about a speaker’s real quality than reading reviews.
- Understanding speaker placement tricks, like pulling bookshelf speakers away from walls, transformed my listening experience and proved that environmental tweaks often trump hardware upgrades.
My Go-To Gear for Spotting Great Garage Sale Finds
- The Portable Bluetooth Speaker—Reliable, battery-powered, and affordable, it’s the perfect companion for quick sound tests on the go. Trust me, its clear audio helps identify potential winners fast.
- DeoxIT Contact Cleaner—A small investment that keeps connectors and switches in peak condition, preventing static and ensuring your tests aren’t compromised by corrosion.
- Your Favorite Music Playlist—Loaded onto your phone or MP3 player, it’s essential for assessing how speakers handle different frequencies and genres. Personal favorites make this process enjoyable.
- A Tiny Clamp or Manual Cone Press—Useful for detecting loose or damaged drivers without invasive disassembly. It’s a surprisingly effective tool for DIY diagnostics.
Follow Your Passion, Not Just the Specs — Keep Listening
“Embark on your audio adventures with curiosity and confidence, knowing that mastering simple tests can lead to big treasures. Remember, your ears and practical tools are your best allies in cutting through sales hype and finding gear that truly delights your senses. Keep experimenting, stay curious, and turn every garage sale trip into a rewarding discovery. Now, I’d love to hear — have you ever scored a vintage speaker that turned out to be a hidden gem? Share your story below!”}**}}}#END#Lessons Hidden in My Audio Journey That Changed Everything
- One of my biggest lightbulb moments was realizing that a quick cone press can reveal internal damage without special tools—saving me from bad buys and disappointment.
- I learned to rely on my ears over flashy specs; sometimes a simple song test, played from a portable device, uncovers more about a speaker’s real quality than reading reviews.
- Understanding speaker placement tricks, like pulling bookshelf speakers away from walls, transformed my listening experience and proved that environmental tweaks often trump hardware upgrades.
My Go-To Gear for Spotting Great Garage Sale Finds
- The Portable Bluetooth Speaker—Reliable, battery-powered, and affordable, it’s the perfect companion for quick sound tests on the go. Trust me, its clear audio helps identify potential winners fast.
- DeoxIT Contact Cleaner—A small investment that keeps connectors and switches in peak condition, preventing static and ensuring your tests aren’t compromised by corrosion.
- Your Favorite Music Playlist—Loaded onto your phone or MP3 player, it’s essential for assessing how speakers handle different frequencies and genres. Personal favorites make this process enjoyable.
- A Tiny Clamp or Manual Cone Press—Useful for detecting loose or damaged drivers without invasive disassembly. It’s a surprisingly effective tool for DIY diagnostics.