
Ever been excited to sit down with your favorite playlist only to be greeted by crackling static or uneven sound suddenly cutting out? I remember the first time I swapped out my cheap audio cables, convinced that better connectors or fancier equipment would fix my audio woes. But somehow, the issue persisted. That lightbulb moment led me down a rabbit hole into the world of audio cables, where I discovered that not all cables are created equal—and understanding the difference between balanced and unbalanced audio cables can make a real difference in your listening experience.
Why the Right Cable Can Make or Break Your Sound
Let’s face it: investing in a high-quality speaker, amplifier, or DAC is often what’s marketed, but the truth is, your cables play a crucial role in transmitting that pristine sound. The wrong type of cable can introduce unwanted noise, hum, or even cause subtle distortions that you might not notice at first, but they can add up over time, ruining your enjoyment. Early on, I made the mistake of thinking I could save a few bucks on cheap cables, which only resulted in more frustration. Once I switched to properly matched balanced cables for my setup, the difference was night and day—clearer sound, less background noise, and a more immersive listening experience.
Is All the Hype About Balanced Cables Just Overblown?
Many skeptics dismiss the importance of balanced cables, claiming it’s just a marketing gimmick. Well, I used to think the same until I realized that proper cable choices needed to be in harmony with my audio environment. For example, if you’re running long cable runs in your home studio or outdoor setup, unbalanced cables are more susceptible to picking up interference—like fluorescent lights or power lines—which can significantly degrade sound quality. Meanwhile, balanced cables employ a clever trick of carrying opposing signals to cancel out noise, much like noise-canceling headphones work to eliminate ambient sound. This fundamental difference means that, in certain situations, choosing the right type of cable truly elevates your audio experience.
If you’ve ever faced inconsistent sound or had to deal with persistent hums and buzzes, then understanding the nuances between these cables can be a game-changer. Need a quick guide on how to optimize your setup? You might find useful tips in this article on hiding speaker wires, which emphasizes the importance of clean connections and proper installation, or explore how to match speaker impedance without doing hard math.
So, next time you’re shopping for new cables or considering your audio setup, ask yourself: is that unbalanced cable really the best choice for my environment? Or could switching to a balanced setup unlock a new level of clarity? Let’s unravel the mysteries of audio wiring and get your sound just right.
Inspect and Choose the Right Cables
Start by evaluating your existing cables. If you notice persistent noise, hum, or crackling, it might be time to replace them. Opt for high-quality, shielded cables designed for your setup—balanced cables for long runs and in noisy environments. As I did when I replaced my unbalanced speaker wires, selecting the right cables immediately reduced background hum and improved clarity. Remember, cheap cables often introduce interference, so invest wisely to experience true sound.
Determine the Correct Connection Type
Identify whether your components support balanced connections. For example, professional audio equipment or long cable runs benefit from XLR or TRS cables, which negate interference. Conversely, consumer gear often uses RCA or 3.5mm plugs. To avoid muddled signals, match your cables to both your devices’ inputs and outputs. If unsure, check the specs—it’s better to invest in the correct type than troubleshoot sound problems later.
Implement Balanced Connections for Longevity
If your setup involves long cable runs—say, in a home theater or studio—you’ll want to switch to balanced cables. Remember the time I upgraded my connecting wires for my home theater; the difference in noise reduction was noticeable immediately. Use XLR or TRS cables connecting your amplifiers to your speakers or DACs. This approach cancels out electrical interference effectively, delivering cleaner sound with less hiss or hum. For detailed guidance on matching your speakers’ impedance without complex math, check this impedance matching guide.
Secure Proper Cable Management
Properly routing and securing your cables prevents accidental damage and reduces interference. Use zip ties or cable clips to keep cables organized and away from power cords or sources of electromagnetic interference. When I tidied up my setup, I avoided tangled cables that could cause shorts or signal loss. Hiding cables safely under rugs or along baseboards not only improves aesthetics but also preserves signal integrity. For tips on hiding cables in rental spaces, explore this hiding guide.
Test and Adjust Your Setup
Once cables are in place, power on your system and listen critically. Look for persistent noise or distortions. If issues persist, test each cable with a multimeter or swap out suspect cables one at a time. Adjust positions of speakers and components for optimal sound staging—placing the center channel at ear level enhances dialogue clarity in a home theater. For advanced placement strategies, review this placement guide. Fine-tuning your connections ensures a pristine listening experience without unnecessary upgrades.
Despite the abundance of guides and reviews, many enthusiasts overlook a crucial aspect that drastically impacts the listening experience: the nuanced interplay of components within your audio chain. While common wisdom emphasizes upgrading speakers or amps, the real secret lies in understanding how subtle mismatches and misconceptions can sabotage your setup. For instance, a prevalent myth is that pairing high-powered amplifiers with low-impedance speakers always yields better sound. In reality, this can lead to distortion due to impedance mismatches, which can be avoided by proper impedance matching—learn more about how to do this without complex math in our dedicated guide.
Another trap is the assumption that newer equipment automatically outperforms vintage gear. However, specialized vintage amplifiers, like those discussed in this article on car sound mistakes, often outperform today’s cheap modern models in dynamic range and tonal richness, especially if restored properly.
Have you ever fallen into this trap? Let me know in the comments.
Could Upgrading Your Hardware Alone Improve Sound Quality?
Most don’t realize that the most significant improvements often come from correct setup and compatibility rather than raw hardware upgrades. For example, even the best speakers can sound lackluster if enclosed improperly or placed at the wrong height, which directly affects stereo imaging and bass response. Proper positioning is a game-changer, and our guide on center channel placement illustrates how small adjustments yield big results. Additionally, understanding impedance matching without doing complex math can prevent damage and optimize sound; check this impedance matching guide.
It’s a secret many overlook—the true control over sound quality hinges on mastering these nuanced, often neglected details. Whether you’re setting up a home audio system or upgrading your car speakers, these tips are your secret weapon to avoid costly mistakes and create a setup that truly performs.Maintaining your home audio setup isn’t just a one-and-done task; regular upkeep ensures your system continues to deliver pristine sound. I’ve tested several tools over the years, and a few stand out for their reliability and effectiveness. One must-have is a quality multimeter—specifically, the Fluke 117—which I use to test cables and verify connections, ensuring no hidden issues are lurking behind the scenes. Its precision helps me spot unintended resistance or shorts that can cause static or reduced volume. Additionally, a dedicated cable tester like the Klein Tools VDV Scanner makes diagnosing wiring problems straightforward, saving time compared to trial and error.
How do I maintain my audio gear over time?
Keeping your speakers and amplifiers in top shape requires regular cleaning and inspection. For delicate drivers, I rely on a soft brush and a can of compressed air to remove dust, preventing debris buildup that can distort sound. For electronic components, periodic checking of connections with a multimeter helps catch failing solder joints or corrosion early. I also recommend sealing vintage amps or receivers with appropriate enclosure modifications—like adding a back box for ceiling speakers—to protect against dust and humidity. This practice prolongs lifespan and maintains performance, as discussed in detailed technical guides on vintage amplifier care.<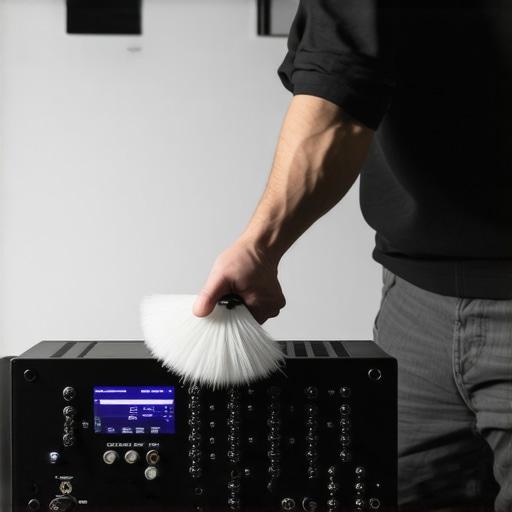 > Sound quality can subtly decline over months and years, so setting reminders to revisit your system’s wiring and connections is wise. Upgrading your tools, like switching to a high-grade soldering iron such as Weller WES51, can make minor repairs faster and more precise, preventing small issues from becoming major faults. In terms of software, I suggest maintaining a catalog of settings and firmware updates for digital components, especially soundbars and DACs. Firmware updates often include bug fixes and performance improvements—think of them as routine tune-ups for your digital gear. Predicting the future, I believe integrated smart maintenance tools will become standard, offering diagnostics and alerts directly through a home app, simplifying upkeep even further.
Ready to upgrade your maintenance game?
Try applying a container of isopropyl alcohol and a soft brush to gently clean contact points and switches on your vintage amplifiers. Not only does this improve connectivity, but it can also revive quieter channels or reduce static introduced by oxidized contacts. Keeping your setup pristine isn’t just about aesthetics; it’s essential for consistent, high-quality audio. Experience the difference—a small investment in proper tools can pay off with years of reliable performance and better sound.
3 Lessons That Transformed How I Approach Audio Cables
One of the most eye-opening lessons I learned was that even a tiny detail, like the quality of cable shielding, can dramatically influence sound clarity. It taught me to never settle for the cheapest option and always prioritize shielded, high-quality cables for longer runs. Another revelation was realizing how proper cable management isn’t just aesthetics—it’s about reducing interference and preserving signal integrity. Lastly, I discovered that understanding impedance matching, even without complex math, is vital; it prevents distortion and equipment damage, keeping my setup reliable and sounding its best. These lessons taught me to listen critically, plan meticulously, and invest wisely—turning my home audio into a truly immersive experience.