
Have you ever turned up the volume on your radio or sound system only to be greeted by that irritating scratchy noise whenever you adjust the slider? It’s like the audio equivalent of nails on a chalkboard—frustrating and enough to ruin your listening experience. I remember the first time it happened to me. I was in the middle of a playlist, and as I casually adjusted the volume, the sound crackled and popped. That moment made me realize I wasn’t alone; countless audiophiles and casual listeners face this issue. But here’s the thing: it’s usually a fix within your reach, and you don’t need to be an electronics wizard to solve it.
The Hidden Reason Behind That Annoying Noise
The scratchy or crackling sound from your volume slider often comes down to dirt, oxidation, or wear and tear on the potentiometer—the part responsible for controlling your volume. When dust or corrosion builds up, it interferes with the electrical contact, leading to those unwanted noises. Over time, this component can degrade, especially in environments with high humidity or exposure to daily dust. The good news? Many of these issues are simple to fix, even if you’ve never tinkered with electronics before.
Early in my experimenting, I made a classic mistake: I immediately replaced the entire radio or added new components without trying a simple cleaning first. That’s like buying a new car every time the tires wear out! A thorough cleaning of the potentiometer can often restore smooth, crackle-free operation. For a more detailed look at common audio component issues, check out this guide on vintage amplifier maintenance.
So, if you’re tired of that annoying sound whenever you adjust the volume, stick around. We’re about to dive into a straightforward, step-by-step method to make your volume slider glide smoothly again, restoring clarity and enjoyment to your listening experience. Ready to say goodbye to scratchy noises for good?
What If This Is Too Simplistic? Will Fixing the Potentiometer Actually Solve It?
I used to think that way too. My initial mistake? Assuming the worst—thinking I needed a costly replacement or professional repair. But often, a simple cleaning and some patience can do miracles. If you’ve faced similar doubts, trust me: start with the basics. Tackle the problem head-on, and you might just be surprised how effective these simple fixes can be. Now, let’s get into the practical steps to bring your volume control back to life.
Step 1: Gather Your Tools and Prepare a Work Space
Start by turning off your audio device and unplugging it from the power source. Collect a small Phillips-head screwdriver, some contact cleaner (preferably one designed for electronics), a soft cloth, and a toothpick or small brush. Find a clean, well-lit workspace free of dust where you can work comfortably. Remember, patience is key—rushing can cause further damage.
Step 2: Access the Potentiometer Carefully
Remove any screws securing the cover of your device’s control panel—common in simpler models. Use the screwdriver to gently loosen the casing, taking care not to damage any wires. As I did when I fixed my old receiver, keep track of all screws and parts. Once exposed, locate the volume slider or knob shaft attached to the potentiometer, which looks like a small, cylindrical component with three terminals.
Step 3: Clean the Contact Points Thoroughly
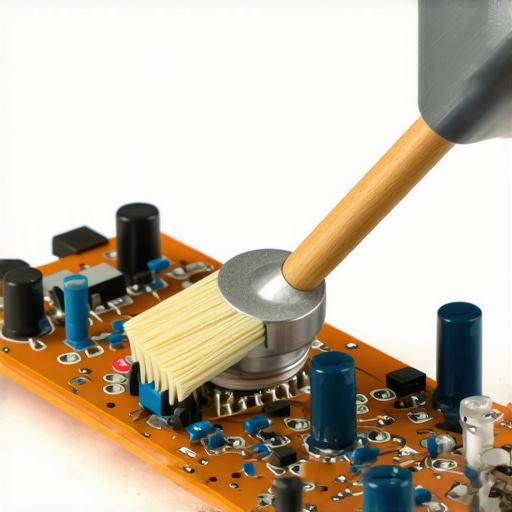
Spray a small amount of contact cleaner onto the potentiometer. If your cleaner is in a spray can, hold the device upside down to prevent excess liquid from entering unintended areas. Gently rotate the knob back and forth 10–15 times to distribute the cleaner evenly inside. Use a toothpick or small brush to gently remove any visible dirt, corrosion, or oxidation around the contact points and shaft. This process is like cleaning a dirty switch—you want to remove any grime that impairs electrical contact.
Step 4: Test the Slider Before Reassembling
Reconnect the power and turn on the device. Slowly turn the volume knob through its entire range, listening for crackles or pops. If the noise diminishes or disappears, you’ve made progress. If not, consider applying a second round of cleaner or repeating the cleaning process. In my experience, a well-cleaned potentiometer can restore smooth operation, saving you the cost of replacements.
Step 5: Reassemble and Final Checks
Once satisfied with the cleaning, carefully reattach the cover and secure it with screws. Plug the device back in and test the volume adjustment again, making sure the slider moves smoothly without noise. If the problem persists despite cleaning, it could indicate wear or a faulty component that needs replacing, which might be discussed in this guide on vintage amplifier maintenance. But in most cases, cleaning solves the issue effectively.
Notes on Maintaining Your Sound Equipment
To prevent future crackles, keep your devices in a dust-free, dry environment. Regularly dust off knobs and sliders and avoid pressing too forcefully. For best results, consider wrapping cables on a regular basis to prevent fraying, and check out this article on storing headphones properly.
 When it comes to home audio, many enthusiasts and casual listeners alike fall into misconceptions that prevent them from truly optimizing their setups. One prevalent myth is that more expensive gear automatically guarantees better sound quality. While price can be an indicator of build quality, it doesn’t always translate to superior audio. Factors like room acoustics, speaker placement, and proper calibration often have a more profound impact than the mere cost of the equipment. For instance, a high-end amplifier paired with poorly positioned speakers can underperform compared to a modest setup that’s correctly configured. To truly elevate your listening experience, understanding these nuances is essential. Additionally, many people overlook the significance of room acoustics; a room filled with hard surfaces can cause echoes and muddiness, diminishing sound clarity regardless of your equipment’s quality. You might also believe that adding more speakers creates richer sound, but placing speakers out of phase can lead to cancellation effects, reducing bass response and overall fidelity. Checking if your speakers are in phase with this quick method can save you hours of frustration. Want to ensure your gear is set up for optimal performance? Consider exploring how calibration tools and room treatments can make a noticeable difference. Remember, even the best equipment can sound mediocre if not properly integrated into your environment. Have you ever fallen into this trap? Let me know in the comments.
Maintaining your home audio system isn’t a set-it-and-forget-it task; it requires regular attention and the right tools to ensure long-term performance and sound quality. From cleaning potentiometers to calibrating soundbars, having the proper equipment can save you from costly repairs and subpar audio experiences. As an audiophile who has tinkered extensively with various gear, I can attest that investing in a few quality tools and establishing a maintenance routine makes a significant difference.
Invest in a Quality Contact Cleaner and Precision Tools
One of my go-to maintenance essentials is a high-quality electronic contact cleaner. I use DeoxIT D100L because it not only cleans corrosion effectively but also conditions the contacts to prevent future oxidation. Applying this with a fine brush helps me clean potentiometers and switch contacts thoroughly. Additionally, having a precision screwdriver set allows me to access and reassemble gear with confidence, avoiding damage to sensitive components.
But tools aren’t just about cleaning; calibration is equally crucial. For soundbars and multi-channel setups, I rely on smartphone apps like the free sound calibration apps. These apps use your phone’s microphone to analyze speaker response and assist in tuning your system to the room’s unique acoustics, improving clarity and bass response.
How do I maintain my home audio equipment over time?
Consistent maintenance includes dusting components regularly, especially vents and critical connectors, which can accumulate dust that impairs performance. Establishing a schedule—say, every three to six months—to inspect and clean your equipment with soft brushes and compressed air can prevent issues before they arise. For cables and connectors, I recommend periodically checking for wear or fraying and storing cables properly using preventive storage techniques to prolong their lifespan.
Long-term performance also hinges on understanding when components like capacitors need replacement. Vintage amplifiers, for example, benefit from regular capacitor checks to avoid degradation that can diminish sound quality or cause damage. The expert advice from technical documentation emphasizes testing capacitors with a capacitance meter and replacing any showing signs of deterioration.
Scaling Up Your Setup for Future Proofing
If you’re planning to expand or upgrade your system, consider modular and easily serviceable components. Modern amplifiers and soundbars often feature quick-access panels or removable modules, making maintenance straightforward. Additionally, integrating room correction microphones with calibration software—available via apps or hardware—can optimize your sound setup as your room or preferences evolve.
Looking ahead, the trend is moving toward smart, self-calibrating systems that use AI to adapt sound profiles dynamically. Investing now in high-quality tools and establishing good maintenance habits will ensure your gear remains top-notch as this technology advances. For detailed procedures on restoring vintage gear or calibrating your entire home theater, be sure to explore related guides on vintage amplifier maintenance.
Don’t wait for a malfunction to disrupt your listening experience. Try incorporating a routine check with a precision screwdriver and calibrate your soundbar with a free phone app today—small steps that lead to lasting audio excellence!
The Unexpected Wisdom I Gained From Fixing My Sound System
One of the most eye-opening lessons I learned was that many audio issues are often simpler to fix than they seem. Early on, I believed I needed expensive new components or professional repairs to resolve crackling noise, but the truth is, a little patience and the right cleaning techniques can work wonders. This shift in mindset transformed my approach to maintaining home audio gear, saving me money and frustration and deepening my understanding of how these systems work.
Another insight I wish I had embraced sooner is the importance of routine maintenance beyond just repairs. Regularly cleaning potentiometers, checking speaker phase, and calibrating soundsettings can prolong the life of your equipment and keep your listening experience consistently top-notch. These small actions create a ripple effect, elevating sound clarity and ensuring your gear performs at its best for years to come.
Lastly, I discovered that sometimes, the most impactful improvements come from understanding room acoustics and proper placement. Even the most high-end gear can sound dull or muddy if your space isn’t optimized. Experimenting with positioning and treating reflections has taught me that great sound isn’t just about hardware—it’s about creating the perfect environment for it.
My Favorite Tools and Resources for Audio Balancing and Fixes
For anyone serious about elevating their home audio setup, I wholeheartedly recommend investing in a quality contact cleaner, such as DeoxIT D100L. I trust it because it effectively restores electrical contact and protects against future oxidation, saving me from frequent repairs. A precision screwdriver set is equally essential, making reassembling gear safer and more accurate. When it comes to calibration, I rely on free smartphone apps, like sound calibration apps, which have helped me fine-tune my audio for my specific room environment without costly equipment. Lastly, reading technical guides on vintage amplifier maintenance has deepened my understanding of component health and everyday troubleshooting.
Let Your Passion Drive Your Audio Journeys
Every tweak and fix brings you closer to a listening experience that truly resonates with you. Embrace the process of learning and experimenting, knowing that even small improvements can significantly enhance your audio enjoyment. Remember, mastery doesn’t happen overnight; it’s built through curiosity and consistent effort. Start today by cleaning a potentiometer, calibrating your soundbar, or checking speaker phase—you might be surprised at how game-changing these simple steps can be. Your perfect sound awaits—are you ready to chase it with confidence?