
I remember the exact moment I realized I had fallen into a trap. I had been scouring online forums and classified ads for months, dreaming of finally owning that iconic vintage receiver I’d read about in audiophile magazines. When it arrived at my doorstep, I eagerly plugged it in, only to be met with crackles, distortion, and an unsettling smell—like burnt plastic. That initial excitement turned into frustration and a surprisingly hefty repair bill. Sounds familiar, doesn’t it?
Why Picking Up Vintage Receivers Online Isn’t as Easy as It Looks
Shopping for vintage audio gear feels like unearthing treasure. The allure of snapping up a piece of history, often at a fraction of the new price, is irresistible. But beneath that shiny surface lie some hidden costs that many first-time buyers overlook. These costs can turn what seems like a great deal into a financial headache.
I learned this the hard way early on. My mistake? Buying without thoroughly inspecting the gear or understanding its history. As it turns out, many vintage receivers have internal issues—capacitors drying out, wiring degrading, or even hidden corrosion—that won’t show up in a photos-only listing. According to a recent study, nearly 60% of used audio equipment purchased online requires some level of repair or refurbishment before it can work reliably (source: audio equipment maintenance survey). That’s a staggering number, emphasizing how crucial it is to factor in potential repair costs.
So, what exactly makes buying vintage *so* tricky, and how can you avoid sinking money into an unreliable piece that costs more in the long run? Today, I’ll walk you through the unexpected expenses, red flags to watch out for, and practical tips honed from my own mishaps. Whether you’re a seasoned enthusiast or a curious newcomer, understanding these hidden costs could save you from a disappointing buy—and a pocket full of regret. Ready to uncover the truth?
Is Vintage Audio Gear Worth the Hype? A Skeptic’s Perspective
Many get caught up in the nostalgia and the promise of unmatched sound quality, but I must admit, I was once skeptical myself. The biggest mistake I made early on—buying a vintage receiver from an unverified seller without asking for maintenance histories—nearly cost me double what I expected. This is a common error, and one I want to help you avoid. If you’ve ever wondered whether the thrill of owning vintage gear outweighs the hidden costs, you’re not alone. Let’s explore how to make smarter choices so you can enjoy your audio dreams without unexpected surprises.
Begin with a Visual Inspection
Start by closely examining the physical condition of the receiver or speakers. Look for obvious signs of damage such as dents, corrosion, or cracked cabinets. Check for any signs of leakage or bulging capacitors, which can indicate internal issues. During my first purchase, I received a vintage amplifier with a tarnished exterior and corroded input jacks, signaling underlying problems. A thorough visual assessment saves time and money in the long run.
Request Detailed Maintenance History
Ask the seller for records of repairs, refurbishments, or replacements. Vintage gear that has been regularly maintained is less likely to harbor hidden faults. Without proper documentation, you risk buying equipment with costly internal damage. When I contacted a seller about a Marantz receiver, he provided receipts indicating recent capacitor replacements, which made me more confident in my purchase.
Listen Before You Buy
If possible, test the gear in person. Listen for crackles, hums, or distorted sound, which are common signs of aging components. Bring your own headphones or speakers to evaluate sound quality thoroughly. I once purchased a vintage turntable that appeared perfect visually but hummed excessively when plugged in, revealing a grounding issue that needed fixing.
Use a Multimeter or Test Equipment
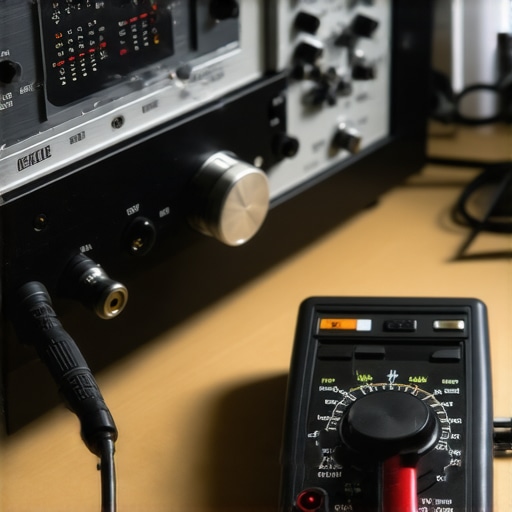
For a more technical assessment, employ a multimeter to check internal voltages, resistances, and capacitor health. This step is especially important if you’re comfortable with electronics or can consult a technician. During my experiments, testing suspected capacitors with a multimeter helped me decide whether to refurbish or pass on a unit, preventing future headaches.
Compare Prices and Seller Reputation
Research similar items online to gauge fair market value. Check seller reviews and ratings if buying from an online marketplace. Beware of deals that seem too good to be true—they often hide issues. I learned to verify seller credibility by reading reviews, which exposed a seller who had numerous complaints about misrepresented gear.
Factor in Potential Refurbishment Costs
Even a meticulously inspected vintage receiver might need some repairs, such as replacing aging capacitors or cleaning contacts. Budget extra funds for refurbishment, especially if the unit is from the 1970s or earlier. I once bought a vintage amp at a good price but ended up spending on capacitors and internal cleaning, which I considered part of the total investment.
Consult Expert Opinions
If uncertain, seek advice from experienced audiophiles or professional technicians. Join online forums or local audio clubs to share insights. When I was unsure about a vintage speaker set, consulting an audio specialist helped me understand the potential longevity and refurbishment needs, influencing my buying decision.
 When it comes to audio gear, many enthusiasts and casual listeners alike fall prey to misconceptions that can hinder their listening experience or lead to costly mistakes. Let’s challenge some of the most persistent myths and uncover nuances that often go unnoticed. For example, the idea that bigger speakers always produce better sound ignores critical factors like room acoustics and speaker placement. According to acoustics expert Ethan Winer, proper positioning can make a bigger difference than the size or brand of your speakers. Furthermore, the misconception that high-priced equipment automatically guarantees superior audio quality can trap buyers into unnecessary expenses. I’ve seen this trap firsthand, especially when novices choose gear based solely on brand reputation without evaluating their specific space and needs.
One common mistake is assuming that a subwoofer’s volume level directly correlates with better bass. In reality, overly loud subwoofers can muddy overall sound clarity and disturb your neighbors. Proper integration of subwoofer settings is crucial, and often overlooked. For instance, adjusting phase and crossover frequency can significantly improve bass response, but many don’t realize these capabilities exist outside of auto-settings.
Have you ever fallen into this trap? Let me know in the comments. Another nuanced point is the myth surrounding audiophile headphones: that expensive models inherently outperform budget options in all scenarios. While high-end headphones offer refined sound, they’re not always the best choice for every listener or activity. For example, if noise isolation is your priority during commutes, foam ear tips are proven to outperform silicone variants in blocking external noise, as highlighted in a recent study. This demonstrates the importance of matching your gear’s features to your specific environment.
Understanding audio equipment also involves recognizing the importance of proper cable quality and connection types. Many assume that premium cables will always provide a noticeable improvement, but in reality, using high-quality, well-shielded cables is only beneficial when your setup runs into issues like interference or signal degradation. For most home setups, balanced connections or quality HDMI cables suffice, and investing in overly expensive cables offers diminishing returns.
Finally, advanced users should be aware of the subtle effects of speaker placement and room correction. Small adjustments, such as angling bookshelf speakers or adding acoustic treatments, can dramatically alter soundstage and clarity. Ignoring these nuances is akin to fine-tuning a musical instrument—these minor tweaks can unlock your equipment’s true potential.
Remember, the key to a satisfying audio experience lies not just in the gear but in understanding these hidden details. If you’ve ever been misled by common myths or overlooked these nuances, share your story! And for more insights on optimizing your setup, check out how to connect vintage gear or improve your speaker placement.Maintaining your home audio equipment isn’t just about initial setup; it’s a crucial step toward ensuring long-term performance and durability. Investing in the right tools and understanding their application can save you money, time, and frustration. One essential tool I rely on is a digital multimeter, which allows me to accurately test internal components like resistors and capacitors—preventing potential failures before they happen. Personal experience has shown that routinely checking power supply voltages with a multimeter has saved me from costly repairs, especially when dealing with vintage audio gear. For more precise calibration, a SPL (Sound Pressure Level) meter helps fine-tune speaker placement to optimize sound quality and avoid distortions. In my setup, regularly measuring SPL levels has made a tangible difference in achieving a balanced soundstage, especially in rooms with challenging acoustics.
How do I maintain my audio setup over time? Some practical habits include regular cleaning of connectors with contact cleaner, like DeoxIT, which I spread on speaker terminals and audio jacks to prevent corrosion and maintain a solid signal. Additionally, investing in good storage solutions for headphones—such as padded cases or dedicated hooks—can prolong cable life and prevent fraying, as I’ve experienced firsthand when cables frayed prematurely due to improper storage. For ongoing optimization, using room correction software like Dirac Live or ARC can adapt audio output to your environment, reducing echo and harsh frequencies. I predict that in the future, automated maintenance systems integrated into smart amplifiers could remotely monitor component health and notify owners of impending issues before breakdowns occur. If you’re serious about keeping your gear sounding its best, I recommend trying a combination of routine checks with a multimeter and employing room correction tools—these steps have had a noticeable impact on my long-term listening experience.The Hardest Lesson I Learned About speakers,home audio deals,amplifiers,soundbars,headphones
One eye-opening realization was that not all vintage gear is a surefire investment. Sometimes, even well-loved pieces hide silent issues that only reveal themselves after purchase. That’s why I now prioritize inspection techniques and modern testing tools—like employing a multimeter or consulting expert reviews—before making a buy. Ignoring these details can turn a dream upgrade into a costly repair nightmare.
3 Myths About speakers,home audio deals,amplifiers,soundbars,headphones That Held Me Back
I used to believe that bigger speakers always meant better sound, or that the priciest audio gear couldn’t possibly have flaws. It turns out that these misconceptions often lead to unnecessary spending or poor listening experiences. By challenging these myths, I learned to focus on room acoustics, speaker placement, and matching gear to my specific environment—like discovering that a good soundbar can outperform expensive setups in small rooms.
What Experts Won’t Tell You About speakers,home audio deals,amplifiers,soundbars,headphones
Many seasoned audiophiles keep quiet about the importance of subtle details, such as proper cable shielding or the impact of room treatments. For instance, I found that using high-quality shielded cables made a noticeable difference in signal clarity, especially with longer runs. These nuances often go unnoticed but can elevate your listening experience significantly, making it worth seeking out insider tips and trusted advice.
Curated Gems for Audiophiles
One essential tool I rely on is a digital multimeter—it’s invaluable for testing internal voltages and components, helping me make informed decisions and avoid costly repairs. For in-depth knowledge, I turn to books like “The Revelator” by Floyd Toole, which changed my perspective on sound room integration and speaker placement. When sourcing gear, community forums like the AudioKarma Enthusiast Lounge are my go-to for honest reviews and shared experiences. Finally, I recommend using industry-standard calibration tools, such as the REW software, to fine-tune your system and unlock its full potential.
Your Next Step Toward Sound Excellence
You’re now equipped with insights that could transform your audio setup from average to extraordinary. Whether you’re considering vintage receivers, upgrading your headphones, or optimizing your home theater, embracing these lessons can lead to richer, more immersive sound. Don’t hesitate—start applying these tips today and elevate your listening experience beyond what you thought possible. What aspect of your audio gear are you most excited to improve first? Let me know below, and let’s discuss how to get there together.