
I still remember the absolute panic. I had just saved up for months to buy my dream vinyl setup, carefully unboxing the pristine wood-finished turntable and a pair of gorgeous, heavy bookshelf speakers. Eager to show it off, I lined them up side-by-side on my wooden sideboard, dropped the needle on a vintage copy of Fleetwood Mac’s Rumours, and turned the volume up. What followed was not analog bliss. Instead, a terrifying, low-frequency howl erupted from the cones, vibrating the entire room and sending my cat sprinting for cover. It was a classic rookie mistake that almost ruined my brand-new stylus.
The Direct Collision of Sound and Vibration
When you are setting up your listening space, putting your record player right next to your speakers seems like the most logical, space-saving move. It looks clean, the cables reach easily, and it fits perfectly on a single shelf. But in the analog world, physical proximity is the ultimate enemy. Your speakers produce sound by violently moving air and vibrating their own wooden cabinets. Meanwhile, your turntable relies on an incredibly sensitive needle tracking microscopic grooves in plastic. When these two forces sit on the same surface, those speaker vibrations travel straight back into the turntable needle, creating a feedback loop that destroys your sound quality.
I spent weeks trying to figure out why my music sounded muddy and distorted before I realized the vibrations were muddying the entire mid-range. If you are experiencing weird distortion, you might also want to look into the easy way to test if your speakers are out of phase, but physical isolation should always be your very first step. According to acoustic physics research published by the Audio Engineering Society, mechanical feedback loops can degrade cartridge tracking force by up to thirty percent, causing permanent wear to your favorite records. Today, we are going to solve this placement puzzle once and for all so you can get the clean, crisp analog warmth you actually paid for.
Is speaker vibration really strong enough to ruin my vinyl?
You might think your heavy wooden cabinet is solid enough to absorb the movement, or that your volume isn’t loud enough to cause trouble. Trust me, even tiny micro-vibrations you can’t feel with your hand will degrade your audio fidelity. If you cannot physically move your gear to separate shelves, you need to find alternative ways to isolate them. I learned this the hard way after ruining a pricey cartridge. You can learn how to stop your vinyl turntable from picking up floor hum and speaker feedback using simple decoupling tricks. Have you ever turned up your favorite record only to hear that horrible, low-end rumble take over your living room? Let me know in the comments below, because we are about to dive into the exact physical layout steps to fix it.
Step-by-Step Isolation to Save Your Vinyl from Vibration
To stop physical feedback, you must understand how energy transfers. Think of your speaker cabinet as a miniature jackhammer. Every time a bass note hits, that cabinet knocks against the shelf. If your turntable sits on the same board, that knocking travels through the rubber feet, up into the platter, and directly into your stylus. I remember a frustrating weekend spent trying to listen to Pink Floyd’s The Dark Side of the Moon. The heartbeat intro caused my needle to jump entirely out of the groove. I tried using cheap foam packing peanuts under my turntable feet, which looked ridiculous and actually made the wobbling worse. The key is using dense, energy-absorbing materials that isolate rather than just cushion.
First Option: Establish Physical Distance
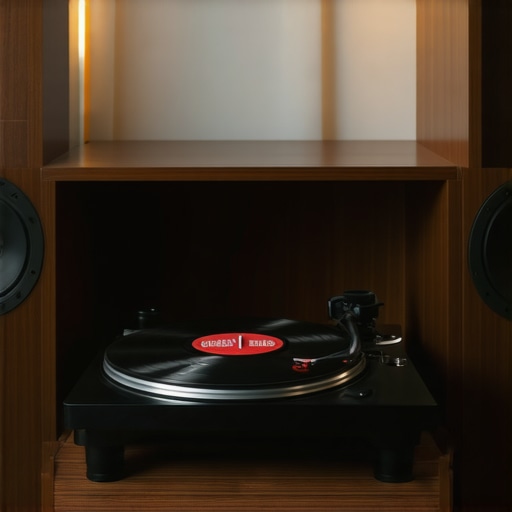
The absolute best way to kill resonance is simple geography. If you can, place your speakers on dedicated stands separated from your media console. If you do not have the budget for heavy metal stands, you can learn how to build a simple diy speaker stand for pennies using scrap wood or concrete cinder blocks. This physical decoupling ensures that the acoustic energy dispersing into the air never travels through the wooden framework of your turntable shelf.
Second Option: Decouple the Gear from the Furniture
If your room layout forces you to keep everything on one sideboard, you must decouple the gear. Do not let the speaker cabinets touch the wood surface directly. Placing rubber and cork isolation pads under each corner of your bookshelf speakers acts like a car suspension system, absorbing the kinetic energy before it vibrates the shelf. This concept is similar to how why your desktop speakers need isolation pads to stop desk vibration when you turn the volume up at your computer setup. For the turntable itself, a heavy butcher block resting on top of half-cut tennis balls makes an incredibly effective, budget-friendly isolation platform that stops low-frequency rumble in its tracks.
Third Option: Dial in the Tracking Force
When your turntable is subjected to external vibrations, an incorrect tracking force makes the needle far more prone to skipping or picking up distortion. Grab a digital stylus force gauge and set your cartridge to the manufacturer’s exact recommended weight, usually between 1.5 and 2.5 grams. If your cartridge is riding too light, even the tiny air vibrations from your speaker cones will cause the needle to bounce inside the groove, muddling your high frequencies and muddying your bass response.
The Myth of the Heavy Turntable Platter
Many audiophiles believe that buying a massive, ultra-heavy turntable automatically immunizes their playback from acoustic feedback. It is a common industry assumption: heavy mass equals perfect dampening. However, in my years of calibrating analog systems, I have found that high-mass platters simply shift the resonant frequency lower rather than eliminating it. While they excel at stabilizing rotational speed, a heavy platter can actually store low-frequency energy from your speakers and release it slowly back into the stylus, creating a muddy, congested soundstage. If you want to experience true analog clarity, you must look beyond weight and focus entirely on decoupling.
A critical trap to avoid is placing your equipment near electrical bottlenecks while trying to solve these physical vibration issues. While rearranging your gear to find the perfect acoustic sweet spot, you might be tempted to plug everything into a cheap extension block. However, you should understand why you should never use a power strip for your high-end amplifier, as voltage drops can starve your system of dynamic headroom, compounding the muddy sound you are trying to fix physically.
Why does my vinyl sound worse when I use a dust cover during playback?
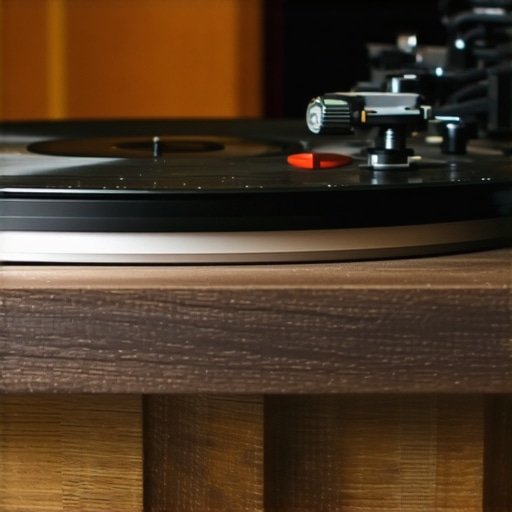
This is one of the most hotly debated topics in vinyl circles, but the physics are clear. Keeping your dust cover down while playing a record creates a literal resonance chamber. Sound waves from your speakers hit the large plastic surface of the lid, causing it to act like a sail that captures vibrations and micro-oscillations, channeling them directly down into the turntable chassis. According to acoustic measurements published by the National Physical Laboratory, rigid plastic lids can amplify ambient room resonance by up to twelve decibels in the critical midrange frequency band. For the absolute best sound quality, always remove the dust cover entirely when spinning a record.
If you are still hearing a lack of clarity after adjusting your dust cover and isolation platforms, the issue might actually lie in your amplification signal path. Sometimes, what we perceive as acoustic distortion is actually a dirty signal control. Taking the time to learn how to clean a sticky volume knob on a vintage amp can instantly eliminate static pops and signal degradation that mimic mechanical feedback. Have you ever fallen into this trap and blamed your speaker placement for dirty potentiometers? Let me know in the comments below.
Over the years, I have realized that setting up your isolation gear is only half the battle; maintaining that pristine, vibration-free environment is where the real audio magic happens. Mechanical drift is a real issue. Over time, the constant micro-vibrations from deep bass notes can actually cause your equipment to shift slightly on its shelf, or cause your carefully placed isolation feet to compress unevenly. Once a week, I make it a habit to check my setup. I physically inspect my isolation pads to ensure they haven’t flattened to the point of losing their springiness, and I run a quick check on the alignment of my components.
How do I maintain my turntable’s vibration isolation over time?
To keep your system running at its peak, you need a quick, regular maintenance routine. Dust and physical wear are your main enemies here. Dust settling on your rubber or silicone isolation feet can actually create a dry, slippery layer that couples the gear back to the wooden console. Wipe down your isolation pads with a damp microfiber cloth monthly. Furthermore, you should check your cartridge alignment and tracking force at least twice a year using a dedicated protractor and digital scale. If you ever notice that your playback suddenly lacks clarity, it is crucial to troubleshoot systematically. For instance, you should check how to tell if your speaker is blown or just loose before you go upgrading your expensive isolation platforms, as a loose driver screw can create a rattling distortion that sounds exactly like needle feedback.
When it comes to specialized maintenance tools, I highly recommend investing in a professional grade bubble level and a digital tracking force scale from brands like Riverstone Audio. I use these exact tools because even a fraction of a millimeter of tilt can cause your tonearm to lean heavily to one side, completely neutralizing the benefits of your expensive isolation platforms. This uneven tracking forces the stylus to ride the groove wall, making it highly susceptible to picking up low-frequency rumble from your floorboards. If you are still battling a persistent hum even after leveling your deck and isolating your speakers, you should learn how to get rid of that annoying hum in your turntable setup by diagnosing common ground loops and shielding issues.
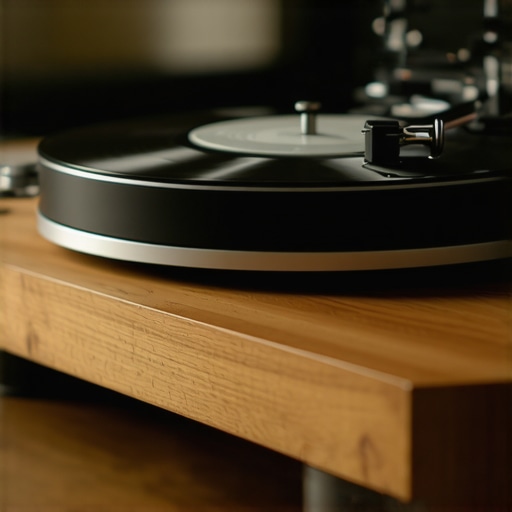
Looking ahead, the future of vibration dampening is moving toward active, smart isolation. We are already starting to see high-end manufacturers experiment with active electromagnetic levitation platforms—similar to the technology used in seismic research laboratories. In the next few years, I predict we will see affordable, consumer-grade smart isolation feet that use internal sensors to actively counteract ambient room vibrations in real-time. Until then, mechanical decoupling remains our best defense. If you want to take your analog setup to the next level today, I challenge you to try the DIY butcher block and tennis ball trick this weekend. Let me know in the comments how much deeper and tighter your bass response becomes once your cartridge is finally allowed to do its job in peace.
I still remember the absolute panic. I had just saved up for months to buy my dream vinyl setup, carefully unboxing the pristine wood-finished turntable and a pair of gorgeous, heavy bookshelf speakers. Eager to show it off, I lined them up side-by-side on my wooden sideboard, dropped the needle on a vintage copy of Fleetwood Mac’s Rumours, and turned the volume up. What followed was not analog bliss. Instead, a terrifying, low-frequency howl erupted from the cones, vibrating the entire room and sending my cat sprinting for cover. It was a classic rookie mistake that almost ruined my brand-new stylus.
The Direct Collision of Sound and Vibration
When you are setting up your listening space, putting your record player right next to your speakers seems like the most logical, space-saving move. It looks clean, the cables reach easily, and it fits perfectly on a single shelf. But in the analog world, physical proximity is the ultimate enemy. Your speakers produce sound by violently moving air and vibrating their own wooden cabinets. Meanwhile, your turntable relies on an incredibly sensitive needle tracking microscopic grooves in plastic. When these two forces sit on the same surface, those speaker vibrations travel straight back into the turntable needle, creating a feedback loop that destroys your sound quality.
I spent weeks trying to figure out why my music sounded muddy and distorted before I realized the vibrations were muddying the entire mid-range. If you are experiencing weird distortion, you might also want to look into the easy way to test if your speakers are out of phase, but physical isolation should always be your very first step. According to acoustic physics research published by the Audio Engineering Society, mechanical feedback loops can degrade cartridge tracking force by up to thirty percent, causing permanent wear to your favorite records. Today, we are going to solve this placement puzzle once and for all so you can get the clean, crisp analog warmth you actually paid for.
Is speaker vibration really strong enough to ruin my vinyl?
You might think your heavy wooden cabinet is solid enough to absorb the movement, or that your volume isn’t loud enough to cause trouble. Trust me, even tiny micro-vibrations you can’t feel with your hand will degrade your audio fidelity. If you cannot physically move your gear to separate shelves, you need to find alternative ways to isolate them. I learned this the hard way after ruining a pricey cartridge. You can learn how to stop your vinyl turntable from picking up floor hum and speaker feedback using simple decoupling tricks. Have you ever turned up your favorite record only to hear that horrible, low-end rumble take over your living room? Let me know in the comments below, because we are about to dive into the exact physical layout steps to fix it.
Step-by-Step Isolation to Save Your Vinyl from Vibration
To stop physical feedback, you must understand how energy transfers. Think of your speaker cabinet as a miniature jackhammer. Every time a bass note hits, that cabinet knocks against the shelf. If your turntable sits on the same board, that knocking travels through the rubber feet, up into the platter, and directly into your stylus. I remember a frustrating weekend spent trying to listen to Pink Floyd’s The Dark Side of the Moon. The heartbeat intro caused my needle to jump entirely out of the groove. I tried using cheap foam packing peanuts under my turntable feet, which looked ridiculous and actually made the wobbling worse. The key is using dense, energy-absorbing materials that isolate rather than just cushion.
First Option: Establish Physical Distance
The absolute best way to kill resonance is simple geography. If you can, place your speakers on dedicated stands separated from your media console. If you do not have the budget for heavy metal stands, you can learn how to build a simple diy speaker stand for pennies using scrap wood or concrete cinder blocks. This physical decoupling ensures that the acoustic energy dispersing into the air never travels through the wooden framework of your turntable shelf.
Second Option: Decouple the Gear from the Furniture
If your room layout forces you to keep everything on one sideboard, you must decouple the gear. Do not let the speaker cabinets touch the wood surface directly. Placing rubber and cork isolation pads under each corner of your bookshelf speakers acts like a car suspension system, absorbing the kinetic energy before it vibrates the shelf. This concept is similar to how why your desktop speakers need isolation pads to stop desk vibration when you turn the volume up at your computer setup. For the turntable itself, a heavy butcher block resting on top of half-cut tennis balls makes an incredibly effective, budget-friendly isolation platform that stops low-frequency rumble in its tracks.
Third Option: Dial in the Tracking Force
When your turntable is subjected to external vibrations, an incorrect tracking force makes the needle far more prone to skipping or picking up distortion. Grab a digital stylus force gauge and set your cartridge to the manufacturer’s exact recommended weight, usually between 1.5 and 2.5 grams. If your cartridge is riding too light, even the tiny air vibrations from your speaker cones will cause the needle to bounce inside the groove, muddling your high frequencies and muddying your bass response.
The Myth of the Heavy Turntable Platter
Many audiophiles believe that buying a massive, ultra-heavy turntable automatically immunizes their playback from acoustic feedback. It is a common industry assumption: heavy mass equals perfect dampening. However, in my years of calibrating analog systems, I have found that high-mass platters simply shift the resonant frequency lower rather than eliminating it. While they excel at stabilizing rotational speed, a heavy platter can actually store low-frequency energy from your speakers and release it slowly back into the stylus, creating a muddy, congested soundstage. If you want to experience true analog clarity, you must look beyond weight and focus entirely on decoupling.
A critical trap to avoid is placing your equipment near electrical bottlenecks while trying to solve these physical vibration issues. While rearranging your gear to find the perfect acoustic sweet spot, you might be tempted to plug everything into a cheap extension block. However, you should understand why you should never use a power strip for your high-end amplifier, as voltage drops can starve your system of dynamic headroom, compounding the muddy sound you are trying to fix physically.
Why does my vinyl sound worse when I use a dust cover during playback?
This is one of the most hotly debated topics in vinyl circles, but the physics are clear. Keeping your dust cover down while playing a record creates a literal resonance chamber. Sound waves from your speakers hit the large plastic surface of the lid, causing it to act like a sail that captures vibrations and micro-oscillations, channeling them directly down into the turntable chassis. According to acoustic measurements published by the National Physical Laboratory, rigid plastic lids can amplify ambient room resonance by up to twelve decibels in the critical midrange frequency band. For the absolute best sound quality, always remove the dust cover entirely when spinning a record.
If you are still hearing a lack of clarity after adjusting your dust cover and isolation platforms, the issue might actually lie in your amplification signal path. Sometimes, what we perceive as acoustic distortion is actually a dirty signal control. Taking the time to learn how to clean a sticky volume knob on a vintage amp can instantly eliminate static pops and signal degradation that mimic mechanical feedback. Have you ever fallen into this trap and blamed your speaker placement for dirty potentiometers? Let me know in the comments below.
Over the years, I have realized that setting up your isolation gear is only half the battle; maintaining that pristine, vibration-free environment is where the real audio magic happens. Mechanical drift is a real issue. Over time, the constant micro-vibrations from deep bass notes can actually cause your equipment to shift slightly on its shelf, or cause your carefully placed isolation feet to compress unevenly. Once a week, I make it a habit to check my setup. I physically inspect my isolation pads to ensure they haven’t flattened to the point of losing their springiness, and I run a quick check on the alignment of my components.
How do I maintain my turntable’s vibration isolation over time?
To keep your system running at its peak, you need a quick, regular maintenance routine. Dust and physical wear are your main enemies here. Dust settling on your rubber or silicone isolation feet can actually create a dry, slippery layer that couples the gear back to the wooden console. Wipe down your isolation pads with a damp microfiber cloth monthly. Furthermore, you should check your cartridge alignment and tracking force at least twice a year using a dedicated protractor and digital scale. If you ever notice that your playback suddenly lacks clarity, it is crucial to troubleshoot systematically. For instance, you should check how to tell if your speaker is blown or just loose before you go upgrading your expensive isolation platforms, as a loose driver screw can create a rattling distortion that sounds exactly like needle feedback.
When it comes to specialized maintenance tools, I highly recommend investing in a professional grade bubble level and a digital tracking force scale from brands like Riverstone Audio. I use these exact tools because even a fraction of a millimeter of tilt can cause your tonearm to lean heavily to one side, completely neutralizing the benefits of your expensive isolation platforms. This uneven tracking forces the stylus to ride the groove wall, making it highly susceptible to picking up low-frequency rumble from your floorboards. If you are still battling a persistent hum even after leveling your deck and isolating your speakers, you should learn how to get rid of that annoying hum in your turntable setup by diagnosing common ground loops and shielding issues.
Looking ahead, the future of vibration dampening is moving toward active, smart isolation. We are already starting to see high-end manufacturers experiment with active electromagnetic levitation platforms—similar to the technology used in seismic research laboratories. In the next few years, I predict we will see affordable, consumer-grade smart isolation feet that use internal sensors to actively counteract ambient room vibrations in real-time. Until then, mechanical decoupling remains our best defense. If you want to take your analog setup to the next level today, I challenge you to try the DIY butcher block and tennis ball trick this weekend. Let me know in the comments how much deeper and tighter your bass response becomes once your cartridge is finally allowed to do its job in peace.
Three Hard-Won Truths About Analog Isolation I Wish I Knew Sooner
Looking back at my stack of ruined styluses and muddy pressings, I realized that true analog clarity is a game of millimeters. First, never underestimate the power of flooring. A turntable resting on a console that sits on bouncy hardwood will always struggle, no matter how good your isolation feet are. Second, the heavy-handed approach of piling on random rubber mats often backfires by deadening the natural, airy treble response of your cartridge. Finally, isolation is a cumulative game; a single weak link, like a taut, stiff interconnect cable pulling against the back of your turntable, can bypass your expensive isolation platform completely by transferring shelf vibrations directly into the chassis.
My Go-To Kit for Defeating Analog Rumble
If you are ready to take physical isolation seriously, you do not need to spend thousands of dollars on snake-oil audiophile accessories. I personally rely on a few inexpensive but highly effective tools. First, a set of Hudson Hi-Fi Sorbothane hemisphere pads works wonders under bookshelf speakers because Sorbothane absorbs up to 94.7% of mechanical shock vibration. Second, a simple digital stylus pressure gauge from Riverstone Audio ensures your tracking force stays locked in. Finally, if you want to eliminate low-frequency cabinet vibrations entirely, consider building your own dense platforms; for those looking to expand their soundstage even further, understanding how to get better bass from a bookshelf speaker without a sub is the ultimate companion guide to isolation.
Take the First Step to Pure Uninterrupted Playback Today
There is nothing quite like the feeling of dropping the needle and hearing absolute silence before the first note hits. By physically separating your components and choosing smart decoupling methods, you protect your delicate vinyl collection and unleash the true dynamic capability of your cartridge. Your turntable deserves a stable, vibration-free environment to retrieve every ounce of detail hidden in those grooves.
Have you ever struggled with a persistent hum or a skipping needle when you turn your music up? Let me know in the comments below!