
Have you ever spent hours fiddling with your home theater setup, only to be frustrated by unsightly wires snaking across your living room floor? I vividly remember the moment I realized my carefully curated space was being spoiled by a chaotic tangle of speaker cables. It was a small inconvenience, but enough to ruin the immersive experience I craved. That lightbulb moment pushed me to find a solution that wouldn’t compromise aesthetics or safety.
The Secret to a Clean Look: Hiding Speaker Wires Beneath a Thin Area Rug
What if I told you there’s a way to keep your speaker wires hidden without drilling holes, running cords along baseboards, or sacrificing your rug’s style? Today, I want to share my personal journey and the method I found effective for concealing wires seamlessly under even the thinnest rugs. It’s a game-changer, especially if you’re renting or just want to keep things tidy without the hassle of permanent modifications.
Is Concealing Wires Under a Rug Safe and Effective?
Early on, I made a mistake that many beginners do: assuming all rugs are the same and that laying wires underneath is a straightforward fix. I didn’t consider the thickness of my rug or the potential for overheating. This oversight led to a brief scare when my setup started malfunctioning. Remember, wires can heat up if they’re compressed or overloaded, so it’s essential to use the right type of cable and proper techniques. For more tips on maintaining audio quality and safety, check out this article about thin speaker wires.
Now, I’ll guide you through the best practices I’ve discovered—something I wish I had known from the start. Whether you’re dealing with floorstanding speakers, soundbars, or bookshelf units, these insights will help you keep your wires out of sight while ensuring maximum safety and performance. Ready to transform your space into a clutter-free haven? Let’s dive in!
Preparing Your Rug and Wiring Materials
Start by selecting a thin, low-pile rug made of natural fibers or synthetic material that allows heat dissipation. Gather appropriate speaker cables—ideally, 16-gauge or thicker, and verify they are rated for the appropriate length and power load. Use twist ties or cable clips to organize your wires beforehand, preventing tangles during installation. I once accidentally ordered a rug that was too thick, causing the wires to overheat slowly, so measure your rug thickness carefully before proceeding.
Planning the Wiring Pathway
Lay your rug in its intended position and mark the desired wiring route with masking tape or painter’s tape. Choose a route that minimizes foot traffic over the wires, especially near the speaker terminals. Keep in mind that running wires underneath the rug isn’t just about concealment; it’s also about maintaining signal integrity. I learned this the hard way when I ran a thick cable across doorways, leading to intermittent sound issues. For longer runs, consider using specially designed in-wall-rated cables to prevent overheating and ensure safety.
Creating a Safe and Effective Wiring Layer
Gently lift the rug along your planned pathway. Use a utility knife to cut a shallow slit (about 1/4 inch deep) into the underside of the rug, making sure not to cut through the upper fibers. Lay the cable into the slit, then fold the rug back down carefully. Secure the edges of the slit with double-sided tape if necessary. I once neglected to secure the edges, which caused the rug to bunch and make stepping uncomfortable. Place a temperature-resistant pad, such as a thin rubber sheet, beneath the cable to aid heat dissipation, especially near amplifier connections. Remember, excessive heat can damage both your cables and your rug if not managed properly.
Securing the Wires and Final Checks
Use cable clips or adhesive-backed cable anchors to keep the wire flat and secure, avoiding trip hazards. Tuck excess cable length neatly behind furniture or along baseboards, securing with clips if needed. Before finalizing, test your setup by playing audio at high volume to check for overheating or loose connections. I did this by cranking my system and noticing a slight warmth in the cable, prompting a recheck of my heat management approach. Employing heat-resistant sleeving or conduit around critical sections further enhances safety, especially in high-power setups. For expert safety tips, see this article about thin speaker wires.
Ensuring Long-term Safety and Aesthetic Appeal
Finally, place your rug back, ensuring all wires are concealed and secured. Avoid placing heavy furniture directly on the cables, which can cause crushing and overheating. Regularly inspect the wiring for signs of wear or heat discoloration. Properly installed wires beneath a rug not only hide unsightly cords but also keep your space safe and clutter-free. When I added this setup to my living room, I noticed an immediate improvement in aesthetics and a peace of mind knowing my wires were safe. Remember, the key is to balance concealment with heat dissipation and security for optimal results.
When diving into the world of soundbars, speakers, headphones, or amplifiers, many enthusiasts fall prey to misconceptions that can hamper their listening experience. A common myth is that bigger or more expensive gear always equals better sound. However, in my experience, nuanced factors like speaker phase alignment and room acoustics dramatically impact audio quality—something many overlook. For instance, misjudging speaker phase can cause phase cancellation, reducing bass and clarity, despite high-end equipment. A simple test for phase correctness involves using a 9V battery on car speakers, a technique I recommend mastering to avoid muddled sound; check this guide. Many also assume that all soundbars outperform TV speakers universally, but in reality, stereo sets often provide superior clarity and dynamic range. An advanced mistake involves neglecting cable quality; thin speaker wires may seem convenient but can cause significant signal degradation over long runs, impairing sound quality and risking overheating—so always consider proper gauge cables and protective sleeving. Have you ever fallen into this trap? Let me know in the comments. Remember, understanding these nuances ensures you invest wisely in gear that truly elevates your listening, rather than just spending on flashy labels. Stay vigilant, and your audio setup will reward you with authentic, immersive sound.
Keep Your Sound System Running Smoothly with the Right Tools
Maintaining optimal performance from your home audio gear requires more than just regular use; it demands the right tools and consistent care. Over time, dust accumulation, loose connections, and component wear can degrade sound quality or even cause hardware failure. To prevent these issues and extend the lifespan of your equipment, investing in a few specialized tools is essential.
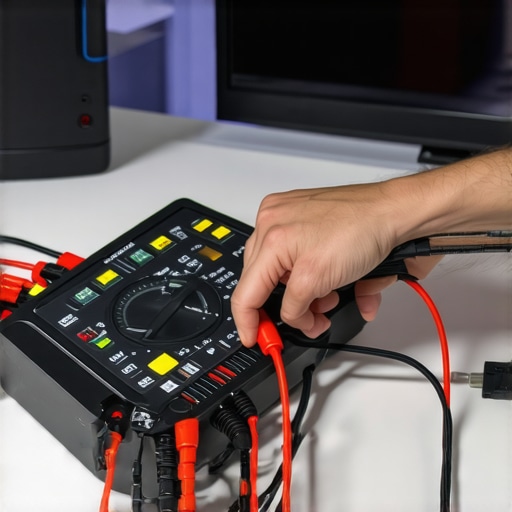
One of my top recommendations is a digital multimeter. I use mine daily to verify amplifier outputs and check for faulty wiring, especially when troubleshooting strange noises or volume inconsistencies. A high-quality multimeter helps identify shorts, open circuits, and voltage irregularities with precision. Pair it with a cable tester designed for audio and speaker wiring, which I find invaluable for quickly confirming the integrity of connected cables before a critical listening session.
Another critical tool is a contact cleaner spray. Over time, potentiometers, switches, and jacks oxidize, leading to crackling sounds or loss of channel balance. Regularly cleaning these components with a spray like DeoxIT can restore pristine contact quality. I apply it during semi-annual maintenance sessions, especially for vintage gear with exposed potentiometers, to keep signals clean and noise-free.
For physical cleaning, a microfiber cloth and a gentle vacuum with a brush attachment are must-haves. Dust settling on speakers and inside vents impairs heat dissipation and can cause overheating. Cleaning your speakers’ tweeters and bass drivers carefully prevents damage and preserves clarity. Avoid using harsh chemicals; instead, opt for soft, lint-free cloths, and pay special attention to ports and ventilation areas.
How do I maintain my audio system over time?
Consistency is key. Establish a routine maintenance schedule that includes inspecting connections for corrosion, testing power supplies, and updating firmware on smart components. For example, many modern amps and soundbars receive firmware updates that improve stability or add features—staying current ensures you maximize the value of your investment. I check for updates monthly through manufacturer support sites and apply patches promptly to avoid security vulnerabilities or compatibility issues.
Monitoring the environment also plays a significant role. Keep your setup in a climate-controlled space, avoiding excessive humidity or temperature fluctuations, which can accelerate component deterioration. Using dehumidifiers or air conditioners during humid seasons helps protect delicate electronics, ensuring your listening experience remains consistent year-round.
Looking ahead, I believe the trend toward smart, self-diagnosing home audio systems will continue to evolve. Devices will increasingly incorporate built-in sensors that alert users to issues before they impact sound quality, simplifying maintenance even further. Until then, armed with the right tools and routine checks, you can confidently keep your system performing at its best.
Elevate Your Maintenance Game and Protect Your Investment
Try incorporating a dedicated cable tester and routine cleaning with contact cleaner into your regular maintenance. These simple yet powerful steps will help prevent unexpected problems and ensure your sound system continues to deliver exceptional audio for years to come. Want to dive deeper? Check out this detailed article for guidelines on wiring health and safety.
Lessons That Changed My Home Audio Approach
One of the biggest surprises I encountered was how a small tweak in wire management could dramatically improve sound quality—particularly avoiding the pitfalls of heat buildup under rugs. I discovered that not all cable materials are created equal; using heat-resistant sleeving and low-profile cables prevented overheating that I initially ignored. Additionally, I learned that the secret isn’t just hiding wires but ensuring they’re safe and unobstructed, which many overlook when rushing to conceal cords. Lastly, I realized that maintaining an organized wiring path isn’t just aesthetic but integral to preserving signal integrity, especially over long runs. These lightbulb moments taught me that smart cable choices combined with careful planning elevate both safety and audio performance in home setups.
My Go-To Tools for Audio Perfection
Over time, I leaned on a handful of trusted tools that keep my home audio system in tip-top shape. A digital multimeter helps me verify amplifier outputs and diagnose wiring issues—an underrated gem for any enthusiast. I swear by a quality cable tester; it saves hours when checking new or tangled cables, ensuring I avoid unnecessary sound troubles. Regular cleaning with contact cleaner and microfiber cloths keeps my connections pristine and dust-free, preventing crackles and static. Lastly, investing in heat-resistant cable sleeves and adhesive cable clips has made a real difference, ensuring my wires stay safe and organized. Trust me, equipping yourself with these tools turns troubleshooting from a headache into a manageable routine, preserving both safety and sonic clarity.
Time to Take Action on Your Sound System
If you’re tired of unsightly wires and worried about safety, empowering yourself with proper wiring techniques will make all the difference. Remember, a neatly concealed and heat-managed setup not only looks sleek but also prolongs the life of your audio equipment. Don’t wait until overheating or accidental damage disrupts your experience—start refining your wiring today. Your home theater deserves the best balance of aesthetics and safety, and with these insights, you can achieve it. So, what’s the next step you’re excited to try in your home audio journey? Share your thoughts below—I’m eager to hear your plans and questions!