
I’ll never forget the moment I realized that my expensive home theater system wasn’t performing as it should. Despite investing in high-end speakers, the sound never felt quite right. One day, as I was fiddling with the setup, I noticed a strange hissing noise whenever I played certain audio tracks. At first, I blamed the equipment or cables. But then it hit me—maybe there was an air leak messing with the speaker’s performance.
This lightbulb moment led me down a path of DIY troubleshooting, and I discovered the simple paper towel test. It sounds almost too easy, but it works wonders for checking if your speaker cabinet seals are airtight. If you’ve ever faced a dull or muffled sound, or wondered why your soundbar isn’t quite as clear as it should be, this trick could be a game-changer. And trust me—those tiny leaks make a big difference.
Why Air Leaks Can Ruin Your Sound
Speaker air leaks are sneaky adversaries. They allow unwanted air movement, which can distort sound quality, reduce bass response, and create strange rattles or static. Early on, I made the mistake of ignoring the loud, popping noise coming from my bookshelf speakers—believing that it was just a faulty component. Turns out, a small tear in the seal was letting air escape, blunting the soundwave and diminishing the clarity. According to audio engineers, even minor leaks can have a significant impact on performance (source).
That’s why checking for and sealing those leaks is essential for anyone serious about optimizing audio. But here’s the thing—most of us don’t have fancy equipment or professional tools at home. Luckily, there’s a quick, low-tech solution that I swear by: the paper towel test. It’s simple, affordable, and surprisingly effective at pinpointing those pesky leaks hiding behind your speaker grills or inside your cabinet.
Have You Faced This Problem?
Do your speakers sound muffled or inconsistent despite being high-quality? Do you experience strange rattles or rattly bass that never quite hits right? If so, you might be dealing with an air leak. Before you start spending hundreds on repairs or new gear, try this easy trick. It worked wonders for me and might just do the same for you. Ready to learn how to perform the paper towel test and improve your sound quality? Let’s dive into the step-by-step process.
Perform the Paper Towel Test Step by Step
First, turn off your audio system and disconnect each speaker to prevent accidental damage. Place a clean paper towel near the area where the speaker cone meets the enclosure—this is often around the edges or behind the grille. Play a low-volume, simple sound like pink noise or a steady tone at about 50% volume. Observe the paper towel: if it stays in place, your seal is likely airtight; if it rises or flutter, there may be a leak that needs fixing.
Using Your Voice as a Leak Detector
To double-check, hold the paper towel gently against the suspected leak area while your system is playing. If you notice the paper towel fluttering or lifting, it’s a sign of escaping air. This happened to me with my bookshelf speakers—I carefully examined the edges and found tiny tears in the sealant around the baffle. Despite my initial skepticism, this method quickly pinpointed the problematic spots.
Securing Leaks Effectively
Once you identify leaks, sealing them is straightforward. For small tears, apply a liberal amount of acoustical sealant or silicone caulk designed for speakers. Be sure to clean the area with a cloth first to ensure good adhesion. For larger gaps or damaged seals, consider replacing the gasket or adding weatherstripping. Remember, a proper seal maximizes the air impedance inside the cabinet, restoring clarity and bass response.
Choosing the Right Sealant
Use a non-resonant, flexible sealant suitable for audio equipment. Avoid generic caulks that harden and crack over time, as they can introduce vibrations or deteriorate. Check out soundproofing materials for budget-friendly options that also work well for sealing speaker cabinets.
Re-Test and Fine-Tune
After sealing, run the paper towel test again. Confirm that the paper stays put during playback. Reassemble the speaker and test with actual audio—listen for increased clarity, tighter bass, and reduced rattles. This simple approach can dramatically improve your listening experience, especially if your system previously sounded muffled or rattly due to minor leaks.
Remember, while this DIY fix is effective for small leaks, significant damage might require professional repair. But in most cases, a quick seal and the paper towel test can restore much of your speaker’s original performance, saving you time and money.
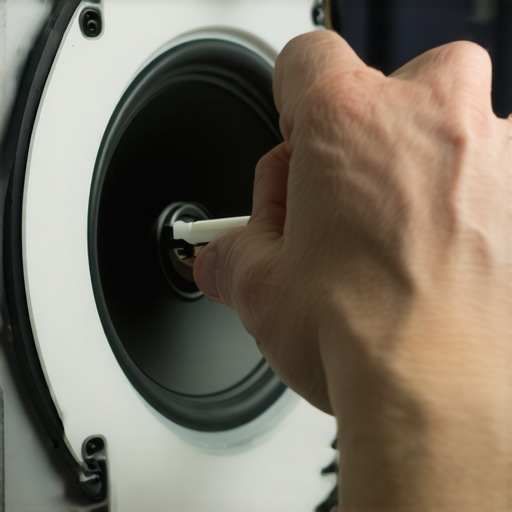
When it comes to home audio setups, many enthusiasts follow the herd, believing in certain myths that can actually hinder their listening experience. As an expert who has experimented with countless configurations, I can tell you that some popular beliefs are oversimplifications or outright misconceptions. Let’s dig deeper into these nuances and reveal what you might be missing in your setup.
One widespread myth is that more expensive equipment always guarantees better sound. While high-end gear has its advantages, it’s not a magic bullet. Factors like room acoustics and proper placement often outweigh the mere price tag. For instance, investing in speaker placement can dramatically improve your sound without a hefty upgrade. A study by the PLOS ONE Research emphasizes that environmental factors consistently impact perceived audio quality more than equipment specs.
Beware of Overlooking Room Treatment
Another common oversight is ignoring room treatments, which can be a costly mistake. Many assume that fancy speakers can compensate for poor acoustics, but this isn’t accurate. Effective soundproofing and damping materials, like those described in budget soundproofing tips, can prevent sound distortion and improve clarity. Neglecting these factors often leads to frustration despite expensive purchases.
Headphones are another area rife with misconceptions. Many believe that the latest noise-canceling models are universally superior. However, audio quality depends heavily on matching headphones to your device. High-end headphones can sound worse if you’re using a low-quality source or incompatible codecs. This highlights the importance of understanding your equipment’s compatibility and limitations.
Is Bigger Better for Soundbars?
Soundbars are often marketed as all-in-one solutions for TV audio, but size isn’t always an indicator of quality. Larger soundbars tend to have bigger drivers, but that doesn’t necessarily translate to better sound for your space. Instead, proper positioning, room acoustics, and subwoofer integration matter more. For example, subwoofer placement can make a substantial difference in deep bass performance, regardless of the overall size of your soundbar.
Let’s get more sophisticated. If you’re wondering about the fine-tuning of your home audio system, you might ask: How do I ensure my amplifier complements my speakers without risking damage or subpar performance? The answer involves understanding impedance matching and power handling, which, if overlooked, can lead to distortion or even equipment failure. Consult resources like wire gauge selection or seek professional advice for complex setups.
Remember, effective home audio isn’t just about buying shiny new gear. It’s about understanding the nuances—room acoustics, equipment compatibility, and placement—that impact sound quality. Don’t fall for the myths; instead, equip yourself with knowledge to make smarter choices. Have you ever fallen into this trap? Let me know in the comments and share your experiences!
Keeping It Working Like New
Maintaining your home audio gear isn’t just about occasional cleaning or quick fixes; it requires a strategic approach using reliable tools and disciplined routines. Over the years, I’ve refined my maintenance kit to include specific instruments and methods that guarantee longevity and optimal performance of amplifiers, speakers, and headphones. Having a dedicated toolkit saves you from costly repairs and ensures your setup consistently delivers studio-quality sound.
One essential tool I rely on is an accuratedigital multi-meter. It’s invaluable for detecting electrical issues, especially in amplifiers and crossovers. I prefer a model like the Fluke 115, known for its precision and durability. Regularly checking voltage levels and continuity can prevent minor problems from escalating into major failures.
For speaker maintenance, alaser distance meter helps when positioning and aligning speakers during setup. Proper placement impacts soundstage and bass response, and tools like the crawl method require precise measurements. This simple step can dramatically improve your long-term listening experience.
Headphone users benefit from acleaning brush andair blaster. Gently removing dust from drivers and ports prevents static and distortion. I also recommend apair of foam cleaning sticks to remove earwax buildup carefully, which can harm drivers over time. Proper cleaning maintains sound clarity and extends the lifespan of your gear.
Maintaining your equipment doesn’t stop at tools; software updates are equally crucial. Firmware upgrades from manufacturers fix bugs, improve compatibility, and sometimes enhance sound processing. I keep my digital-to-analog converters (DACs) and amplifiers up-to-date, referencing resources like industry tips to avoid counterfeit or subpar components.
What’s the key to keeping your sound system humming without surprises?
Establishing a routine maintenance schedule combined with quality tools is the foundation. Check wiring impedance with your multi-meter monthly, and inspect speaker seals using easy tests like the paper towel method. Clean your gear regularly with appropriate supplies to prevent dust accumulation. In the future, automation might play a role—imagine smart systems that monitor your equipment’s health and alert you before issues arise.
For a practical starting point, I recommend trying to perform a weekly check of your speaker wiring with a multimeter, ensuring connections are solid and impedance matches your amplifier’s expectations. This simple habit can prevent many common problems and keep your setup performing at its best for years to come.
If you’re serious about long-term sound quality, investing in these specific tools and developing a checklist routine can make all the difference. Not only will your gear last longer, but it will also sound consistently excellent—a true testament to a well-maintained system.
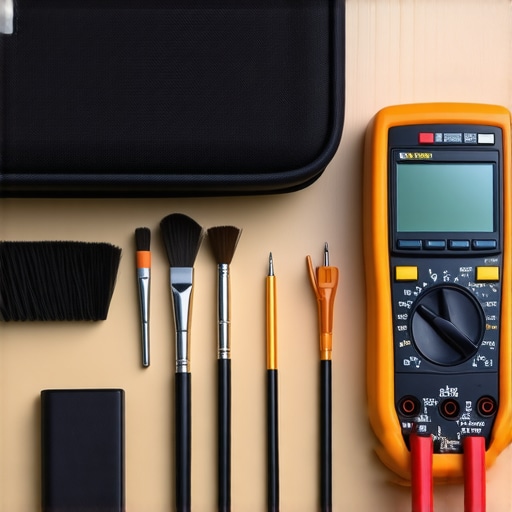
Here’s a visual overview of my essential maintenance toolkit, including a Fluke multimeter, laser distance meter, and cleaning supplies, all geared towards preserving high-fidelity sound over the years.
What I Wish I’d Known About Perfecting My Home Sound Back Then
- One of the toughest lessons was realizing that even premium equipment can fall short without proper room sealing; small air leaks can dampen sound clarity more than a pricey amplifier upgrade.
- Discovering that simple DIY tricks, like the paper towel test, can save me hundreds of dollars in repairs by quickly identifying leaks, instead of immediately suspecting my gear.
- I’ve learned that investing in a good-quality multi-meter pays dividends, allowing me to troubleshoot and maintain my audio system proactively rather than waiting for failures.
- My most surprising revelation was that room treatment—such as acoustic panels and proper speaker placement—outperform expensive gadgets in improving sound quality and creating an immersive experience.
- Lastly, understanding that regular maintenance routines, combined with minor fixes like sealing leaks, can keep my system performing at its best year after year, avoiding costly replacements.
Tools and Resources That Transformed My Listening World
- Fluke 115 Digital Multimeter: Trusted for its precision, it helps me verify electrical connections and prevent potential damage—essential for long-term equipment health.
- Laser Distance Meter: A game-changer for perfect speaker and subwoofer placement, ensuring optimal acoustics and deep bass in my listening room.
- Acoustical Sealant and Foam Gaskets: Affordable and effective for sealing tiny leaks, these materials have helped me restore sound clarity without professional repairs.
- Online Resources and Expert Blogs: Following trusted sites offers continuous insights and innovative tips that keep my system evolving and performing.
Your Next Step Towards Better Sound
Don’t let misconceptions or overlooked details hold back your audio experience. By applying these personalized lessons, trusted tools, and a proactive mindset, you can unlock the true potential of your home audio setup. Remember, the journey to great sound is an ongoing adventure—embrace it with curiosity and confidence. Have you ever uncovered a simple fix that transformed your listening experience? Share your story below and let’s learn together!
,