
One evening, I was eagerly unpacking a new pair of budget earbuds, expecting a decent listen. Instead, I was met with tinny sound, muffled bass, and that familiar disappointment. It was a lightbulb moment for me—how can something so affordable feel so cheap in both sound and experience? I realized I wasn’t alone; countless folks settle for underwhelming audio because they think premium sound is reserved for expensive gear. But here’s the truth: with a few simple tricks, your cheap earbuds can feel remarkably close to high-end headphones, transforming your listening experience without breaking the bank.
The Hidden Power of Earbud Positioning and Modification
What if I told you that the secret to elevating your earbuds lies not in buying the latest gadget but in making small adjustments and modifications? It’s about understanding why your earbuds sound dull and discovering how little tweaks can make a big difference. From basic tip replacements to clever positioning, these tips can unlock richer sound, deeper bass, and a more immersive experience—no expensive upgrades needed. Curious? Let’s explore how to turn those cheap buds into quality sound machines.
Is Your Earbud Comfort or Fit Actually Worth the Hype?
Early on, I made the mistake of ignoring ear tip comfort, which drastically affected my sound quality. A snug fit creates a better seal, blocking out noise and enhancing bass. It’s a simple fix—try different ear tips to find the perfect match for your ears. This small step can make your earbuds feel premium by delivering cleaner, fuller sound. So, before you ditch your buds for an expensive set, consider if a simple tip upgrade might be all you need.
Experiment with Ear Tip Upgrades
Start by trying different ear tips to improve the seal in your ear canal, which enhances bass and reduces sound leakage. I recall spending an afternoon trying foam and silicone tips from various brands until I found the perfect fit that dramatically improved clarity and comfort. Visit this guide to understand the impact of ear tips on sound quality and how to choose the right ones for your ears.
Adjust Earbud Positioning for Better Sound
Proper placement inside your ears makes a measurable difference. I once fiddled with my earbuds in different angles until I achieved a snug fit that created a better seal and richer sound. Think of your earbuds like a speaker cabinet; positioning affects resonance. Use a mirror to ensure consistent placement and avoid letting earbuds sit loosely. Small shifts can unlock deeper bass and clearer highs, transforming cheap gear into a surprisingly immersive experience.
Use Surface and Environment Tricks
Surface vibrations and room acoustics influence sound perception. I placed my earbuds on a soft cloth instead of a hard surface, which dampened unwanted vibrations and clarified sound. Also, positioning yourself away from reflective surfaces can significantly improve clarity. For detailed guidance, refer to this article on why speaker placement matters and how similar principles apply to earbuds.
Enhance with Simple Modifications
Modifications require minimal effort but yield substantial results. For example, wrapping a small piece of foam or felt around the stem of your earbuds can reduce vibrations and improve sound focus. I used a bit of blue tack to stop vibrations on my earbuds, which enhanced clarity and bass response. Basic DIY mods like replacing or customizing ear tips and adding damping materials can elevate your listening without extra cost.
Bass Boost with DIY Hacks
If bass is lacking, try creating a better seal or adding a small foam pad at the sound outlet. I once placed a tiny foam piece over the driver housing, which amplified bass response noticeably. For more advanced tweaks, consider substituting the silicone or foam tips with memory foam options, which conform better to your ear canal, improving both comfort and sound isolation. This is akin to how speaker placement can influence bass response—small adjustments lead to big improvements.
Protect and Maintain Your Tweaked Gear
Once you’ve optimized your earbuds, keep them clean and free from debris that can hinder performance. Regularly clean the drivers with a soft brush, avoiding liquids, as explained in this guide. Proper maintenance ensures your DIY enhancements continue delivering top-notch audio for a longer time.
Remember, transforming budget earbuds into a more refined listening device is about small, strategic changes. Experiment, tweak, and enjoy a richer soundstage right from your pocket.
,
Many audio enthusiasts and consumers alike fall into the trap of believing popular myths about headphones, soundbars, amplifiers, and speakers. A prevalent misconception is that bigger or more expensive gear always guarantees better sound. In my experience, this isn’t necessarily true. Sometimes, manufacturers push for larger cabinets or higher wattages as a marketing tactic, but the actual performance depends on nuanced factors like proper placement and room acoustics. For example, did you know that moving your bookshelf speakers a few inches away from the wall can significantly improve bass response and clarity? This simple tweak often yields more noticeable improvements than upgrading to a pricier model.
Are High-End Products Always the Best Choice for Your Room?
It’s tempting to assume that premium brands and flagship models deliver superior audio quality across the board. However, many users don’t realize that optimal placement and environment adjustments can outperform expensive gear in less-than-ideal spaces. For instance, even the most sophisticated open-back headphones can underperform if you’re in a noisy or restrictive environment. Conversely, sealed-back earbuds may provide excellent isolation and sound quality when used correctly. Recognizing that placement and room acoustics are integral, not just equipment specs, can save you money and frustrations.
Another common trap is underestimating the importance of cable management and wiring. Many overlook how poorly organized or hidden cables can lead to interference, signal degradation, or even accidental disconnections. For example, hiding speaker wires under a rug not only cleans up your space but also prevents accidental pulls that might damage connectors or speakers. Proper cable routing and guarding are often overlooked, yet they profoundly impact sound quality and system longevity.
Advanced users often ask: “Is more power always better for amplifiers?” The answer is nuanced. Overpowering your speakers can cause distortion or damage, especially if you’re not matching impedance properly. Instead, aim for an amplifier with a clean, accurate output that suits your specific speakers. Learning how to match impedance properly can elevate your setup’s performance without unnecessary expense.
In conclusion, many common assumptions about audio gear are oversimplifications. It’s their placement, environment, and proper setup that often matter more than raw equipment specs. Don’t get blinded by marketing hype—pay attention to the details that truly affect sound quality. Have you ever fallen into this trap? Let me know in the comments.
Maintaining your home audio system requires more than just occasional cleaning; it involves using the right tools and adopting best practices to ensure consistent performance over time. A well-kept setup not only preserves sound quality but also extends the lifespan of your equipment, saving you money and frustration in the long run.
Tools That Keep Your Audio Gear in Top Shape
For ongoing maintenance, I rely on a few specific tools that make a noticeable difference. First, a soft, anti-static brush is indispensable for cleaning delicate components like speaker drivers and amplifier vents. I use the AudioQuest StaticWand to gently remove dust without risking damage. Regular cleaning with this prevents dust buildup, which can cause overheating or static issues, especially in vintage or frequently used gear.
Second, a calibrated audio test microphone connected to a measurement software like REW (Room EQ Wizard) helps me monitor frequency response and identify issues like phase shifts or bad connections. This ensures my speakers and soundbars are performing optimally across the spectrum, particularly after long use or moving the system.
Third, quality cable testers, like the Mediasonic Cable Diagnostics Tool, are excellent for diagnosing wiring issues—crucial for home theater and multi-room setups. Troubleshooting wiring problems early can prevent dropouts or degraded sound quality, especially in complex wire runs behind walls or under carpets.
How to Extend Your Setup’s Lifespan
Proper environment control is equally vital. Avoid exposing your equipment to extreme temperatures or humidity, which can cause corrosion and component failure. Regularly inspecting for signs of wear—such as frayed cables or loose connectors—allows you to address minor issues before they escalate.
Implementing organized cable management not only cleans up your space but also prevents accidental disconnections and cable damage. Using cable clips or conduits keeps everything tidy and reduces strain on jacks and ports.
How do I maintain my audio equipment over time?
Consistency is key. Schedule routine inspections—every six months—to check for dust, loose fittings, and unusual noises. Clean connectors with contact cleaner to ensure a solid signal. If you notice hissing or distortion, refer to this guide for troubleshooting tips on active speakers. Replacing worn-out parts at the first sign of trouble is more cost-effective than waiting for complete failure.
Looking ahead, the trend in home audio maintenance is leaning toward smart monitoring tools. Devices like the Sonarworks SoundID Reference are beginning to offer real-time feedback and calibration, which will make upkeep more straightforward and automated. Embracing these innovations now can keep your system sounding spectacular for years to come.
Don’t hesitate to try advanced maintenance techniques, such as calibrating your system with REW software, which can reveal subtle issues invisible to the naked eye. For practical implementation, start by measuring your room’s response and tweak your speaker placement or equalization accordingly. Remember, a little effort today ensures your sound remains pristine tomorrow.
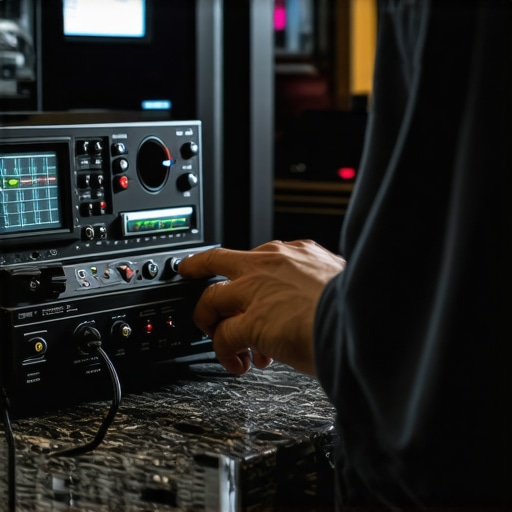
Sometimes, the most profound improvements in sound quality come not from costly upgrades but from simple, strategic tweaks to your existing equipment. A lightbulb moment for me was realizing that with just a little experimentation—like adjusting ear tip fit or repositioning earbuds—you can achieve a listening experience that rivals much pricier gear. These insights have empowered countless enthusiasts to enjoy richer, fuller sound without stretching their budgets.
Lessons That Changed My Approach to Home Audio
- Placement Over Price: Small adjustments in speaker placement or room setup can outperform expensive gear if done thoughtfully. For example, pulling bookshelf speakers slightly away from the wall can dramatically enhance bass and clarity, proving that environment matters more than raw cost.
- Familiarity Breeds Better Sound: Knowing your gear intimately—like exploring different ear tip materials or experimenting with damping materials—can unlock nuances you never knew existed, making your cheap earbuds feel like high-end audio devices.
- Room Acoustics Are Your Friend: Simple environment tweaks, such as adding rugs or curtains, can absorb reflections and improve soundstage, often more effectively than upgrading your equipment.
- Maintenance Matters: Regular cleaning and careful cable management prevent performance degradation. Using tools like this guide ensures your gear stays in top shape, protecting your investment.
- Critical Perspectives Open Doors: Question common myths like bigger equals better or premium brands guarantee great sound. Embracing a more analytical outlook helps you prioritize placement and environment, which often matter more than the equipment itself.
My Go-To Tools for Audio Excellence
- Anti-static Brush: The AudioQuest StaticWand helps me keep delicate components dust-free without damage.
- Calibration Microphone: Using a calibrated mic connected to REW software allows precise frequency response adjustments, fine-tuning my system’s performance.
- Cable Testers: The Mediasonic Cable Diagnostics Tool ensures my wiring is sound, preventing issues like signal degradation that can be subtle but impactful.
- Sound Treatment Materials: Foam pads and damping wraps, which I often craft myself, notably improve sound clarity and bass response—proving DIY can be effective and budget-friendly.
Keep Your Audio Experience Thriving
Extending the lifespan of your setup starts with environment control—avoiding extremes of temperature and humidity—and regular inspections for wear. Thoughtful cable management, such as hiding wires under rugs or using conduits, minimizes damage risks and maintains sound integrity. Tools like speaker placement tips emphasize that the environment around your gear significantly influences performance.
Looking ahead, adopting smart monitoring solutions—like the emerging automatic calibration tools—can streamline upkeep, ensuring your high-value sound even as devices age. Routine calibration and cleaning, guided by expert resources, safeguard your audio investments for years to come.
Remember, achieving great sound quality isn’t solely about spending more; it’s about understanding and optimizing what you already have. Small, informed changes can elevate your listening experience to new heights, making every penny work harder.