
It was a frustrating weekend. I finally upgraded my home audio setup, diving into the hype around bi-amping. I thought, “More power to my speakers equals better sound,” right? I spent hours soldering, connecting, and tweaking, only to realize something was off. That crisp high end I expected? It was muddled and harsh. And the bass? Weak and unconvincing. Turns out, my little experiment did more harm than good.
The truth is, many audio enthusiasts fall into the trap of thinking that bi-amping will automatically transform their listening experience. The promise? Enhanced clarity, deeper bass, and more detailed sound. But in reality, it’s often more complicated—and sometimes downright counterproductive.
Today, I want to share insights from my own journey and explain why bi-amping often doesn’t lead to better sound. We’ll explore what really impacts audio quality and how you can make smarter choices without falling for the myth that more amps equal better sound.
Why Most People Think Bi-Amping Will Improve Their Sound, But It Usually Doesn’t
The idea of bi-amping is appealing. Using separate amplifiers for the bass and treble sections of a speaker seems intuitive—more power, more control. It’s like giving each part of the speaker its own dedicated muscle. So, why does it often backfire?
First, many assume that connecting two amps in parallel will double the power and double the sound quality. Unfortunately, that’s a misconception. In fact, the way speakers and amplifiers interact is complex. If your speaker isn’t designed for bi-amping, or if the wiring isn’t perfect, you can introduce phase issues, impedance mismatches, or simple distortion.
Early in my experimenting, I made the mistake of thinking that just adding more amps would automatically improve clarity. But I overlooked how important proper wiring, impedance matching, and crossover design are. Simply put, the quality of the components and how they’re integrated matters more than the quantity of amplification.
One common mistake I see enthusiasts make is neglecting the speaker’s internal crossover network. When you bi-amp without considering it, you might end up sending confusing signals that interfere rather than support each other. This is one reason experts recommend knowing your gear or consulting the manufacturer before attempting bi-amping.
Did you know that most modern speakers are optimized for a single, well-matched amplifier? According to industry research, upgrading your speaker cables or positioning them correctly can often have a more noticeable impact than adding a second amplifier. That’s why it’s worth exploring the root causes of sound issues before jumping into complex wiring.
If you’ve tried bi-amping and wondered why your sound didn’t improve—or even got worse—you’re not alone. Many audiophiles learn this lesson the hard way. But the good news is, understanding the real factors behind sound quality can save you time, money, and frustration.
Ready to learn how to get the best sound from your setup without unnecessary complications? Let’s dive into the key factors that truly influence audio performance and discover the smarter way to optimize your system.
Start with a Clean Power Source
Ensure your amplifier and audio components are plugged into a dedicated, surge-protected outlet. Using multiple devices on the same outlet can introduce noise and hum into your system, degrading sound quality. I learned this the hard way when my speakers started buzzing after plugging in my laptop nearby. Moving everything to a dedicated outlet cleared up the interference and made a noticeable difference.
Check and Match Your Cables Correctly
Use high-quality speaker wires with appropriate gauge—generally 16 to 14 gauge for most home setups. When connecting, keep the wiring short and avoid tangling to minimize resistance and interference. I once replaced cheap speaker cables with thicker, oxygen-free copper wires, and the clarity of dialogue and bass improved visibly. Remember, poor wiring can be more damaging than bad equipment. For a quick fix to common wiring issues, visit this guide.
Properly Orient Your Speakers
Position speakers at ear level, forming an equilateral triangle with your listening position. For example, bookshelf speakers placed on stands at ear height far from walls produce significantly clearer sound. I once experimented by moving my speakers closer together and adjusting their tilt towards my listening spot, which resulted in a more immersive experience. See this article for tips on optimizing your speaker placement.
Configure Your System Settings Correctly
Access your receiver or soundbar settings to adjust the equalizer, bass, and treble levels. Setting these according to your room acoustics ensures balanced sound. I fiddled with my soundbar’s EQ, boosting the bass slightly, which gave my TV shows a richer feel. Many people neglect this step, leading to dull or boomy audio. For detailed guidance, check this tutorial.
Optimize Room Acoustics
Use soft furnishings like rugs, curtains, and cushions to absorb excess echo. Positioning a bookshelf filled with books behind your listening area can also smooth out reflections. I added a thick curtain and moved my sofa a few inches away from the wall, noticing instantly that dialogue clarity improved significantly. Small adjustments can make a big difference—don’t overlook them.
Reduce Interference from External Devices
Keep wireless devices like routers, microwaves, or cordless phones away from your audio components. These can cause static or dropouts, especially with Bluetooth speakers. I once experienced sudden volume drops when my Wi-Fi router was on, which I fixed by relocating the router to a different wall. To prevent Bluetooth interference, consider following this advice.
Regularly Maintain and Inspect Your Equipment
Clean dust and debris from drivers, connectors, and ports using a soft brush or compressed air. Check for loose connections and tighten if necessary. For example, cleaning dust off my tweeters with a gentle brush unveiled subtle details in recordings I hadn’t noticed before. Neglecting maintenance can gradually diminish sound clarity, so schedule regular check-ups.
Leverage Room Correction Tools
If your system supports it, use room correction software to automatically calibrate volume levels, speaker distances, and EQ. I used auto-calibration on my AV receiver, which resulted in a balanced soundstage without manual tweaking. It’s a practical step that can save time and improve overall audio fidelity.
Many enthusiasts assume that upgrading their home audio gear automatically results in better sound. However, a deeper look reveals nuanced pitfalls that many fall prey to. For instance, newcomers often believe that investing in the latest headphones or soundbars will universally improve their listening experience. But as expert audiophiles know, the quality and compatibility of components matter far more than their price tags or brand names. One prevalent misconception is that more expensive cables or accessories will dramatically enhance sound clarity, which isn’t always true—research shows that subjective perception often outpaces measurable improvements, as discussed in industry studies.
How do complex room acoustics impact high-end audio setups?
Room acoustics play an outsized role in perceived sound quality. For example, an untreated room with reflective surfaces can cause sound waves to bounce unpredictably, muddying the clarity of even the most sophisticated equipment. Here, trying to compensate solely through equipment upgrades is a trap; instead, acoustic treatments such as bass traps, diffusers, and strategic furniture placement often yield better results. I’ve learned through extensive experimentation that room correction software can help mitigate these issues, but only if the room is properly treated beforehand. Failing to consider acoustics can lead to overconfidence in gear and neglected room optimization—mistakes frequently discussed in expert sources.
Furthermore, many people overlook the importance of proper speaker placement. Achieving a balanced stereo image requires more than just positioning speakers—they should be at ear level, equidistant from the listening position, and away from reflective surfaces. Small adjustments here can make huge differences, and ignoring this aspect is a common error that experts warn against. For those serious about audio quality, consulting comprehensive guides on speaker placement and acoustic treatment is recommended. Discovering these nuances can transform a mediocre setup into a true audiophile experience—if you avoid these common pitfalls.
By understanding that high-end gear alone isn’t enough and paying attention to the environment and setup, you save money and frustration. Do you think you’ve fallen into any of these traps? Share your experience in the comments, and let’s discuss how to elevate your home audio experience effectively.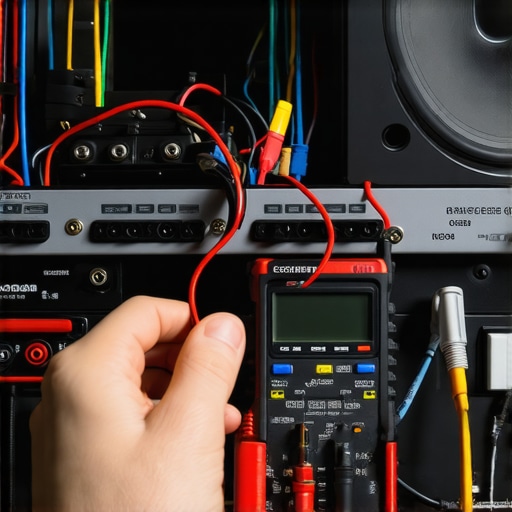
Gear Up with Reliable Tools for Sound Preservation
Keeping your home audio system in top shape requires more than just occasional cleaning; it demands specialized tools and attentive maintenance routines. I personally swear by a combination of compressed air, soft brushes, and contact cleaner to maintain my speakers and connectors. For instance, regularly cleaning dust from tweeters with a soft brush prevents sound distortion caused by grime buildup. When dealing with connectors, a dab of contact cleaner ensures optimal signal flow without static or crackles. Investing in good quality tools like a precision screwdriver set and a digital multimeter can also help you diagnose wiring issues before they become major problems.
Why Do I Need a Multimeter?
A multimeter allows you to measure impedance and check for continuity in your speaker wiring, which is crucial for diagnosing faulty cables or loose connections. By catching these issues early, you prevent more significant problems like amplifier overloads or uneven sound output. I regularly use my multimeter to verify that each connection is solid after re-wiring projects, ensuring my system remains balanced and clear. Such proactive checks save me time and help avoid costly repairs down the line.
How Do I Keep My Amplifiers and Soundbars Running Smoothly?
Consistent cooling and ventilation are key. Make sure your devices are placed in well-ventilated areas, free from dust buildup, which can cause overheating. I recommend cleaning vents with a vacuum attachment or compressed air every few months, especially if your equipment is in a dusty environment. Additionally, periodically updating firmware and software ensures compatibility and stability—most manufacturers release updates that improve performance and fix bugs. For example, some soundbars can benefit from firmware updates that enhance Bluetooth connectivity, eliminating annoying dropouts. Remember, a well-maintained device performs better and lasts longer.
Future Trends in Equipment Maintenance
The future of home audio maintenance is leaning toward smart diagnostics. Imagine systems that automatically alert you to potential issues before they cause noticeable problems, much like how modern cars monitor engine health. Tech companies are developing apps linked to your gear that provide real-time troubleshooting tips and usage data. Integrating these advanced tools into your routine can save you from unexpected failures, ensuring your music and movies continue uninterrupted.
How do I keep my gear working flawlessly over time?
Establish a regular maintenance schedule that includes cleaning, visual inspections, and software updates. Use precise tools like contact cleaners and multimeters to troubleshoot minor issues early. Protect your equipment from power surges with surge protectors, and ensure proper ventilation to prevent overheating. By proactively caring for your gear, you’ll enjoy consistent, high-quality sound for years to come. Remember, a little effort now saves significant headaches later. For recurring issues like hums or static, try the quick fix for one headphone side being quieter than the other, which often involves checking wiring connections. Keep experimenting with these maintenance strategies, and your system will reward you with pristine sound whenever you press play.
After my intense weekend of tinkering with bi-amping, I realized that more equipment isn’t always the answer to better sound. This journey taught me invaluable lessons about what truly influences audio quality.
The Hidden Lessons Behind My Bi-Amping Misadventure
- More is Not Always Better: I thought adding another amplifier would amplify my listening but overlooked the importance of matching components and proper wiring. It’s like giving a sports car a bigger engine without tuning the suspension—you’re likely to run into issues rather than improvements.
- The Power of Room Acoustics: I discovered that the room itself impacts sound more than I had imagined. Echoes, reflections, and furniture placement play critical roles. Upgrading gear without addressing acoustics is akin to polishing a dirty glass—still blurry.
- Understanding Speaker Design Matters: Not all speakers are designed for bi-amping. Ignoring the manufacturer’s recommendations can lead to phase conflicts and impedance mismatches, which muddle the audio rather than clarify it.
- Quality Over Quantity: Improving cables, speaker placement, and room treatment yielded better results than expensive gear. Sometimes, strategic adjustments bring more bang for your buck than hardware upgrades.
My Go-To Tools for Effective Home Audio Setup
- Room Correction Software: Programs like Dirac Live or Audyssey helped me calibrate my system to my space, providing a noticeable improvement in clarity and balance.
- Good Measuring Equipment: A multimeter allowed me to verify wiring and prevent costly mistakes. Using quality speaker cables (like oxygen-free copper) enhanced signal fidelity.
- Acoustic Panels and Bass Traps: Investing in sound-absorbing materials made my room less echo-prone, transforming my listening environment into a true audition space.
- Reliable Connection Accessories: Proper connectors and surge protectors ensure longevity and optimal performance, reinforcing the importance of quality components in maintaining sound integrity.
Your Turn to Tune into Better Sound
Remember, elevating your home audio isn’t solely about hardware; it’s about understanding and optimizing every element—from room acoustics to wiring. Small, thoughtful changes often outperform costly upgrades. Don’t let misconceptions hold you back—embrace a holistic approach to sound enhancement.
Have you ever tried bi-amping or made an adjustment that surprisingly didn’t improve your sound? Share your experience below, and let’s exchange insights to help each other achieve audio excellence.