
It was a frustrating Saturday afternoon when I finally decided to upgrade my home theater speakers. As I eagerly unboxed the new setup, I genuinely believed I was about to experience the pinnacle of audio bliss. But instead, what I got was a high-pitched, sharp, and almost shrill treble that made my ears tense up in protest. I couldn’t believe it. Was I doing something wrong? The answer hit me during a late-night listening session: the type of tweeters used in my speakers was making all the difference.
The Unsung Hero of Smooth Sound: Silk Dome Tweeters
Since that day, I’ve been on a quest to understand why some tweeters sound so much smoother than others. Turns out, the material of the dome—specifically silk—has a massive impact on audio quality. Unlike aluminum, which can produce a more piercing high-frequency response, silk domes tend to offer a gentler, more natural treble that is much easier on the ears. This realization transformed my listening experience, and I want to help you find that same sense of audio bliss.
In this post, we’ll explore why silk dome tweeters deliver a smoother, more refined sound than aluminum ones, dive into common misconceptions, and I’ll share tips from my own experience to help you choose speakers that truly satisfy your ears.
Is the Hype About Silk Tweeters Really Just Marketing?
Early in my journey, I mistakenly dismissed the importance of tweeter material, assuming it was just a fancy marketing term. I bought a pair of speakers based solely on brand reputation, only to be met with sharp, fatigue-inducing treble. That was my mistake. Focusing on the material and design of the tweeters can mean the difference between listening fatigue and hours of enjoyable sound. For a deeper dive into how tweeter design affects your listening, check out this article on active speakers.
Are you tired of earbuds or speakers that make your ears hurt after just a few minutes? If so, you’re not alone — and understanding the subtle difference between different tweeter materials might be your game-changer. Now, let’s step into WHY silk dome tweeters are often considered superior and how that knowledge can shape your next purchase.
Identify Your Sound Goals and Preferences
Before diving into technical specifications, define what you want from your speakers. Do you prioritize smooth treble for long listening sessions or sharp, punchy high frequencies for party environments? Personal experience taught me that aiming for clarity without fatigue is key. This clarity often hinges on tweeter material choices, with silk domes providing a more forgiving sound for extended use.
Select the Appropriate Tweeter Material
Choose Silk for Natural Smoothness
Silk dome tweeters excel at producing gentle, natural high frequencies that won’t strain your ears. During my first upgrade, switching to silk domes transformed my listening experience, eliminating that ear-tiring sharpness I priorly endured. When shopping, look for speakers explicitly mentioning silk, fabric, or textile domes in their specs.
Avoid Aluminum if You Want Relaxed Treble
Aluminum tweeters tend to be brighter and more piercing, which can cause listener fatigue. I learned this the hard way when a budget set with aluminum tweeters gave me headaches after an hour of music. Consider this if you often listen for hours at a stretch or have sensitive hearing. For more about speaker components, check out this guide on active vs. passive speakers.
Assess the Design and Compatibility
Ensure the tweeters match your speaker cabinet and crossover design. Improper matching can lead to overlapping frequencies or gaps, muddying your sound. I tested a pair of silk dome tweeters by temporarily mounting them on my existing speakers, which helped determine if the tonal balance was right before a full upgrade. Remember, the placement of tweeters affects sound dispersion—aim for positions that optimize imaging, like in the best mounting spots.
Implement Proper Tweeter Placement
Positioning affects the perceived smoothness and clarity. Mounting tweeters at ear level and angling them slightly downward can smooth out high-frequency response. I once experimented with different angles in my listening room—initially a mess of reflections—and found that slight tilts reduced harshness significantly, mimicking the intended silk dome effect. Use stands or mounts to fine-tune the angle for your space.
Test and Fine-Tune with Real Content
Once installed, test with familiar music tracks that highlight high frequencies. Notice the difference in sibilance and sharpness. Adjust placement if needed. During my setup, a simple repositioning of the speakers and slight toe-in resolved a shrill top end, resulting in a smoother sound reminiscent of professional studio monitors. For insights on optimizing your entire sound system, see five-channel system setups.
Many audiophiles and casual listeners alike often fall prey to misconceptions that can cost them significantly in both performance and money. A common myth is that buying the most expensive or latest model guarantees superior sound, but in reality, understanding the nuanced differences and technical intricacies can prevent costly mistakes. For example, some assume that high wattage ratings always mean louder or better, yet without proper matching of amplifiers and speakers, you might end up with distorted or imbalanced sound, as explained in expert analyses of amplifier-speaker compatibility. When shopping for soundbars or headphones, many overlook the importance of sound signature and room acoustics, which play a crucial role in the listening experience. It’s also tempting to assume that more features equate to better quality; however, features like Bluetooth multipoint or app control are secondary to core audio fidelity.
A critical trap to avoid is focusing solely on specifications rather than listening tests. An overly hyped speaker or headphone might appear impressive on paper, but could produce harsh treble or muddy bass in real-world use. For instance, many fall into the trap of choosing speakers based on max SPL ratings without considering how the sound interacts with their room’s acoustics. Investing in good room placement and calibration can drastically improve performance, often more than upgrading to a slightly better model.
Advanced users should pay close attention to component synergy—how amplifiers, speakers, and source devices work together—and not just their individual specs. Misalignment here can lead to muddy, disconnected soundstage, diminishing the immersive quality of home audio. As audio engineer Ethan Winer points out, “Matching your gear properly can make budget setups sound like high-end systems.” Conversely, neglecting this synergy is a common mistake, leading to disappointment despite high investments.
Here’s a question for the seasoned audiophile: how does room correction technology interact with traditional speaker placement? Modern room correction solutions can compensate for acoustic flaws, but relying solely on them can create a false sense of perfect sound, masking underlying acoustical issues. Proper placement and acoustic treatment often yield better results. For a detailed look into optimizing your setup, check out this comprehensive guide on five-channel system setup.
Finally, be cautious of impulse buys driven by discounts or limited-time deals. You might save money initially, but if the gear doesn’t match your listening preferences or needs, it becomes a costly mistake. Remember, quality home audio gear is an investment that pays off through longevity and satisfying performance. Do you think you’ve been caught in misconceptions about audio gear? Let me know in the comments and share your experiences!
Essential Tools for Long-Term Audio Maintenance
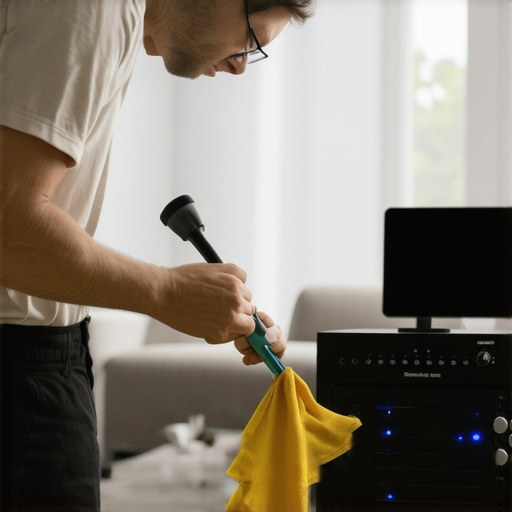
Keeping your home audio system performing at its best requires the right tools and a bit of routine care. One tool I personally swear by is a precision screwdriver set with magnetic tips. It’s invaluable when tightening loose screws on speaker terminals or adjusting back panels without risking damage. Additionally, a soft-bristled brush, like a dedicated electronic dusting brush, helps remove accumulated dust from vulnerable components like tweeter diaphragms and amplifier heatsinks, preventing overheating and distortion. For cleaning delicate drivers, I recommend a microfiber cloth lightly dampened with isopropyl alcohol—just enough to lift grime without leaving residue. Regular inspection of cables for wear or corrosion also extends the lifespan of your connection points, ensuring consistent sound quality.
Adopt a Routine to Extend Equipment Life
Establishing a maintenance schedule can dramatically improve the longevity of your audio gear. For example, every six months, I disassemble and gently clean my soundbar and speakers, paying close attention to the drivers and internal vents. When handling connectors, I use contact cleaner sprays available at electronics stores, which help eliminate oxidation on terminals. These simple practices prevent issues like crackling or loss of channel, which often stem from degraded connections. Remember, even high-end equipment benefits from periodic checks—think of it as a preventive tune-up that saves you costly repairs later on.
Software and Calibration Make a Big Difference
Beyond physical tools, calibration software like REW (Room Equalization Wizard) helps optimize your system’s sound profile over time. I use REW in conjunction with a calibrated measurement mic (such as the MiniDSP UMIK-1) to identify frequency imbalances caused by room acoustics or component aging. This allows me to apply digital room correction via my AV receiver’s settings, maintaining a balanced and immersive soundstage. Future audio trends point toward smarter, AI-driven calibration tools that analyze and adjust settings dynamically, making ongoing maintenance even more intuitive. Staying ahead means embracing these developments and integrating them into your routine.
How do I maintain my audio setup effectively as it ages?
Consistent checkups are key. Regularly inspect physical connections, keep components dust-free, and update firmware when available. For instance, updating your soundbar’s firmware can fix bugs and improve compatibility, ensuring long-term enjoyment. Don’t forget to test your system with familiar content after every tweak, watching for any shifts in clarity or volume consistency. If you notice issues with bass or treble response over time, using tools like REW to measure and recalibrate can restore your audio’s pristine quality. By making maintenance a habit, you’ll keep your investment sounding great for years to come.
For a quick hands-on tip, try using a microfiber cloth dipped lightly in alcohol to gently clean driver surfaces—this can remove stubborn dust and fingerprints that dull sound quality. Incorporating routine cleaning and calibration steps now will save money and frustration later, helping you enjoy your home audio experience to the fullest. Want to understand more about digital room correction and how it can elevate your setup? Check out this detailed guide on advanced calibration techniques.
Lessons That Came from a Sharp Wake-Up Call
One of my biggest surprises was realizing that the smallest component—the tweeter—could dramatically alter my entire listening experience. I once dismissed speaker materials as marketing hype, but after experiencing unbearable treble, I learned that actual sound signatures matter deeply.
Another lesson was the importance of patience during setup. Rushing to buy the fanciest model without considering your room acoustics or component compatibility ended in disappointment. Understanding the subtle differences in tweeter design prevented many future frustrations.
Lastly, I discovered that embracing imperfections—like slight placement adjustments—increased my listening pleasure more than any high-end upgrade. Sometimes, small tweaks and knowledge can unlock astonishing audio quality that feels personalized and alive.