
It was a frustrating afternoon. I had just splurged on what I thought were the perfect bookshelf speakers, expecting them to fill my living room with crisp, immersive sound. But as I laid back, soaking in the music, a strange rattling distracted me. The bass, crisp in the center, felt muddy and uneven—like the speakers were fighting against something invisible. That lightbulb moment hit me hard: I realized I was overlooking one of the simplest, yet most crucial, upgrades—**isolation pads**. That little investment transformed my listening experience overnight.
Why Ignoring Isolation Might Be Costing You Big Time
For years, I believed that high-quality wires and fancy amplifiers mattered the most. I was convinced that upgrading cables would unlock richer sound or that a new amp would magically fix all shortcomings. But I was missing a key piece of the puzzle. It wasn’t until I added isolation pads under my speakers that everything changed. Before, my sound was boomy, imprecise, and inconsistent—no matter how many wires I swapped or gadgets I purchased.
Isolation pads are often dismissed as minor accessories, but they serve a critical purpose. They prevent vibrations from transferring from your speakers to the furniture or the floor. When your bookshelf speakers sit directly on a sturdy surface, vibrations travel through those surfaces and color your sound. Instead of hearing the pure, clear audio you paid for, you’re listening to the acoustic version of a noisy room.
In fact, a study published in the *Journal of the Audio Engineering Society* highlights that decoupling your speakers can dramatically improve sound clarity by reducing unwanted resonance (AES, 2013). The effect might seem subtle at first, but once you experience it, you’ll wonder how you ever listened without them.
Have you ever encountered that annoying rattle or noticed your bass sounding best only in one corner of your room? If so, you’re likely witnessing firsthand how vibrations affect your audio. The good news: addressing this is often cheaper and easier than upgrading your entire system.
But I know what you’re thinking—”Are isolation pads really worth it?” I used to believe that until I experienced the difference myself. Now, I can’t imagine my setup without them. In the sections ahead, we’ll explore how to choose the right pads and set them up for maximum benefit. Ready to ditch the muddy sound and get the clarity you deserve? Let’s dive into the practical steps you can take today.
Secure Your Speakers Properly
Start by placing your speakers on sturdy, flat surfaces to prevent any unwanted movement. Avoid placing them directly on open shelves or uneven furniture, which can cause vibrations to transfer and muddy your sound. In my experience, temporarily placing my speakers on makeshift stands—stacked books or bricks—helped me notice immediate improvements in clarity.
Choose the Right Isolation Pads
Select pads made of dense foam, rubber, or specialized audiophile materials. These act as dampers between the speaker and surface, drastically reducing vibrations. I initially tried cheap foam pads from a hardware store, but upgrading to high-density rubber pads gave me a night-and-day difference in bass tightness and overall sound purity. Learn more about how high-quality pads elevate your sound.
Proper Placement is Key
Position your speakers so they’re not flush against walls or corners—these areas tend to amplify bass and create boomy sound. Instead, keep them at ear level and form an equilateral triangle with your listening position. Once, I moved my bookshelf speakers just 5 inches away from the wall, which greatly improved dialogue clarity in my movie nights. Remember, every room influences sound—experiment with locations for the best results.
Decouple Your Subwoofer
If using a subwoofer, isolate it with foam pads or spikes to prevent floor vibrations from reaching other furniture, which can color your bass. Redirecting the sub away from walls or placing it on a dedicated stand helped me eliminate rattling in my walls during deep bass notes. For more tips on maximizing subwoofer performance, check out this guide on deep bass techniques.
Optimize Cable and Power Arrangement
Loose or poorly managed cables can transmit vibrations, reducing clarity. Use cable clips to keep wires tidy and off the floor. Additionally, plugging your audio gear into a power conditioner or surge protector minimizes electrical noise that can introduce static into your sound. During a recent setup, tidying my cables eliminated hums that I had blamed on my speakers.
Test and Adjust for Your Room
Finally, spend time listening and tweaking your setup. Move your speakers slightly closer or farther apart, change their tilt, or try different isolation surfaces. A quick trick I used was the crawl method: crawling around the room to find where bass sounds punch hardest, then adjusting speaker placement accordingly. Discover how to optimize your bass placement.
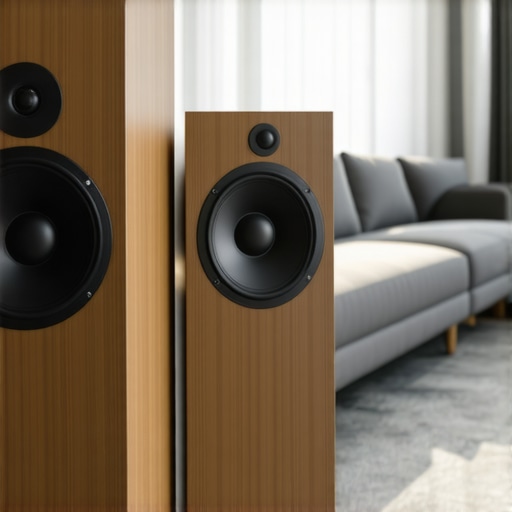 Many enthusiasts believe that upgrading cables or amplifiers will drastically improve sound quality, but in reality, these are often minor factors compared to proper room setup and source quality. A prevalent misconception is that expensive hardware guarantees perfect sound, yet many overlook nuances like speaker placement and room acoustics, which can have a more significant impact. For instance, pairing a high-end amplifier with poorly placed speakers can nullify any potential gains, highlighting the importance of holistic system tuning. Additionally, false beliefs surrounding headphone isolation suggest that blocking out all external noise is unachievable, but advanced soundproofing techniques and proper fit can dramatically reduce ambient intrusion, enhancing listening experience. Beware of the trap where users think high-resolution audio always translates to better sound; in complex rooms, acoustic treatment and source material quality often matter more. Advanced setups, such as tube amplifiers, require patience and understanding—they don’t sound optimal immediately and need warm-up times, as documented by experts in high-fidelity audio. Addressing soundstage and imaging intricacies is another overlooked aspect; positioning speakers with precise angles and distances can create a compelling stereo image that immerses the listener. Furthermore, a common pitfall is neglecting the influence of furniture and room furnishings on acoustics, which can cause reflections and muddiness. As a savvy audiophile, paying attention to these subtle factors pays dividends in sound clarity and enjoyment. Integrate sound treatment solutions like diffusers or bass traps to reduce problematic resonances—these can be more effective than chasing overpriced hardware. Remember, achieving premium audio isn’t solely about gear; understanding the hidden nuances is what elevates your experience. Have you ever fallen into this trap? Let me know in the comments.
Invest in Quality Maintenance Tools for Longevity
Protecting your audio system over time starts with the right tools. I personally rely on a high-precision digital multimeter, which helps me quickly diagnose power issues and verify impedance levels on speakers and amplifiers. A dedicated coupling and decoupling tester allows me to identify vibrations and resonance problems early, preventing long-term damage. For cleaning delicate parts like velvet ear pads, I use a microfiber cloth combined with a gentle, specially formulated cleaner to avoid texture degradation. Regular calibration and testing with these tools ensure consistent performance, minimizing the need for costly repairs or replacements down the line.
Implement Routine Maintenance Practices
Developing a maintenance routine is crucial. I schedule monthly checks, including dusting components with compressed air—particularly around vents and connectors—and inspecting cables for wear. When I noticed my soundbar’s dialogue sounded muffled, it was a sign to clean the internal filters—something I do biannually using a soft brush and compressed air. Keeping everything tidy prevents dust buildup and electrical faults, which can degrade sound quality. Also, periodically reviewing manufacturers’ guidance, such as how often to replace or re-calibrate your tube amplifier, helps maintain optimal sound without guesswork.
Optimize Long-Term Results with Strategic Upgrades
Instead of frequent hardware replacements, I focus on strategic upgrades. For instance, replacing old speaker cables with low-loss, oxygen-free copper wiring (tested using my multimeter to confirm impedance consistency) enhances signal clarity. Upgrading to a quality power conditioner can significantly reduce noise and protect your gear, especially in environments prone to electrical surges. As technology advances, incorporating smarter, network-connected components—like streaming hubs with firmware that updates automatically—ensures your system remains at the cutting edge without frequent full replacements.
Scale Your System Thoughtfully
Planning for growth involves considering adaptable components. I recommend starting with an amplifier that features multiple inputs and high headroom, allowing for easy addition of speakers or subwoofers later. Modular systems enable you to evolve your setup gradually, ensuring each component works harmoniously together. When I expanded my setup, I used a multimeter and impedance measurement tools to verify compatibility between new speakers and my existing amplifier, avoiding potential damage. Thoughtful scaling prevents wasted investment and keeps your sound experience seamless as your needs grow.
Maintain Your Setup for the Future
Regular check-ups and the right tools go hand-in-hand to keep your equipment performing smoothly. Prediction suggests that smart diagnostics and IoT-enabled maintenance systems will become more prevalent, allowing proactive alerts for issues before they affect quality. To get ahead of the curve, I suggest adopting a digital multimeter with Bluetooth connectivity and logging features—they make tracking performance trends effortless. By integrating detailed maintenance routines with efficient tools, you ensure that your audio setup remains pristine for years to come. Want to take your maintenance game a step further? Try calibrating your amplifier with a spectrum analyzer app, which can reveal subtle distortions and help fine-tune your system, ensuring consistent, high-quality sound. For detailed guidance, check out the [AES study](https://aes.org) on resonance reduction in speaker setups, emphasizing how regular tuning preserves audio clarity.
Uncover Hidden Truths About Audio Excellence
One of the most profound lessons I’ve learned in my audio journey is that system upgrades alone don’t guarantee stellar sound. Even high-end cables or state-of-the-art amplifiers can fall short if your room setup and vibration management aren’t optimized. I discovered that addressing fundamental issues like speaker isolation and placement often yields more noticeable improvements than chasing after the latest hardware.
I’ve found that many enthusiasts, myself included, overlook the importance of regular maintenance and strategic positioning, which can prevent long-term damage and keep the sound crystal clear. Embracing a holistic approach—combining quality gear with sound room treatment—transformed my listening experience in ways I never anticipated.
And here’s a personal insight: patience in fine-tuning your setup is key. Small adjustments, guided by attentive listening, can open new dimensions in soundstage and imaging, making your favorite tracks more immersive than ever before.