
It hit me unexpectedly one quiet evening as I was tweaking my home audio setup—my bookshelf speakers, usually positioned tight against the wall, suddenly sounded dull and claustrophobic. No matter how much I fiddled with the volume or swapped cables, the sound remained thin and lifeless. Then, a lightbulb went off. I realized I had been making a critical mistake, one that many audio enthusiasts overlook: placing bookshelf speakers too close to the wall.
The Big Revelation: Distance Makes a Difference in Sound Quality
I’ve always been passionate about getting the best tone out of my audio gear. Like most, I started with the assumption that pushing my speakers flush against the wall would deliver the fullest, most immersive sound. Turns out, that thinking is exactly backwards. When bookshelf speakers are nestled tight against the wall, they tend to produce a boomy, muddy bass, and the overall clarity suffers. The reason is simple physics—closer proximity to boundaries amplifies certain frequencies, often to the point of distortion.
From personal experience, I’ve learned that moving my speakers just a few inches away from the wall drastically improved the soundstage, making vocals clearer and instruments more distinct. That subtle shift created a much more engaging listening experience, one that’s richer, more detailed, and surprisingly, more bass-rich without overwhelming the room.
Understanding this leads us to a critical question: where should I actually place my bookshelf speakers for optimal sound? Well, that’s what I’ll explore next. But first, have you ever faced the frustration of poor sound quality despite investing in decent gear? If so, you’re not alone—and the solution might be simpler than you think.
For a deeper dive into common speaker placement mistakes that sabotage your sound, check out this guide on why your bookshelf speakers sound thin when placed on a desk. It’s packed with practical tips that can transform your listening experience.
As I continued experimenting, I realized that proper positioning wasn’t just about distance—angle, height, and even room acoustics played vital roles. This isn’t just theory; it’s backed by experts. For example, research highlights that speaker placement can influence sound clarity and bass response significantly, emphasizing the importance of positioning above all else.
Now that we’ve uncovered the why behind better sound performance, let’s move on to the how—exactly how you can position your bookshelf speakers to unlock their full potential.
Start with the Basics of Distance
Position your bookshelf speakers approximately 12 to 24 inches away from the wall to prevent bass mudiness. I recall moving my speakers from right against the wall to about 18 inches back and immediately noticing clearer vocals and tighter bass. Use a measuring tape for accuracy and mark the spots with painter’s tape to experiment easily.
Adjust the Height and Angle
Align your speakers so that their tweeters are roughly ear level when seated comfortably. Slightly angling them inward can create a more focused stereo image. I once aimed my speakers directly at my listening position, which resulted in a more centralized and immersive soundstage. Use a protractor or a level to ensure consistent angles on both sides.
Experiment with Distance and Toe-In
Move your speakers closer or farther from the listening spot in small increments, listening carefully to the impact on clarity. Toe-in your speakers—angle them so they face the listening position directly—to boost stereo imaging. I suggest starting with 10-15 degrees inward and adjusting based on the soundstage you desire.
Consider Room Acoustics and Obstacles
Soft furnishings, carpets, and curtains absorb excess reflections, improving clarity. Avoid placing your speakers next to reflective surfaces or behind furniture that might cause sound scattering. In my own setup, adding a plush rug and removing nearby shelves significantly enhanced sound quality. 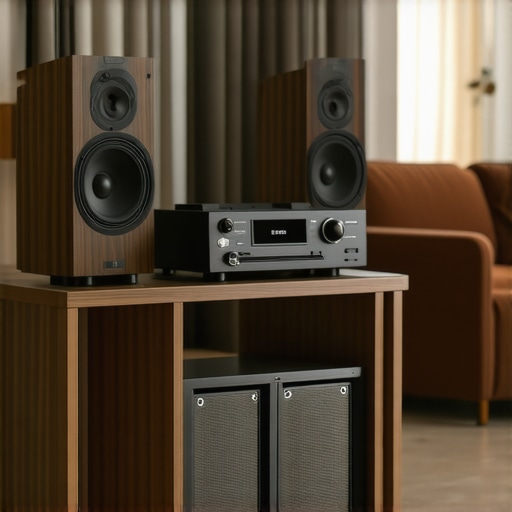
Optimize Placement for Bass Response
Use a simple test: play bass-rich music and walk around the room to find spots where the sound is boomy or thin. Moving the speakers slightly away from corners and walls can reduce unwanted resonance. Remember, the goal is a balanced bass without muddiness, which I achieved by puffing my bookshelf speakers a few inches away from the nearest wall.
Test and Fine-Tune
Invest time listening and making small adjustments. Track improvements by listening to familiar tracks that highlight vocals, instruments, and bass. I dedicated an afternoon to tweaking my system and, through a series of tiny shifts, experienced a noticeable upgrade in clarity and depth. Keep notes on your adjustments to remember what works best.
Additional Tips for Better Performance
- Use speaker stands to elevate speakers for better ear alignment.
- Ensure your speaker cables are quality and properly connected to avoid signal loss.
- Try different toe-in angles to find what gives the best stereo separation.
Remember, your room’s unique shape and furnishings influence placement. Regular testing ensures you maximize your system’s potential.
When discussing home sound systems, many enthusiasts fall prey to misconceptions that limit their audio experience. A common mistake is assuming that upgrading to the latest, most expensive gear automatically guarantees superior sound. In reality, the environment and setup often play a more crucial role than the equipment’s price tag—something I’ve learned through countless experiments and expert advice. For instance, even high-end amplifiers can underperform if not paired correctly with speakers or if room acoustics aren’t optimized, highlighting the importance of proper matching and placement. Moreover, many believe that all soundbars deliver a comparable experience, but in my experience, selecting the right model requires understanding the nuances, such as driver quality and surround sound processing, which are often overlooked in marketing claims. A pervasive myth is that headphones are primarily about driver size; however, sound quality is more influenced by tuning, driver material, and damping techniques.
What advanced techniques can maximize sound quality without additional equipment?
Pushing beyond basic setup, audiophiles now leverage room correction technologies and digital signal processing (DSP) to fine-tune audio profiles for their specific environment. Studies show that implementing these solutions can result in a perceptible improvement in clarity and imaging, rivaling that of expensive upgrades. For example, using calibration software to adjust frequency response tailored to your room’s acoustics can be instrumental—more than most realize, as discussed in this in-depth guide. It’s also critical to avoid the trap of equating higher wattage with better volume; power handling and efficiency matter more for sound fidelity, especially with high-impedance headphones or speakers, which many users overlook. Remember, achieving a true high-fidelity experience involves understanding these subtleties, not just chasing the latest models. For practical advice on avoiding common pitfalls, you might want to read more at this resource. Have you ever fallen into this trap? Let me know in the comments.Maintaining your home audio setup requires more than just occasional dusting; it demands precision tools and regular care to ensure consistent performance. Personally, I rely on a set of specific equipment and methods that have stood the test of time, enabling me to enjoy optimal sound quality and avoid costly repairs.
One indispensable tool I use is a high-quality acoustic calibration microphone, such as the MiniDSP UMIK-1. This compact device connects via USB and allows me to run room correction software like REW or REW Room EQ Wizard, which I use to measure and adjust the frequency response of my system. Regular calibration ensures that speakers and subwoofers perform as intended, compensating for room acoustics and minimizing drift over time.
For routine cleaning, I avoid liquids that can damage delicate drivers. Instead, I opt for a soft, anti-static microfiber cloth and a gentle brush for dust removal. To clean individual speaker cones, I use a soft brush attachment—being careful to avoid dislodging components. For electronics, I utilize compressed air to remove dust from vents and ports, preventing overheating and corruption of internal connections.
When it comes to maintaining amplifiers and AV receivers, I prioritize keeping vents clear and checking for signs of overheating, especially during long listening sessions. I install cooling stands and ensure there’s sufficient clearance around the units. For example, high-end amplifiers like the Cambridge Audio CXA81 tend to run hot under heavy load, so I regularly monitor their temperature and clean internal fans if accessible.
The software I swear by includes Room EQ Wizard, which offers comprehensive tools for system measurement, alignment, and optimization. Furthermore, investing in a good quality impedance tester helps verify headphone and speaker cables periodically, ensuring consistent impedance and preventing potential damage to amplifiers or headphones.
Looking ahead, the trend is shifting toward integrated smart home audio systems that incorporate self-calibration and advanced diagnostics, making maintenance more straightforward. Companies like Sonos are already implementing auto-room correction, but for audiophiles who seek maximum control, combining hardware like the MiniDSP UMIK-1 with software remains the gold standard.
How do I maintain my home audio gear over time?
Regular cleaning, using measurement tools like the MiniDSP UMIK-1 for room correction, and staying vigilant about ventilation are key. I recommend setting a quarterly maintenance schedule, including calibration checks and dust removal, to keep everything performing optimally.
For instance, a simple upgrade such as integrating a calibration microphone with your existing setup can drastically enhance sound clarity. If you haven’t tried this yet, I suggest investing in one and dedicating an afternoon to calibration—it’s a game changer in preserving audio fidelity.
To learn more about maintaining your speakers and amplifiers effectively, check out this comprehensive guide. Proper maintenance not only extends the lifespan of your gear but also ensures every listening session is optimal.
Remember, consistent care is the foundation of long-term sound excellence. By employing precise tools and routine practices, you’ll enjoy pristine audio quality for years to come.
The Hardest Lesson I Learned About soundbars,amplifiers,home audio deals,speakers,headphones
One of my biggest realizations was that even the most expensive gear won’t shine without proper placement and room awareness. I once upgraded to a high-end amplifier, expecting a significant jump in audio quality, only to be disappointed. It took me digging deeper into acoustics and positioning to unlock its potential—proving that gear alone isn’t enough. This taught me that patience and learning the nuances of placement can transform your listening experience more than a new purchase.
3 Myths About soundbars,amplifiers,home audio deals,speakers,headphones That Held Me Back
I used to believe that bigger speakers automatically mean better sound, but I found that emplacing smaller, well-placed speakers can outperform larger ones in limited spaces. Another myth was that all headphones are created equal—turns out tuning and driver technology make a huge difference. Lastly, I thought higher wattage meant louder volume without distortion, which isn’t true without proper efficiency and impedance matching. Busting these myths helped me focus on what truly matters for quality sound.
What Experts Won’t Tell You About soundbars,amplifiers,home audio deals,speakers,headphones
Many seasoned audio professionals emphasize room acoustics and subtle positioning tweaks over expensive upgrades. Behind the scenes, they rely on calibration microphones and DSP tools—like the MiniDSP UMIK-1—to fine-tune sound for their environment. This realization shifted my approach from chasing gear to mastering setup and calibration, making a profound difference in the richness and clarity of my home system. Remember, even small details can unlock a massive leap in audio enjoyment.