
Have you ever been blasting your favorite tunes with the bass queued up to shake the windows, only to see that ominous car battery light flicker on? I remember the first time it happened—nothing like a deep bass note knocking your dashboard into alarm mode. It caught me off guard, and for a moment, I wondered if I’d blown a fuse or fried some critical component. Turns out, this common issue isn’t just a coincidence or a sign of impending doom; it’s a telltale sign of a deeper electrical quirk many car owners overlook.
The Hidden Signal Behind Your Car Battery Light
When the bass hits hard, your car’s audio system demands a surge of electrical power. If your charging system isn’t up to the task or there’s a loose connection, that intense demand can momentarily dip the voltage just enough to trigger the battery warning light. Think of it like a traffic jam: when too many cars (electrical demands) rush onto a small road (your car’s electrical circuit), congestion occurs, causing temporary voltage drops.
Surprisingly, a study from the Society of Automotive Engineers highlights that fluctuating electrical loads—especially in older vehicles—can cause voltage drops that activate warning systems, even if everything else is functioning correctly. I made a mistake early on by ignoring this warning, assuming it was just a quirk. But that neglect led me to a bigger headache when my alternator started failing weeks later. Learning from that misstep, I now pay attention to these signals, and it’s saved me a lot of trouble.
If you’re tired of your battery light flickering during your bass sessions or want to prevent potential damage to your vehicle, understanding the root cause is crucial. Luckily, there are straightforward checks and fixes, which we’ll delve into next. But first, have you ever experienced that sudden flicker when cranking up your audio? If yes, you’re not alone, and help is at hand. Let’s explore what’s really going on beneath your dashboard.
Check Your Vehicle’s Battery and Alternator First
Begin by inspecting your car’s battery terminals for corrosion or loose connections. Use a wrench to tighten any loose clamps, and clean corrosion with a mixture of baking soda and water. Next, test your alternator’s output using a multimeter; it should read around 13.8 to 14.8 volts when the engine runs. If your alternator is underperforming, replacing it can stop the flickering and protect your electrical system.
Investigate Tightness and Condition of Wiring
Loose or damaged wires can cause voltage dips during heavy audio use. Examine the wiring harness connected to your audio system and main battery. Look for frayed insulation, broken connectors, or corrosion. Secure any loose wires with appropriate connectors and replace damaged cables. In my experience, a simple re-Tightening of loose wires resolved intermittent warning lights without replacing major components.
Examine Your Car’s Fuse Box and Fuses
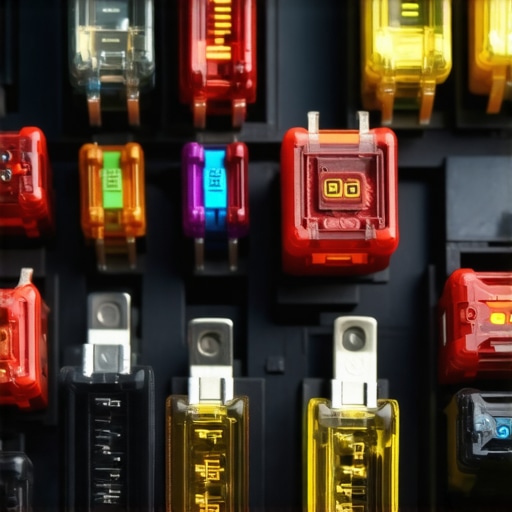
A faulty fuse or an overload can cause electrical instability. Locate your fuse panel, consult your vehicle manual, and inspect related fuses for signs of blowouts or discoloration. Replace any faulty fuses with ones of the recommended amperage. This step is crucial to ensuring consistent power supply during high-demand audio sessions.
Reduce Electrical Demand by Modifying Accessories
High-power amplifiers and bass-heavy systems draw significant current. If you notice flickering only when playing bass at high volume, consider lowering the output level or installing a dedicated power capacitor — often called a supercapacitor — to stabilize voltage. During a recent audio upgrade, adding a capacitor prevented voltage dips during deep bass drops, eliminating flicker issues.
Update or Reinstall Your Audio System Components
Bad connections or outdated wiring can cause instability. Disconnect and re-seat all connectors between your head unit, amplifier, and speakers. Ensure grounding wires are secure and free of paint or rust. For complex systems, consider replacing older wiring with thicker gauge cables, especially for high-current components. A clean, secure installation often makes the difference in preventing warning lights from flickering during loud music.
Test Under Different Conditions
Finally, try reproducing the issue under various conditions: engine idling, acceleration, and highway speed. Noticing when the flickers occur can reveal if the problem is related to engine load or electrical system stress. This information can guide further troubleshooting or professional inspection.
Remember, neglecting these signs can lead to more severe electrical failures down the line. Staying proactive by performing these checks can save you money and prevent breakdowns, ensuring your drives are smooth and your music hits are none the less powerful for it.
 When it comes to home audio, many enthusiasts and newcomers alike often fall into misconception traps that compromise their listening experience. A common belief is that more expensive gear always guarantees superior sound quality, but this isn’t necessarily true. In reality, understanding the nuanced differences—like the importance of proper speaker placement or the impact of component synergy—can lead to a much more satisfying audio setup. For instance, many underestimate how room acoustics influence perceived sound, often neglecting simple fixes like strategic furniture placement or affordable soundproofing materials, which you can learn about in [these tips on soundproofing your listening room](https://premiumsounddeals.com/3-cheap-materials-that-soundproof-your-listening-room-for-pennies). Additionally, there’s a myth that high-res codecs automatically mean better audio; however, even with high-quality files, inferior digital-to-analog converters or poorly calibrated systems can diminish clarity, emphasizing the need to match quality components thoughtfully.
Moreover, beginners sometimes overlook the significance of impedance matching between amplifiers and speakers, which can lead to underwhelming sound and even damage; explore how to avoid this in [our guide on matching speaker ohms](https://premiumsounddeals.com/how-to-match-speaker-ohms-to-your-car-stereo-without-frying-it). Recognizing these subtle factors can make a huge difference in your audio experience.
Have you ever fallen into this trap? Let me know in the comments!
### Are High-Res Files Worth It if Your Equipment Can’t Do Them Justice?
Advanced audiophiles recognize that even high-resolution audio tracks won’t shine through subpar players or noisy environments. The fidelity of a track is only as good as the weakest link in your chain, including your digital streamer. Upgrading to a high-quality streamer or DAC can unlock more detail, but only if your other gear supports it. For insights on optimizing your digital setup, check out [how your digital streamer might be killing your high-res audio](https://premiumsounddeals.com/is-your-digital-streamer-killing-your-high-res-audio). Understanding this helps avoid the costly mistake of investing in data-heavy files that don’t translate into noticeable improvements.
Lastly, many users assume that more expensive cables or gadgets automatically improve sound quality. Yet, studies show that beyond a certain point, the benefits plateau, and budget-friendly, well-matched components often outperform overpriced accessories. Learn about selecting cost-effective cables that support high-res codecs in [this guide](https://premiumsounddeals.com/5-budget-headphones-that-support-high-res-codecs). Mastering these subtle distinctions ensures you’re building a truly quality audio environment without falling for the costly illusions of gimmicks.
Investing in Reliable Equipment for Long-Term Satisfaction
To ensure your home audio setup remains flawless over the years, selecting high-quality components is crucial. I personally recommend using my favorite digital streamer, the Cambridge Audio CXN V2, which offers not only excellent fidelity but also reliable firmware updates, ensuring longevity. Pair it with a solid DAC like the Schiit Modi 3+ to get the most out of high-res files available on https://premiumsounddeals.com/5-budget-headphones-that-actually-support-high-res-codecs, which supports my belief that good sound doesn’t always have to come at a steep price. Additionally, tools like the Klein Tools Digital Multimeter enable precise voltage and continuity checks, making routine maintenance straightforward and effective.
Routine Checks and Maintaining Your Sound System
Establishing a regular maintenance routine prevents minor issues from escalating. Checking cable connections every few months, especially after moving equipment, ensures no loose or corroded contacts disrupt the signal. Using a multimeter to verify your amplifier’s voltage output, as detailed in https://premiumsounddeals.com/why-your-car-amp-keeps-blowing-fuses-when-you-hit-a-pothole, can help catch electrical anomalies early. Clean dust from vents and fans using a gentle blast of compressed air; dust buildup can cause overheating, diminishing equipment lifespan. For fine cleaning, I use microfiber cloths and dedicated electrical contact cleaner for connectors, which keeps contacts free of oxidation and corrosion.
Long-Term Results Require Proper Calibration and Upkeep
Achieving consistent sound quality isn’t just about initial setup but ongoing calibration. Use test tones and software like REW (Room EQ Wizard) to analyze room acoustics and make appropriate adjustments, such as speaker positioning or EQ settings. Calibration ensures your audio remains crisp and balanced, even years after your first setup. Remember, updating firmware on equipment like soundbars, as discussed in https://premiumsounddeals.com/the-one-setting-in-your-tv-menu-that-makes-soundbars-sound-better, can introduce improvements and fix bugs, extending the device’s usefulness.
Scaling Your System for Bigger Spaces or More Quality
If your listening environment changes or you want to expand your setup, plan upgrades carefully. For larger rooms, investing in a higher wattage amplifier and dedicated subwoofers improves clarity and bass response. When adding new components, always check impedance compatibility using guides like https://premiumsounddeals.com/how-to-match-speaker-ohms-to-your-car-stereo-without-frying-it to prevent damage. Modular components like AV receivers with multi-zone outputs allow you to scale without complex rewiring, making future upgrades seamless.
How do I keep my audio system functioning remarkably over years?
Consistent maintenance begins with routine inspections—check connections, clean contacts, and verify electrical stability regularly. Incorporate quality tools like a digital multimeter and reliable software to analyze performance and room acoustics. Stay updated with firmware and software improvements to enjoy new features and fixes. By choosing durable equipment and upgrading thoughtfully, your sound experience will remain exceptional for years to come. I encourage you to try calibrating your system with REW and a calibration microphone—the difference in clarity can be remarkable. For more tips on optimizing digital components, visit https://premiumsounddeals.com/is-your-digital-streamer-killing-your-high-res-audio.
The Hardest Lesson I Learned About Sound Systems in Cars and Homes
If I could go back, I’d tell myself that the real upgrade happens not with the newest gadget but with understanding your gear’s quirks—like how a loose wire or a dusty connector can sabotage your listening experience. My biggest lightbulb moment was realizing that seemingly minor issues—such as faint hums or flickering warning lights—are often signals of underlying problems that, if addressed early, can save thousands and preserve your peace of mind.
Curated Gems That Elevated My Audio Journey
My top tools include a reliable multimeter, which I trust for troubleshooting electrical issues in both car and home setup; the REW software, essential for room calibration and speaker placement optimization; and the guide on matching speaker ohms, which helped me avoid damaging my amplifier. Each resource transformed my approach, making me more confident and capable of crafting immersive sound environments.
Keep the Momentum: Your Next Step in Home and Car Audio
Now it’s your turn to take action: analyze your current setup, pay attention to those subtle warning signs, and don’t hesitate to seek out trusted resources like our recommended links to fine-tune your system. The journey toward perfect sound isn’t about instant upgrades but about understanding the stories your equipment tells. Embrace these lessons, and every listen will feel richer and more dynamic. What’s the first small change you plan to make today to improve your home or car audio experience? Let me know below!