
Ever been cruising down the highway, blasting your favorite song, only to be met with that annoying crackling sound from your car speakers? It’s like your sound system has a sneaky rebellion inside. I used to think it was just a bad song or maybe my speakers aging gracefully, but one day, I finally realized it was a common issue many car owners face—and not just a minor annoyance. That lightbulb moment led me down a rabbit hole of troubleshooting, and I’m here to share what I discovered.
Why Your Car Speakers Crackle When You Crank Up the Volume
When I first noticed my speakers crackling louder as I increased the volume, I thought it was a simple sign of worn-out equipment. But later, I learned that distorted sound at high volumes often results from a mismatch between your amplifier’s power output and your speakers’ capabilities. Over time, pushing these components beyond their limits causes clipping, which manifests as that harsh crackling. This realization helped me understand that it’s not just about replacing speakers but also about ensuring your entire audio setup is correctly calibrated and suited to your listening habits. If you’re still battling this issue, don’t fret—there’s a way to fix it, and I’ll walk you through it soon.
Is Cracking Audio Worth Fixing or Just Annoying Background Noise?
Many people dismiss the crackle as a minor flaw, but it’s actually a symptom of underlying problems that can worsen over time. Early on, I made the mistake of ignoring minor distortions, thinking they wouldn’t lead to bigger issues. Turns out, neglecting these signs can cause your speakers to fail prematurely, leading to costly replacements. Trust me, addressing the root cause early is the best way to preserve your sound quality and save money in the long run. Want to learn more about avoiding common pitfalls? Check out this insightful article on the sound improvements of proper speaker placement.
Now, let’s dive into why this crackling happens and how you can restore your car’s audio to its full glory. We’ll cover everything from diagnosing the issue to practical solutions that actually work—so you can turn up the volume without fear of that dreaded crackle.
Diagnose the Problem
Start by listening carefully to determine if the crackling occurs at specific volume levels or if it persists across different audio sources. Remove the head unit and inspect the wiring harness for loose connections or corrosion. Check if the speaker cones are visibly damaged or warped. This initial assessment helps identify whether the issue is wiring, equipment failure, or speaker damage. Remember, a loose wire similar to a bad connection in a headphone jack can cause intermittent crackling, so ensure all connections are secure.
Test and Isolate Components
Replace the speaker with a known good unit or connect the suspect speaker to a different channel or amplifier. If the crackling persists, the problem might be with the amplifier or wiring. If it disappears, the speaker itself is likely faulty. Using a multimeter, test the speaker voice coil resistance; a reading significantly different from the manufacturer’s specifications indicates a malfunction. Such testing parallels checking headphone impedance to diagnose issues without replacing parts blindly.
Secure and Replace Wiring
Ensure all wiring connections are tight and free of damage. Use high-quality crimp connectors or solder joints to improve contact reliability. If wiring insulation is frayed or damaged, replace the section to prevent short circuits or interference, much like sealing a leaky pipe to restore proper flow. For long-distance runs, consider professionally packing the speakers for transport, which can prevent damage and preserve sound quality during a move. You can learn more about proper packing strategies here.
Replace or Repair the Speaker
If the cone is torn or the voice coil burned out, replacing the speaker might be inevitable. Remove the damaged unit carefully, noting the wiring configuration. When installing a new speaker, match its impedance and power rating with the original to avoid clipping and distortion, similar to matching an amplifier’s output to a headphone’s compatibility. If you’re handy, minor repairs like re-gluing a loose surround or replacing the foam surround with new materials can extend the speaker’s life. For stuck potentiometers or volume knobs causing crackling, consult guides like this tutorial.
Adjust Settings and Fine-Tune
Once the hardware issues are resolved, calibrate your system for optimal sound. Set the crossover frequencies appropriately and ensure your amplifier isn’t overdriving the speakers. Proper placement is crucial—avoid placing speakers directly on the floor or too close to walls, which can cause unwanted vibrations and rattles that mimic crackling. For general advice, see this article. Dust and debris can also cause audio issues; cleaning your speakers periodically prevents buildup that degrades sound quality, much like cleaning camera lenses to improve clarity.
Prevent Future Issues
Implement routine maintenance: check wiring connections regularly, keep your speakers dust-free, and avoid exposing them to extreme temperatures or moisture that can damage delicate components. If you use speakers in your car, consider how placement and noise interference affect sound clarity. You might find useful tips in this guide on optimizing in-car audio. Properly storing and handling your gear prolongs its lifespan, just like protecting expensive headphones with proper cases and avoiding cable fraying—see this storage method.
Why Most People Overlook the Fine Details in Audio Equipment
While many enthusiasts focus on brand names and wattage ratings, they often miss the nuances that truly define sound quality. For instance, the misconception that expensive cables automatically improve sound is widespread, but research shows that most high-end cables are mainly marketing strategies rather than functional upgrades. The key lies in understanding that good sound depends more on proper system setup and room acoustics than on premium gear alone. Learn more about this common myth here.
Addressing Common Myths About Amplifiers and Headphones
A frequent error is assuming that more power always equals better sound. In reality, an amplifier’s quality and its compatibility with your speakers matter more. Overdriving an amplifier beyond its limits results in distortion and potential damage, a mistake many make when trying to maximize volume. To avoid this, pay attention to the amplifier’s true output and ensure it matches your speaker impedance. Here’s a detailed guide on selecting the right amplifier. For headphones, many believe that higher impedance guarantees better quality, but sometimes low-impedance models offer more clarity and are easier to drive, especially with portable devices.
Advanced Question: How Does Room Acoustics Strategically Impact Sound Clarity?
Many premium setups falter not because of faulty gear but due to poor room acoustics. Echoes, standing waves, and speaker placement can drastically alter audio perception—often more than the equipment specifications suggest. For example, the best subwoofer placement can mitigate bass muddiness, enhancing clarity without upgrading hardware. Professional sound engineers spend as much time treating rooms as selecting components, recognizing that acoustics are integral to a truly high-fidelity experience. Studies confirm that room treatment yields more audible improvements than swapping to more expensive speakers, highlighting the importance of the environment over gear alone.
Beware of the Traps That Sabotage Your Listening Experience
One oops moment I encountered was underestimating the importance of proper power conditioning. Dirty power can cause subtle interferences, leading to noise and crackles—problems seemingly hardware-related but actually rooted in electrical quality. Investing in a good power conditioner often proves more beneficial than buying the latest speaker model. Furthermore, neglecting regular maintenance like cleaning contacts and checking wiring can introduce issues that mimic expensive equipment faults. These overlooked details can make or break your sound quality in ways you didn’t initially suspect.
Have you ever fallen into this trap? Let me know in the comments below! Remember, paying attention to these nuanced details ensures your gear performs at its best, translating into a richer, more immersive listening experience. By digging beneath the surface, you elevate your setup from average to audiophile-grade. For more in-depth tips, explore our articles on setting up the perfect stereo system and why open-back headphones may not always be ideal.
Maintaining high-quality sound equipment isn’t a one-time effort but a continuous process that ensures longevity and optimal performance. As audio gear becomes more sophisticated, having the right tools and a systematic approach to upkeep is crucial. I personally rely on a few specialized tools that have consistently helped me keep my amplifiers, headphones, and speakers performing at their best. Here’s a breakdown of what works for me and what I recommend for fellow audio enthusiasts.
Precision Multimeter for Accurate Troubleshooting
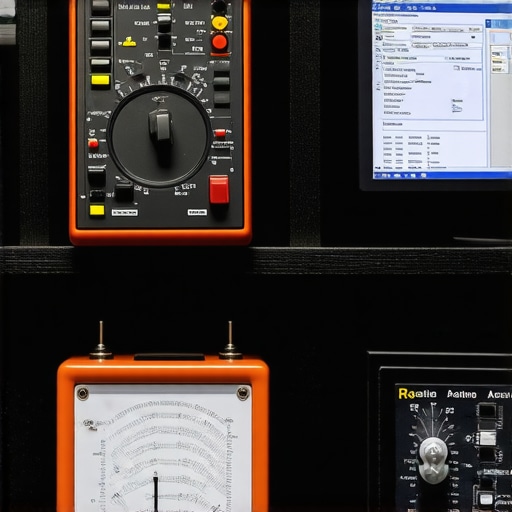
I always keep a digital multimeter handy because it allows me to quickly check impedance loads, test wiring continuity, and verify power supplies. Personally, I prefer the Fluke 117 Electricians True RMS Multimeter because of its reliability and ease of use. Regularly measuring speaker voice coil resistance with a multimeter helps me identify failing components early, preventing costly replacements. For example, a sudden change in resistance often indicates a burned-out coil, much like testing headphone impedance can reveal issues before they worsen.
Sensor Gel for Cleaning Connections and Contacts
Corrosion and oxidation can wreak havoc on audio fidelity. I use a contact cleaner with a conductive lubricant such as DeoxIT which not only cleans but also protects connectors from future corrosion. Applying this to speaker terminals, potentiometers, and amp connections ensures clean, stable signals. This simple step greatly reduces crackling or noise issues, and I recommend it to anyone serious about maintaining pristine sound quality.
Calibrated Sound Level Meter for Proper Room Tuning
Optimizing how sound behaves in your space requires precise measurement. I utilize the NTi Audio XL2 sound level meter to calibrate speakers and subwoofers, ensuring they are positioned and set correctly. Proper calibration prevents clipping and distortion, especially at high volumes, and helps in achieving a balanced, immersive environment. If you’re serious about long-term results, investing in a quality SPL meter can dramatically improve your room acoustics.
Reliable Software: Room Acoustic Analysis Tools
Beyond hardware, software tools like Room EQ Wizard (REW) are invaluable. I use REW to analyze room acoustics, identify problematic reflections, and fine-tune speaker placement or install absorption panels. With REW, I can generate frequency response graphs and impulse responses, making complex adjustments more straightforward and scientifically grounded.
Regular Maintenance and Long-term Results
Consistency is key. I schedule quarterly checks of wiring, connectors, and physical condition of my gear. Cleaning dust and debris, inspecting drivers, and updating firmware when available extend the lifespan of equipment. For example, keeping a speaker’s grille free of dust maintains clarity and prevents rattling. Also, periodically checking for firmware updates, especially for soundbars and smart speakers, ensures compatibility and bug fixes, which can improve performance over time.
Tools to Scale Your Sound System Effectively
As you grow your setup, investing in protective packing materials and professional installation services can save money and preserve gear quality. For long-term success, consider modular upgrades and scalable components, like adding dedicated amps or expanding room treatments, guided by the data from your measurement tools.
Where Is This Headed?
The future of sound maintenance leans toward automation, with smart sensors continuously monitoring performance and alerting you to issues. Integration with home automation systems will enable predictive adjustments, akin to how advanced HVAC systems optimize climate control. Embracing these innovations will make maintaining top-tier sound quality easier and more reliable in the coming years.
How do I keep my audio gear working flawlessly over time?
The best approach is a combination of the right tools, routine inspections, and timely upgrades. Regularly testing connections with a multimeter, cleaning contacts with contact cleaner, and calibrating room acoustics with software like REW will greatly extend your gear’s lifespan and sound clarity. I recommend trying out a dedicated SPL meter or running periodic calibration routines—these small investments can dramatically improve your listening experience. For detailed guidance on calibration, explore this resource.
What I Wish I Knew Before Blasting My Favorite Tracks
- Initially, I believed turning up the volume would make my music better, but I overlooked the importance of proper calibration. I learned that matching your amplifier’s output to your speakers’ capabilities prevents distortion and crackling, turning my drive into a rich experience.
- I used to ignore wiring issues thinking they were minor, until a loose connection caused frequent crackles. Regularly inspecting and securing wiring connections has saved me from countless audio headaches.
- Upgrading speakers without considering room acoustics led to muddled sound. Incorporating room treatment and correct placement transformed my setup from good to immersive, proving that environment matters as much as gear.
My Secret Arsenal for Perfect Car Audio
- Fluke 117 Multimeter: Reliable for diagnosing wiring and speaker impedance, helping me catch problems early.
- DeoxIT Contact Cleaner: Ensures clean, corrosion-free connections, reducing crackles and static.
- Room EQ Wizard (REW): Analyzes how my car’s interior affects sound, guiding me to optimal placement and tuning.
- Quality Packing Materials: Protects my gear during long moves, preventing damage that can compromise sound quality.
Your Turn to Fine-Tune Your Sound
From diagnosing wiring to selecting tools that make troubleshooting easier, mastering your car’s audio involves attention to detail and patience. Remember, every upgrade and adjustment brings you closer to that perfect listening experience, whether you’re commuting or parked. Don’t wait—dive into these tips, experiment with your setup, and enjoy the journey to audiophile-quality sound every time you hit the road.