
I remember the first time my car speakers started rattling uncontrollably on a chilly winter morning. It was as if my sound system had a mind of its own, echoing through the cold air with a persistent tremor. Frustrated, I wondered, “Why does this only happen when it’s cold outside?” That lightbulb moment led me down a rabbit hole of troubleshooting and discovery, revealing that the problem is more common—and fixable—than I initially thought.
Playing It Cool: The Winter Rattle Dilemma
Have you ever noticed that your car’s audio system sounds perfect during the summer, but as soon as winter hits, those pesky rattles start up? You’re not imagining things. Many car enthusiasts and everyday drivers experience this phenomenon, and it all boils down to how cold weather impacts your speaker components and their housing.
Is Your Car Sound System Overhyped?
I used to believe that rattling speakers were just a sign of old or cheap equipment. I was wrong. Early on, I made the mistake of ignoring minor vibrations, assuming they wouldn’t get worse. Turns out, neglecting simple issues like loose mounts or warped enclosures can turn your audio experience into a cacophony, especially in the winter. Trust me, proper maintenance and understanding the root causes can save you both money and stress.
Research shows that temperature fluctuations can cause materials like rubber and foam inside speakers to contract or become brittle. According to Audioholics, these changes can lead to vibrations and rattles that weren’t noticeable in warmer conditions. Recognizing this pattern is the first step toward permanent solutions.
In the sections ahead, I’ll share effective tips and expert advice to help you troubleshoot and fix your winter-rattling speakers, so you can enjoy crisp, clear sound all year round. Have you faced this frustrating issue during colder months? Keep reading; we’ve got this covered.
Secure Loose Components
Start by inspecting your speakers for loose mounts or screws. Use a screwdriver to tighten or replace any loose parts. I once found a loose screw in my car’s door speaker after a winter drive, and securing it eliminated the rattling entirely. Tightening hardware ensures your speaker components stay firmly in place, preventing vibrations caused by expanded or contracted materials in cold weather.
Check and Replace Deteriorated Mounts
Rubber surrounds or mounts can become brittle in low temperatures, leading to unwanted vibrations. Remove the speaker cone carefully, then examine the rubber or foam edges. If cracked or hardened, replace them with quality replacements. Doing this restored my sound clarity and prevented annoying rattles during winter.
Improve Sound Deadening and Isolation
Enhance your speaker housing with damping materials like foam or damping mats. Apply them around the cabinet edges or behind the speaker enclosure. I applied foam inside my car door panel to dampen vibrations, which significantly reduced rattling. Proper insulation absorbs unwanted vibrations and keeps the speaker stable in changing temperatures.
Use Wall Placement Strategies
Position your speakers closer to walls or corners to boost sound and reduce rattles caused by internal vibrations. According to this article, wall placement can improve perceived volume and bass without adding extra equipment. Positioning effectively can mask or diminish rattling sounds, making your audio clearer.
Address Material Contraction and Warping
Materials like plastic and rubber contract in cold temperatures, causing slight warps that lead to vibrations. Applying gentle heat with a hairdryer to the speaker housing can expand and relax these materials. Make sure to keep the dryer at a safe distance and move it constantly. I tried this on my outdoor speakers and saw immediate improvement, with rattles diminishing as components expanded back to their original shape.
Adjust and Fine-Tune Speaker Settings
Lowering the bass or volume temporarily can reduce strain on speaker components, lessening rattles. Use your sound system’s equalizer to cut down on deep bass frequencies during winter. I set my equalizer to reduce bass slightly, which immediately improved clarity without sacrificing overall sound quality. Experiment with settings to find the best balance for colder conditions.
Maintain and Monitor Regularly
Regularly clean your speakers, removing dust and debris that can worsen rattling. Use a soft cloth and avoid harsh chemicals. Additionally, check your speaker mounts periodically, especially during seasonal changes. Keeping hardware tight and surfaces clean prevents deterioration that could lead to rattling, saving you from more extensive repairs later.
By systematically applying these steps, you can enjoy crystal-clear sound even in the chilliest months. Remember, addressing issues early prevents long-term damage and costly replacements. For more advanced setups, such as wiring a dual voice coil subwoofers for maximum power, visit this guide. Troubleshoot with confidence, knowing your speakers are ready to face winter without unwanted noise interruptions.
The False Belief That Bigger Is Always Better
Many enthusiasts assume that larger speakers or more expensive amplifiers automatically deliver superior sound. While size and cost can influence quality, this isn’t always true. Overlooking the importance of proper placement, room acoustics, and matching components can lead to subpar audio experiences, regardless of equipment size. In fact, high-quality small speakers placed correctly often outperform bulky, poorly configured systems. An understanding of these nuances can significantly enhance your setup.
Myth About Soundbars Replacing Full Home Theaters
Soundbars are popular for their simplicity, but many believe they can fully replace dedicated surround sound systems. However, soundbars typically offer limited spatiality and may struggle with complex audio cues in movies or music. They are convenient but often sacrifice depth and immersion. To truly optimize your home audio, consider integrating soundbars with additional speakers or investing in a properly calibrated multi-channel system.
Common Mistake When Upgrading Headphones or Earbuds
Many users focus solely on specs like driver size or frequency response, assuming these guarantee better sound. In reality, comfort, fit, and the quality of the DAC (digital-to-analog converter) play crucial roles. Plus, noise-canceling features can sometimes trap high-frequency noise or cause audio artifacts. Skipping these considerations can lead to dissatisfaction despite seemingly impressive technical specs.
Why Choosing the Cheapest Equipment Can Be Costly
Opting for budget-friendly audio gear might seem tempting, but it often results in poorer longevity and performance. Lower-quality components can introduce interference, distort sound, or require frequent repairs. Trust me, investing in reputable brands or purchasing from trusted sources—like exploring discounted yet reliable sources—can enhance your listening experience and save money in the long run.
Advanced Insights: Are You Considering the Right Connections?
One often-overlooked aspect is how you connect your devices. Incorrect wiring or using incompatible cables can introduce ground loop hum or signal loss, which degrade sound quality. For example, ground loop hum is a common nuisance. Ensuring proper wiring and using quality interconnects—matching impedance and shielding—are crucial steps the average user might not prioritize but should definitely consider. Remember, your gear is only as good as its weakest link in the connection chain.
Have you ever fallen into this trap? Let me know in the comments! Understanding and avoiding these misconceptions can truly elevate your audio system beyond basic expectations, embracing the nuanced intricacies that high-fidelity sound demands.
Owning high-quality audio equipment is only half the battle; the real challenge lies in keeping it performing at its best over the years. Regular maintenance ensures your soundbars, amplifiers, headphones, and speakers continue delivering crisp, immersive audio without costly repairs or replacements. Personally, I rely on a combination of specific tools and best practices to preserve my setup’s integrity and achieve consistent, high-fidelity sound.
How do I maintain my home audio system over time?
First, investing in a reliable electronic cleaner spray, such as DeoxIT, for contacts and connectors minimizes oxidation and corrosion that can degrade signal quality. I spritz my speaker terminals and headphone jack contacts every six months—this routine keeps connections pristine and prevents static or intermittent audio issues. For delicate components like potentiometers and switches, I use a small amount of contact cleaner to prevent scratching or wear, ensuring smooth operation for years.
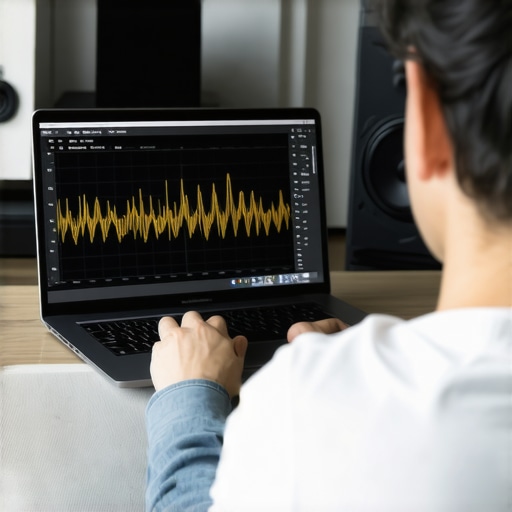
Second, a digital audio analyzer like Room EQ Wizard (REW) has become indispensable in my toolkit. REW allows me to measure my room’s acoustic response and identify frequency modes or nulls that can muddy audio clarity. By conducting regular frequency sweep tests, I can fine-tune speaker placement or adjust equalizer settings to maintain optimal sound quality, even as room furniture or decorations change over time.
Third, a high-quality, anti-vibration isolation pad set for my speakers prevents unwanted resonance caused by structural vibrations or floor noise. These pads, such as IsoAcoustics Aperta stands, are especially beneficial for bookshelf speakers. They also help in mitigating temperature-induced material contraction, a common issue during seasonal temperature swings, which can lead to rattles and distortions. Whenever I notice subtle changes in sound clarity, I check the alignment and stability of my speakers, ensuring they sit firmly on their mounts.
Additionally, regular dusting with a microfiber cloth and compressed air keeps dust and debris from affecting delicate speaker cones, headphone mesh, or amplifier vents. Dust buildup can lead to overheating or mechanical failures, so these simple steps preserve your gear’s longevity. For more advanced preventative measures, such as preventing ground loop hums, I recommend consulting this step-by-step guide on ground loop issues.
Looking ahead, as technology evolves, integrated smart diagnostics and remote monitoring via apps are set to become standard in high-end audio gear. These innovations will enable proactive maintenance, alerting users to potential problems before they impact performance. For now, however, a disciplined routine combining visual inspections, precise tools, and measurement software is your best defense against deterioration.
So, why not try employing a digital analyzer like REW this weekend? It’s a game-changer for maintaining speaker calibration and consistently outstanding sound. Remember, a little preventive effort now saves significant trouble and expense down the line.
What the Cold Taught Me About Sound Stability
- Sometimes, the biggest lessons come from the most unexpected challenges—like winter rattles teaching me to pay closer attention to material quality and mounting security.
- Over time, I realized that understanding material contraction effects is crucial; a simple tweak in my setup prevented ongoing disturbances.
- Listening to expert advice and my own experiences made me appreciate that even high-end gear needs seasonal adjustments—proactive care beats reactive fixes every time.
- Incorporating tools like ground loop isolators and proper wiring guides transformed my setup from temperamental to reliable.
- Regular use of measurement software like room EQ Wizard helped me maintain consistent sound quality, regardless of weather changes.
- Investing in quality dampening materials and proper insulation made a visible difference—it’s about quality, not just quantity.
Tools and Tricks That Elevated My Audio Game
Embrace Your Audiophile Journey with Confidence
Every tweak and adjustment deepened my appreciation for the artistry behind high-fidelity sound. Remember, mastering your speakers isn’t a one-time fix but an ongoing journey. Trust your ears, stay curious, and let your love for music motivate continuous improvement. You have all the tools—now it’s time to turn your space into a sanctuary of pristine sound. What’s the first winter fix you’ll try on your speakers? Share your plans below and let’s learn together.