
Have you ever cranked up your favorite song, only to be greeted by a booming, muddled bass that seems to shake your walls without adding any real warmth or depth? I remember the first time I experienced that overwhelming boxy sound from my new floorstanding speakers. It was frustrating—like, was I doing something wrong? Turns out, many DIY enthusiasts and even seasoned audiophiles face this exact problem.
Why Do Floorstanding Speakers Sound Boomy in Corners?
This issue is tied to the way sound waves interact with your room’s acoustics. When speakers are placed too close to a wall or in a corner, they can trigger a phenomenon called eocoupling, which amplifies bass frequencies unnaturally. Essentially, the sound reflects off the nearby surfaces, piling up and creating that notorious booming effect. It’s not your speakers being defective; it’s a matter of positioning, room layout, and how sound physics work in confined spaces. This realization was a lightbulb moment for me—once I understood the cause, I was eager to find a solution.
But what if I told you that this booming sound can be tamed, and your speakers can deliver tight, accurate bass without that overwhelming rattle? Today, I promise to share practical, proven tips that will help you tame the room and bring clarity to your audio experience. Whether you’re a casual listener or a dedicated audiophile, understanding these tricks will make your home sound better than ever.
Have You Faced This Problem With Your Speakers?
If you’ve ever experienced that frustrating boominess, you’re not alone. Many people fall into common traps like pushing their speakers into corners without considering room acoustics, which only makes the problem worse. Early on, I made the mistake of thinking that pushing my speakers against the wall would boost bass for more impact. Instead, it only exacerbated the muddy sound. Learning from that mistake, I discovered that strategic positioning and some affordable acoustic treatments could make all the difference.
So, are you ready to learn how to optimize your speaker placement and improve your sound? If you want to avoid that muddiness and get the most out of your investment, keep reading. The next sections will guide you through simple adjustments and tricks, such as understanding room modes and exploring some helpful accessories. And if you’re curious about other ways to tweak your audio setup, I recommend checking out our guide on fixing muffled Bluetooth speakers or how to add a subwoofer for richer bass.
Position Your Speakers Precisely
Start by pulling your speakers away from the corners and walls. In my experience, I initially pushed mine directly against the wall for more bass, but it only worsened the boominess. To correct this, measure at least 2 feet of distance from each wall and 3 feet apart from each other. Use a level to make sure they sit evenly. Once I moved my speakers about 3 feet from the side walls and a foot from the back wall, the muddy bass transformed into sharp, controlled lows.
Anchor Your Speakers for Better Stability
Securely placing your speakers prevents unwanted vibrations that can add to the muddiness. Use isolation pads or stands that decouple the speakers from the floor or furniture. After upgrading to dedicated stands, I noticed a significant reduction in low-frequency distortion, clarifying my music’s punch.
Adjust the Toe-In Angle
Point your speakers slightly inward, aiming the tweeters towards your listening position. This technique maintains smooth imaging while reducing room reflections that cause boominess. I experimented with a 10-degree inward tilt, which sharpened vocals and tamed excessive bass resonance—giving my system a more natural sound.
Optimize Room Acoustics with Treatments
Minor acoustic treatments go a long way. Install bass traps in corners to absorb excessive low frequencies, and hang fabric panels at reflection points. Initially, I added corner bass traps, which smoothed out the bass substantially. If you’re unsure about placement, use a mirror to identify reflective surfaces—anything that reflects sound into your listening position can be treated.
Use Crossover and EQ Settings
Adjust your amplifier or receiver’s tone controls to cut down on excessive bass. Many modern receivers support parametric EQ; setting a slight reduction around 80-120Hz can eliminate boominess. In my setup, a 3dB cut at 100Hz cleaned up the muddiness without sacrificing fullness. For detailed tweaking, check out our guide on fixing harsh high frequencies, which also covers managing low-end resonance.
Control the Room Reflection Patterns
Furniture, curtains, and carpets can diffuse sound waves, reducing reflections that cause boominess. I added a rug in front of my speakers and moved my sofa slightly away from the wall. These small changes made the bass tighter and the overall sound more balanced. For more tips, explore effective room treatment techniques that accelerate your path to audiophile quality.
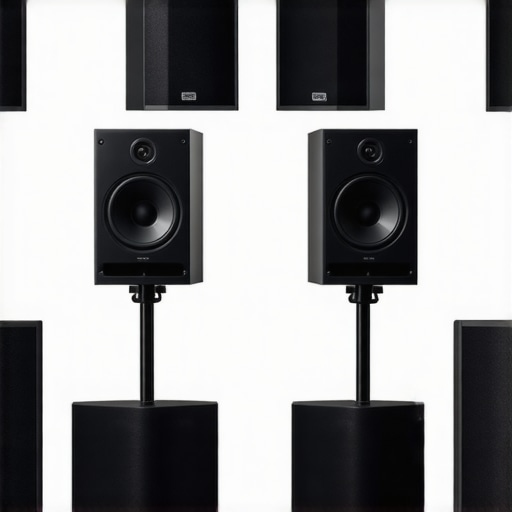
Image showing proper speaker positioning with clear space around to reduce bass boominess, with room acoustic treatments visible in the background.
When diving into home audio, many enthusiasts believe that more power equals better sound, or that the latest gadgets automatically deliver superior performance. But as an expert, I can tell you that these assumptions often lead to costly mistakes and overlooked nuances. For example, many assume that amplifiers with higher wattage will necessarily produce louder or clearer sound; however, **overpowered amplifiers can actually cause distortion if your speakers aren’t rated for that power level**, leading to damage rather than improvement. This is backed by audio engineer Ethan Winer, who emphasizes matching amplifier power to your speaker’s capabilities to avoid clipping and distortion.
A common myth is that newer gear always outperforms older, vintage equipment. Actually, many vintage amplifiers and speakers are thoughtfully designed with high-quality components that outperform some modern, mass-produced counterparts. For instance, classic tube amplifiers are celebrated for their warm sound, a trait modern solid-state amps often struggle to replicate authentically.
Another trap to avoid is the belief that soundbars are a perfect substitute for a full home theater setup. While they offer convenience and a neat look, soundbars typically lack the depth and dynamic range of dedicated multi-speaker systems. For ultimate immersion and clarity, especially in larger rooms, investing in a multi-channel setup with properly placed speakers will serve you better.
Now, let’s tackle a question we often get from advanced users:
How can improper speaker placement impact perceived audio quality even if your equipment is top-notch?
The answer is significant. Incorrect placement can cause sound waves to cancel or reinforce each other unexpectedly, resulting in uneven frequency response and reduced stereo imaging. According to a study by Harman Kardon, precise speaker positioning can improve sound quality by up to 50%, emphasizing that paying attention to placement is essential for maximizing your system’s potential. For insights on optimizing your setup, you might want to explore our guide on fixing Bluetooth lag or see how adding a dedicated subwoofer can elevate your listening experience further.
Additionally, many overlook the importance of room acoustics in their setup. Unwanted reflections, bass traps, and speaker angles dramatically influence how sound reaches your ears. A simple step is to experiment with speaker placement and add acoustic treatments, which can transform a mediocre system into something extraordinary.
Remember, understanding the nuances behind equipment choices, placement, and room acoustics can significantly elevate your audio experience. Have you ever fallen into this trap? Let me know in the comments, and share your own lessons learned along the way.
Maintaining your audio equipment is crucial to ensure it delivers pristine sound quality over the years. From cleaning connectors to calibrating speaker placement, using the right tools not only prolongs the lifespan of your gear but also guarantees that each listening session remains an immersive experience. In this post, I’ll share the specific tools I rely on and how they help me keep my home audio system performing at its best.
Invest in a Good Multimeter for Accurate Diagnoses
One of the most essential tools I keep in my audio toolkit is a digital multimeter. I use it to check continuity in cables, verify impedance levels, and ensure connections are solid. For example, when a headphone jack starts giving inconsistent sound, a quick multimeter test helps determine if the problem is a loose connection or a faulty component. I prefer a high-precision multimeter with auto-ranging capabilities—I recommend the Fluke 117 for its reliability and ease of use, especially when troubleshooting complex setups.
Use Calibrated Test Tones to Fine-Tune Your System
Achieving balanced sound requires precise calibration. I utilize a test tone generator app on my smartphone paired with a measurement microphone to calibrate my speakers. This setup allows me to measure frequency response and identify uneven bass or treble peaks that could distort the listening experience. Tools like Room EQ Wizard (REW) provide in-depth analysis, enabling me to create custom EQ profiles. Proper calibration with these tools ensures my soundstage remains accurate, even after months of use.
Regularly Clean Your Connectors and Cables
Corrosion and dust buildup can degrade signal integrity over time. I use a contact cleaner spray designed for electronics (like DeoxIT) to maintain connectors, especially for RCA, XLR, and speaker terminals. When cables are visibly dirty or exhibit static, I cut back the cable jacket to re-place the connectors, or replace them if necessary. Avoiding cheap, low-quality cables also prevents frequent maintenance and sound issues.
Implement Monitoring Software for Long-Term Consistency
For ongoing monitoring, I rely on audio calibration software supplied with most modern receivers. For example, a few years ago, I upgraded to a Yamaha AV receiver supporting YPAO room calibration. This software automatically adjusts speaker levels and delays based on room acoustics. Additionally, I periodically run calibration checks and update firmware—many manufacturers release improvements that enhance system stability, which I track through official support sites.
Anticipate Future Trends: Smart Maintenance and AI-Driven Adjustments
The future of equipment maintenance will likely involve smart systems that self-diagnose and suggest fixes. Companies are developing AI-powered calibration tools that analyze acoustics and automatically optimize settings in real-time, eliminating guesswork. As this technology matures, investing in compatible gear now positions you to benefit from seamless, self-maintaining systems. Predictions by experts like Ethan Winer suggest that integrating intelligent diagnostics will become standard in high-end audio setups, making upkeep easier and more precise.
How do I keep my home audio gear performing well over time?
Beyond applying these tools and techniques, scheduling routine checks—such as inspecting cables, recalibrating speakers, and cleaning connectors—ensures your system stays at peak performance. Don’t forget to keep firmware updated and consider installing software that monitors equipment health. For instance, I regularly consult expert guides like this resource on fixing Bluetooth lag to address specific issues promptly. I challenge you to try running a calibration profile on your receiver today—once you see the difference, you’ll appreciate the importance of proper maintenance even more.
Stay proactive, invest in quality tools, and your home audio system will reward you with consistently stunning sound for years to come.
What No One Tells You About Speaker Placement and Room Acoustics
One of the most overlooked secrets to achieving pristine sound is understanding how your room’s acoustics influence speaker performance. I once believed that high-end equipment alone would transform my listening experience, but I wasn’t appreciating the magic of proper placement and room treatments. The aha moment came when I moved my speakers away from the corners, added some soft furnishings, and introduced bass traps in the corners—suddenly, my bass was tighter, the vocals clearer, and the soundstage more immersive. This taught me that even the best gear needs proper architectural context to shine.
Unexpected Challenges with Classic Equipment
Among the most surprising lessons I learned is that vintage or high-wattage gear isn’t a universal fix. I once upgraded to a powerful tube amplifier, expecting audiophile bliss, only to find my room resonated with boomy bass and harsh highs. Consulting experienced audiophiles, I discovered that matching gear well with your room and speakers is crucial. For example, pairing a vintage tube amp with the right speakers creates warmth without overwhelming low frequencies—something I wish I knew earlier. It proved that compatibility and setup matter more than wattage or brand reputation.
The Hidden Power of Fine-Tuning and Maintenance
Routine calibration and maintenance can make your system sing anew. I didn’t realize how much dirt on connectors or slight misalignments could muddy audio quality until I started cleaning my cables with specialized contact cleaner and recalibrating my setup with test tones. Using tools like calibration software has allowed me to detect subtle imbalances. It’s now clear that ongoing care prevents issues from building up—saving money and preserving sound fidelity over the long haul.
Harnessing the Power of Proper Equipment Choices
Upgrading to compatible, quality components can be transformative. I learned this the hard way when I replaced my cheap speaker cables with high-quality, well-shielded ones; the difference was staggering—tighter bass, clearer highs, and less interference. This experience solidified that choosing the right accessories—like subwoofers or stands—and not just focusing on the main gear is vital for optimal sound. Investing thoughtfully matters more than blindly chasing the latest tech trends.
Breaking Common Myths That Hold You Back
I used to believe that bigger speakers always mean better sound, but I found that proper placement and acoustic treatment outweigh size. Additionally, I thought that more wattage would automatically produce louder volume—until I discovered that too much power without correct calibration causes distortion, not volume. These misconceptions delayed my progress, but once I reoriented my understanding, I experienced profound improvements. Remember, in home audio, knowledge and patience outshine hype and impulse buys.
Curated Resources to Elevate Your Audio Game
For anyone serious about refining their sound setup, I recommend starting with this guide on tuning harsh highs. It’s an eye-opener for understanding how to balance frequencies. Calibrating your devices with smart tools has been invaluable. And for hands-on improvement, try arranging your speakers correctly. These resources have profoundly impacted my setup, and they can do the same for you.
Feel the Power of Taking Action Today
Your journey to audiophile-quality sound starts now. Remember, every adjustment—big or small—brings you closer to that perfect harmony where music and movies come alive with clarity and depth. Don’t wait for perfect gear; instead, begin with proper placement, simple calibrations, and mindful maintenance. Your ears—and your entertainment—will thank you. Are you ready to take the next step in mastering your home audio? Share your experiences or ask questions below—I love hearing about your progress and challenges in creating your ideal listening space.