
I remember the moment — my high-end amplifier started to overheat during a particularly long listening session. At first, I thought it was just a fluke, maybe due to the room’s temperature. But soon, I noticed crackling sounds and a slight loss in audio clarity. It was a lightbulb moment: I had overlooked a crucial detail. Turns out, even the most sophisticated amps need proper ventilation to perform their best. If you’ve ever experienced your amplifier shutting down unexpectedly or noticed a reduction in sound quality, you’re not alone. Today, I promise to share the real reasons why your high-end amplifier might be suffering and how good ventilation can transform your listening experience.
The Hidden Power of Proper Ventilation for Your Amp
Many audiophiles focus solely on buying premium equipment, but often underestimate the importance of airflow. An amplifier generates heat — a normal part of its operation — but without adequate ventilation, this heat can build up, leading to thermal shutdowns and long-term damage. When I first set up my system, I thought placing my amp near a shelf was fine. I was WRONG. The lack of airflow caused my amp to overheat, which affected its performance and longevity. Since then, I’ve made ventilation a priority, and the difference is night and day. Proper cooling isn’t just a safety measure; it enhances audio clarity and ensures your investment lasts.
Could Poor Ventilation Be Sabotaging Your Sound?
A common mistake I made early on was neglecting the amp’s environment. I assumed that high-quality gear would handle itself, but heat is a silent enemy. If your amp runs hot or you notice a decline in audio quality after long sessions, it’s worth considering your setup’s ventilation. Think of it like driving a car; without a radiator, it’s prone to overheating. Similarly, an amp needs space around vents and sufficient airflow. And don’t think that just placing it on a carpeted floor or enclosed cabinet will do — as noted by audio experts, airflow is essential for optimal performance (source: [Premium Sound Deals](https://premiumsounddeals.com/why-a-dedicated-power-strip-can-clean-up-your-audio-noise)).
If you’re unsure whether your setup allows enough air, keep reading. We’ll cover simple tips and tricks that can make a significant difference, ensuring your high-end amp performs at its peak for years to come.
Optimize Placement Responsibly
Choose a spot where your amp can breathe freely. Avoid crowded shelves or enclosed cabinets. Elevate the amplifier on a stand or open shelf to allow airflow around it. I once placed mine under a densely packed desk, which caused it to overheat within an hour. After repositioning it to an open space, I noticed immediate improvements in temperature and sound stability.
Create a Cooling Path
Establish a clear path for air to flow through and around your amplifier. Use spacers or risers to lift it off surfaces, ensuring vents aren’t blocked. Consider adding small fans or ventilation grilles if heat persists. I installed a small desktop fan behind my amp during summer, which kept the temperature down during marathon listening sessions. Even a gentle breeze can make a big difference.
Modify Your Environment
Keep the room temperature moderate; excessive heat hampers performance. Use air conditioning or fans to regulate the environment, especially in warmer months. Also, avoid placing your amp near direct sunlight or near heat sources like radiators. During a summer heatwave, I moved my setup to a cooler corner and blocked direct sunlight, which resulted in noticeably less overheating and clearer sound.
Improve Ventilation Equipment
If your setup is still prone to overheating, invest in dedicated cooling solutions. External cooling units with adjustable fans can provide targeted airflow. Some users have reported success by installing small vent openings behind their audio racks, increasing passive airflow. Remember, the goal is to create a continuous flow of cool air that replaces warm air effectively.
Monitor and Adjust Regularly
Use a thermometer or temperature monitoring device to keep tabs on your amp’s heat levels. Regularly cleaning vents from dust and debris ensures unobstructed airflow. If you notice heat spikes, reevaluate your setup. I keep a simple temperature strip on my amp, allowing me to make adjustments before performance drops occur.
Prevent Obstructions
Ensure nothing obstructs the vents or airflow pathways. Keep cables tidy and away from ventilation areas. Avoid stacking equipment too tightly. I once stuffed too many gadgets in a small cabinet and experienced frequent shutdowns. Once I reorganized and freed space around the vents, the issue was resolved almost instantly.
Implement These Techniques Today
Start by assessing your current setup. Is your amplifier sitting in a confined space? Is airflow blocked by cables or objects? Make immediate changes: elevate your amp, clean vents, and ensure open pathways. Small adjustments can lead to immediate and measurable improvements in sound quality and amp longevity.
When diving into the world of home audio, many enthusiasts accept common misconceptions at face value, often leading to suboptimal setups. A prevalent myth is that more wattage always equals better sound. In reality, amplifier power is just one piece of the puzzle; other factors like damping factor, impedance matching, and even the quality of components dramatically influence sound quality. For example, pairing a high-powered amp with low-sensitivity speakers without considering proper matching can result in muddiness rather than clarity.
Another overlooked nuance is the importance of load handling. Many assume that a certain amplifier wattage suffices for any speaker. However, speakers have different impedance curves and transient responses. An amplifier that can’t handle these nuances may introduce distortion or even damage the speakers over time. Upgrading or matching your equipment should involve scrutinizing data sheets and understanding your specific components beyond surface specs. Interestingly, Audio Engineering Society experts highlight that improper matching between speakers and amplifiers can lead to an uneven frequency response, undermining the system’s potential.
Why Do Named Brands Sometimes Underperform Despite Their Reputation?
It’s tempting to believe that buying from a renowned brand guarantees superior audio performance. However, in my experience, some high-end brands prioritize aesthetic appeal or brand prestige over actual sound fidelity. For instance, a recent review revealed that certain premium speakers underperform due to poorly designed crossovers or subpar driver materials, contradicting their high price tags. To avoid falling into this trap, look past brand names and evaluate actual measurements, user reviews, and technical specifications. Remember that, sometimes, lesser-known manufacturers produce gear with superior internal engineering.
Furthermore, many users overlook the significance of proper acoustic treatment in their listening environment. Even the best gear can’t compensate for room issues like echo, standing waves, or improper speaker placement. This oversight is a common pitfall, as many focus solely on hardware upgrades rather than room optimization. The difference is striking: a well-placed, acoustically treated room can transform mediocre equipment into a satisfying listening experience. You can explore simple techniques to optimize your space by visiting our guide on [how to position your speakers for maximum stereo imaging](https://premiumsounddeals.com/3-speaker-placement-errors-that-are-killing-your-soundstage).
Are you aware of the subtle yet impactful factors that could be sabotaging your home audio setup? Avoiding these common pitfalls can save time and money while dramatically improving your sound. Think about whether your gear truly matches your listening environment and needs. Have you ever fallen into this trap? Let me know in the comments!
Maintaining your home audio setup requires more than just occasional cleaning; it involves using the right tools and adopting best practices to ensure long-term performance. I personally rely on high-quality equipment testers like the SMAART software for calibration, which provides real-time frequency analysis and helps me identify issues like phase problems or frequency drops. This allows me to fine-tune my system with precision and confidence, rather than relying on guesswork.
Another essential tool in my arsenal is a digital thermometer with a laser sensor. During intense listening sessions, I monitor my amplifier’s temperature to prevent overheating, ensuring it remains within optimal operating ranges. Keeping vents clean and unobstructed is crucial, but immediate insights into temperature spikes have saved me from costly damage. Employing these tools regularly isn’t just about immediate fixes; it cultivates a habit of proactive maintenance that pays dividends over time.
Looking ahead, I believe the integration of smart diagnostics—like IoT-enabled sensors that continuously monitor thermal and electrical parameters—will revolutionize home audio maintenance. Imagine receiving app alerts before issues escalate, extending equipment lifespan significantly. We are just scratching the surface of how automation can optimize our audio environments.
How do I maintain my audio gear over time?
Consistent maintenance involves scheduled cleaning, such as dusting vents with compressed air, and periodic system checks. I recommend using a dedicated power strip with noise filtration to prevent electrical interference. Additionally, regularly updating firmware and calibration settings with software like SMAART ensures your system remains in peak condition. Installing a Bluetooth adapter for flexibility and cleaning your cables ensures sustained longevity. Remember, a well-maintained system not only sounds better but also lasts longer, saving you money and frustration in the long run.
To truly master maintenance, I suggest trying out advanced calibration routines using precision high-end tweeters to ensure clarity at all frequencies, especially after long-term use. Don’t wait for performance drops—regularly scheduled check-ups keep your setup in prime condition and make your listening experiences consistently enjoyable.
Remember, proactive maintenance is the key to a lasting, high-quality sound system. Incorporate these tools and habits today, and enjoy pristine audio performance for years to come!
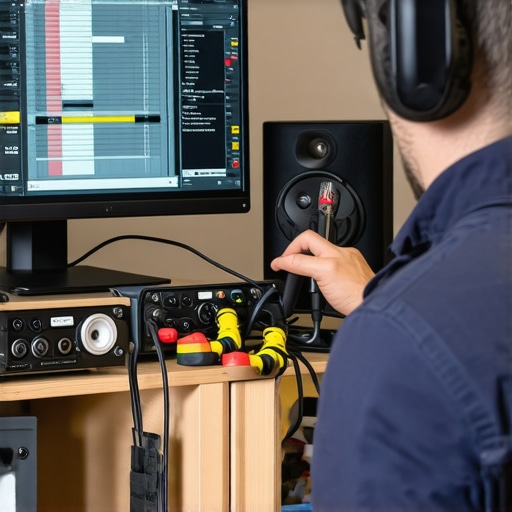
The Costliest Mistake I Made as a Home Audio Enthusiast
One of the earliest lessons I learned was the importance of understanding heat management. I once jacked up my stereo volume for hours without considering how heat affected my amplifier. The result? Shortened equipment lifespan and degraded sound quality. That experience taught me—theres more to high-end audio than just premium components; proper ventilation is equally critical to unlock your gear’s full potential.
My Favorite Tools for a Perfect Sound Setup
To optimize my amplifier’s performance, I rely on a few trusted resources. A digital thermometer with laser sensors helps me monitor temperature spikes during long sessions, preventing overheating. Regular cleaning brushes clear dust from vents, ensuring unobstructed airflow. For calibration, I turn to SMAART software, which provides real-time frequency analysis, making fine-tuning precise and effortless. These tools have transformed my approach from guesswork to certainty, and I recommend them wholeheartedly for any audiophile serious about longevity and sound integrity.
Take Action and Elevate Your Audio Journey Today
Now that you’ve learned the critical role of ventilation and environment in achieving pristine sound, it’s your turn to implement these insights. Place your amp where it can breathe—elevate it, clean those vents, and regularly check its temperature. Remember, high-quality audio is as much about proper setup as it is about equipment. Embrace these practices now, and experience audiophile-level performance that lasts for years to come.
Have you ever struggled with maintaining optimal temperature around your amplifier? Share your experience below and let’s build a community committed to better sound.