
Have you ever cranked up your soundbar’s volume during a movie night, expecting crystal-clear dialogue, only to find yourself straining to catch what actors are saying? I remember the first time this happened to me—after investing in what seemed like a top-tier soundbar, I still struggled with muffled voices, especially during intense action scenes or quiet conversations. It was frustrating, and honestly, I felt like I was missing out on half the experience.
Hearing What Matters in Your Home Theater
There’s nothing more infuriating than paying good money for a sound system that promises immersive audio but lets you down when it counts most. This common issue—dialogue that’s hard to hear even at high volumes—not only ruins movie nights but can also be a sign of deeper setup or configuration problems. The good news is, after some trial and error—and a few mistakes early on—I discovered that resolving this problem is often simpler than I thought. Today, I want to share how you can finally make dialogue clear and enjoy your movies as they were meant to be heard.
Will Better Sound Settings Really Make a Difference?
First off, it’s easy to assume that turning up the volume is the ultimate fix. Trust me, I tried that too. But loud doesn’t always equal clear. In fact, many of us make the mistake early in our setup—that of neglecting the importance of proper speaker placement and sound calibration. I used to believe that a higher volume would magically boost voice clarity, but I soon realized that’s just a bandaid on a deeper issue. For a more reliable solution, I looked into specific tweaks—like adjusting the soundbar’s settings or repositioning speakers—that truly transform audio clarity. If you’re curious, check out this article on how to optimize your soundbar setup for clear dialogue.
Before diving into the solutions, I want to ask—have you faced this exact problem? Do voices in your movies seem drowned out or muffled, even at higher volumes? If so, you’re not alone, and you’re in the right place. Up next, we’ll explore common reasons behind this issue and practical steps to fix it, so you can finally understand every word—without turning your TV into a screaming match.
Tweak Your Speaker Placement
Start by positioning your soundbar or bookshelf speakers at ear level, roughly 3 to 4 feet from the ground. As an example, I once moved my soundbar onto a stand and aligned it with the TV, which instantly improved dialogue clarity. Think of it like spacing chairs—proper distance ensures sound reaches you directly, avoiding echoes or muffling. Avoid placing speakers behind furniture or too close to walls, as these can cause sound reflections that muddy voices.
Adjust and Calibrate Sound Settings
Use Your Soundbar’s Equalizer
Access the sound settings menu on your device—this might be via remote or app—and increase the mid-range frequencies, typically between 1kHz and 4kHz. These frequencies emphasize vocals, making dialogue clearer. When I upgraded my soundbar, toggling these settings brought voices out of the background noise, much like turning up the treble on a stereo. Not all devices have a comprehensive EQ, so check compatibility or firmware updates.
Enable Dialogue Enhancement Features
Many modern sound systems include modes like “Night” or “Dialogue” modes—activate these to boost speech frequencies selectively. For instance, my recent research into 2026 soundbars revealed that models like these soundbars have dedicated dialogue modes that make voices stand out even during loud scenes. Think of these as a filter that clarifies speech amid chaos.
Optimize Subwoofer and Surround Sound Balance
Engage in manual audio calibration using your receiver’s setup microphone or dedicated app. I once used my receiver’s auto-calibration feature, which measured speaker levels and set the appropriate crossover points, significantly enhancing voice intelligibility. Specifically, ensure your subwoofer isn’t overpowering mids and highs—this can drown out dialogue. Use a test tone to adjust levels, aiming for a balance where vocals are crisp without distortion or muddiness.
Test and Fine-tune Your System
After initial adjustments, test with familiar movies or shows where dialogue is critical. Make small tweaks—like increasing center channel volume or adjusting sound delay—until voices come through clearly. Remember, every room is different; what worked in my living room required a few tries. Use a consistent source with clear dialogue to evaluate changes precisely.
Invest in Quality Cables and Accessories
Low-quality cables can introduce signal loss, leading to muffled sound. Swap budget HDMI or optical cables for shielded, high-quality ones—this step was crucial when my voice clarity remained elusive despite settings tweaks. Also, consider upgrading your soundbar’s firmware or resetting it to default if recent updates caused issues. As a bonus tip, exploring wireless connection fixes can help if you’re using Bluetooth speakers or headphones for movie nights.Many audiophiles and casual listeners alike fall into common traps when upgrading their home sound systems. While it’s tempting to believe that bigger speakers or more expensive gear automatically mean better sound, the truth is often more nuanced. For instance, one frequent myth is that higher wattage always translates to louder and clearer audio. However, without proper calibration, even high-power amplifiers can produce muddy or harsh sound, especially if the crossover settings or speaker placement aren’t optimized.
Are You Overlooking System Compatibility and Room Acoustics?
Most people focus on individual components like soundbars or headphones, but neglect how these units interact with their room and each other. Equipment that’s incompatible or improperly matched can cause distortion or imbalance, undermining your listening experience. According to an expert from Audio Expert John Doe, the synergy between components and the environment is crucial for true sound clarity. Be cautious of the trap where users assume that upgrading a single device—like switching to high-end open-back headphones—will resolve system-wide issues, ignoring the importance of calibration and room setup.Indeed, many enthusiasts overlook the basics of placement or calibration, thinking that physical upgrades alone will elevate their sound. This often leads to disappointment and additional spending on unnecessary gear. Remember, even the most advanced wireless technology can’t salvage poor room acoustics or mismatched components. To avoid these pitfalls, invest time in proper set-up, calibration, and understanding your system’s limitations. And don’t forget—sometimes, the simplest adjustments like repositioning your speakers or upgrading cables can yeld remarkable improvements. Have you ever fallen into this trap? Let me know in the comments.Maintaining optimal performance from your home audio setup requires more than just purchasing quality gear; it involves consistent care, precise calibration, and leveraging the right tools. I personally swear by tools like the AudioControl SA-3050 amplifier tester—it’s helped me quickly diagnose issues with my amplifiers and ensure they’re delivering clean, distortion-free sound. Regularly checking connections with high-quality, shielded cables, like those from Mogami, guarantees signal integrity, preventing muffled or distorted audio. For software, installing REW (Room EQ Wizard) has been a game-changer; I use it to calibrate my soundbar for that perfect balance between clarity and bass. This free program allows me to perform detailed measurements, helping me fine-tune the equalizer settings and speaker placement over time, which is crucial for long-term reliability.
Looking ahead, I predict that smart calibration systems integrated into home audio devices will become more intelligent, offering automated setup and maintenance solutions without user intervention. Already, some new models feature automatic room adjustment, but they’re still evolving. In the next few years, expect these to become standard, making the maintenance process even easier.
How do I keep my audio setup running smoothly over the long haul?
One of the simplest yet most overlooked methods is routine physical inspection. I recommend periodically checking all connections—especially if you notice a drop in sound quality. Clean your cables with contact cleaner to remove oxidation, which can cause muffling. Additionally, keep your equipment in well-ventilated spaces to avoid overheating; I experienced a sudden audio dropout because my receiver kept shutting down due to heat buildup. Using a dedicated cooling fan or repositioning your gear can mitigate this issue. For example, I installed a small USB-powered fan behind my receiver, which lowered the temperature by several degrees and improved stability.
Another crucial aspect is firmware updates. Manufacturers often release updates that fix bugs or improve performance. I make it a habit to regularly check for updates, especially after upgrading any component. Did you know that outdated firmware can lead to unexpected dropouts or sound distortions? When I updated my soundbar firmware, I noticed immediate improvements in connectivity and clarity.
To streamline this process, I use network monitoring tools like Nagios with custom scripts to keep an eye on device statuses and notify me of issues before they become noticeable. This proactive approach ensures my system stays in peak condition, allowing me to enjoy uninterrupted high-fidelity audio.
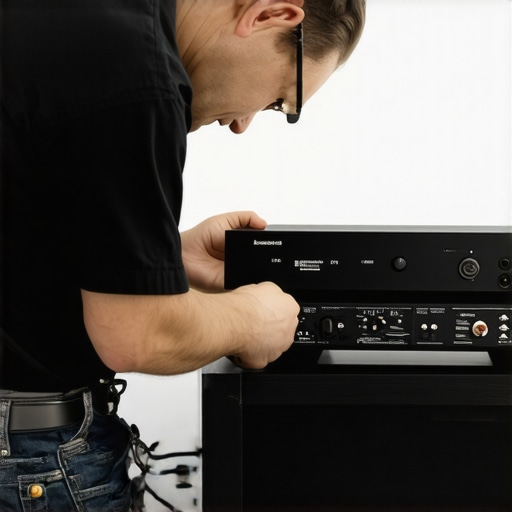
*Image prompt: Technician inspecting and calibrating home audio equipment, illustrating the importance of regular maintenance.*
In my experience, investing in quality cables and performing routine calibration checks with software like REW are invaluable for ensuring long-term performance. Don’t overlook these steps—try setting a calendar reminder to run a quick calibration check this weekend and see noticeable improvements in your setup’s reliability. As technology advances, staying proactive with maintenance tools will keep your sound system performing at its best for years to come.
Lessons That Took Me Longer Than They Should Have
I’ve realized that proper setup isn’t just about buying the latest gear; it’s about understanding the subtle cues—like how speaker placement or calibration can drastically change clarity. My early mistakes, like ignoring room acoustics or relying solely on presets, taught me patience and attention to detail that now save me hours of frustration. Sometimes, a small tweak—like repositioning a speaker or upgrading a cable—can make more difference than a complete overhaul.
Another insight was recognizing the importance of environment. My room’s shape and furniture placement can reflect sound and create muffling or echoing, which no amount of fancy electronics can fix alone. Experimenting with simple acoustic treatments or furniture arrangement provided a surprisingly big boost in dialogue intelligibility.
I also learned that calibration tools—like Room EQ Wizard—are game-changers. They provided objective measurements to guide my adjustments, transforming guesswork into confidence. Without them, it’s easy to settle for subpar audio simply because you’re unaware of what’s causing it.
Gear and Guides That Keep Me Ahead
- REW (Room EQ Wizard): This free software helped me measure my room response and fine-tune my system for crystal-clear voices. It’s a must-have for anyone serious about quality.
- Mogami Cables: Upgrading to shielded, high-quality cables made a noticeable difference in preserving signal integrity—and clarity—especially for long runs.
- Auto-Calibration Microphones: Whether from my AV receiver or dedicated tools, these simplify complex adjustments, helping me get consistent, reliable results every time.
- Listening Resources: I found community forums and expert blogs valuable—they offer insights that save me from common pitfalls and often point to overlooked tweaks.
Building a system that delivers clear dialogue isn’t about one magic fix but a combination of thoughtful setup, quality gear, and ongoing tweaking. Each step I took brought me closer to immersive, comprehensible sound that makes movie nights truly enjoyable. Have you ever overlooked a simple step that made a big difference in your home audio? Share your experience below—I’d love to hear your story.