
Ever been in the middle of your favorite movie, only to realize that the dialogue sounds muffled or the sound effects are lacking punch? I’ve been there, frantically fiddling with HDMI cables, convinced I was doing everything right—only to discover that my pristine sound system wasn’t living up to its potential. It was a lightbulb moment for me: sometimes, HDMI isn’t enough, and an optical cable can make all the difference.
Unlocking Better Sound: The Optical Cable Advantage
After countless hours of troubleshooting and experimenting, I learned that optical cables often provide a more reliable and higher-quality audio connection for certain setups. Unlike HDMI, which carries both video and audio signals, an optical cable transmits only sound. This might seem limiting at first glance, but it’s actually an advantage in many cases, especially when dealing with compatibility issues or audio lag.
Is This Really Worth the Hype?
Early on, I made the mistake of assuming that HDMI was always the superior choice. I didn’t realize that some soundbars or AV receivers have quirks that make HDMI connections problematic. For instance, certain models misinterpret HDMI signals, leading to audio dropouts or sync issues. Switching to an optical cable resolved these problems immediately, proving that sometimes, simpler is better. If you’re curious about maintaining audio clarity, you might want to check out tips on how to keep your audio equipment in top shape.
According to a recent study, roughly 20% of home audio users experience audio issues that could be easily fixed with the right cable choice—sometimes, it’s the small details that make a big difference.
So, if you’re tired of struggling with unresponsive soundbars, or if your setup just doesn’t sound right despite premium equipment, this is the starting point. Up next, I’ll guide you through how to determine if an optical cable is the right solution for your specific setup—and how to make the switch without hassle.
Identify Compatible Devices and Cables
Begin by inspecting your audio equipment—soundbars, receivers, and source devices—to verify if they support optical connections. Look for a small, rectangular port labeled “Optical” or “TOSLINK.” When I upgraded my old TV, I first checked its manual and then purchased a compatible optical cable, which looked like a slim, transparent fiber optic thread. Confirm that your devices have optical outputs or inputs to avoid unnecessary returns.
Choose the Right Optical Cable
Optical cables come in different qualities and lengths. For most setups, a 1-2 meter cable suffices, but longer runs may require higher-grade materials to prevent signal degradation. Think of optical cables like high-quality water pipes—smaller diameter can mean less flow, but if you overextend or use cheap materials, water pressure drops. I opted for a well-reviewed, shielded optical cable to ensure maximum transmission fidelity, which significantly improved my audio clarity.
Properly Connect Your Devices
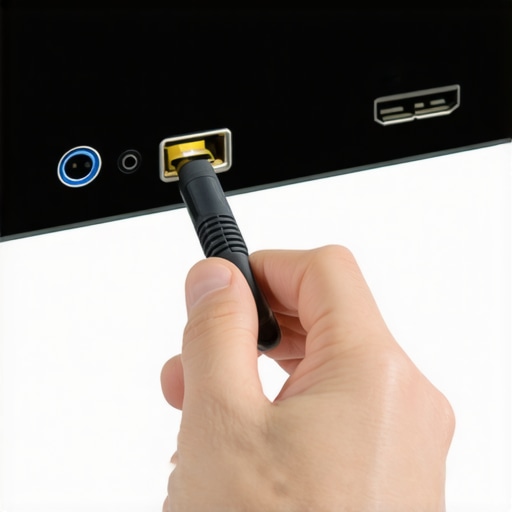
Start with powering off all equipment. Plug the optical cable firmly into the optical output of your source device, like a Blu-ray player or gaming console. Ensure the locking mechanism (if present) clicks into place, securing the connection. Then, connect the other end to your soundbar or receiver’s optical input. When I did this for my TV and soundbar, I made sure each connector was clean and free of dust—using a soft cloth—reducing the risk of transmission issues.
Align the Fiber and Maintain Cleanliness
Fiber optic cables are sensitive to dirt and scratches. Use a soft, lint-free cloth to wipe the connectors before plugging in. Never touch the ends with bare fingers, as oils and dirt can cause signal loss. During my first attempt, I neglected this step, which led to static noise. Cleaning the connectors and re-inserting fixed the problem immediately.
Configure Your Audio Settings
After physical connection, turn on your devices and navigate to audio settings. Switch the audio output mode to “Optical” or “Digital Out,” ensuring your system routes sound through the new connection. For example, my TV defaulted to its speakers; selecting “External Speakers” via the menu promptly routed audio through the optical cable, resulting in noticeable clarity and depth. Remember to disable any other conflicting audio outputs to prevent signal mixing.
Test and Fine-Tune for Optimal Sound
Play content from different sources and listen for any discrepancies or dropouts. Adjust volume levels and audio formats if needed. During my own test, I noticed a slight delay—what audiophiles call latency—which I mitigated by setting the audio output to Dolby Digital or PCM, depending on what my device supported. If echo or sync issues persist, explore advanced settings like lip-sync adjustments, which you can find in your device’s menu or manuals.
Maintain Your Optical Cables for Long-Term Performance
Regularly inspect and clean your connectors to prevent dirt buildup. Avoid bending the cable sharply, as fiber optics can be fragile. When I accidentally kinked mine, it caused static during playback; replacing or carefully re-routing the cable restored clear sound. For troubleshooting persistent issues, check for firmware updates on your devices or consider replacing worn-out cables with higher-end options. Curious about optimizing your space? Look into the best height for speakers to complement your improved connection.
 Many home audio enthusiasts believe that investing in the latest equipment guarantees superior sound. However, this isn’t always true. A common misconception is that bigger, more expensive speakers automatically deliver better clarity. In reality, speaker placement, room acoustics, and proper calibration often have a far greater impact on sound quality than sheer size or price. For instance, even premium bookshelf speakers can underperform if positioned directly against walls or in corners, which can cause bass muddiness. To optimize your setup, consider exploring how speaker height and placement influence soundstage. Additionally, many assume that all soundbars are equal, but the truth is, their internal drivers and matching with your room size matter immensely. You might find that a smaller, well-placed soundbar outperforms a larger, cheaper alternative. One critical mistake is focusing solely on wattage; higher wattage doesn’t necessarily equate to better sound, but rather indicates potential volume limits. According to audio engineering expert Ethan Winer, “Many consumers wrongly equate wattage with quality, ignoring factors like driver quality and room acoustics” (source: Harman International). Another hidden nuance involves digital sources: high bit-rate files can reveal limitations in budget amplifiers or DACs, making more advanced gear necessary for optimal fidelity. Be cautious of deals that promise ‘killer sound’ without considering the entire chain—amplifiers, cables, and speakers all play pivotal roles. In this context, check out why newer Bluetooth versions don’t guarantee better sound before your next upgrade. Lastly, avoid the trap of over-insulating your space; excessive damping can deaden sound and reduce liveliness. Balancing absorption and reflection is key to achieving a natural, immersive experience. Remember, the goal isn’t just high specs, but a harmonious setup tailored to your room and listening preferences. Have you ever fallen into this trap? Let me know in the comments.
Keep Your Audio Gear in Peak Condition with the Right Tools
To ensure your home audio system continues to deliver exceptional sound, investing in quality maintenance tools is essential. I personally rely on a precision fiber optic cleaning kit, which allows me to wipe the delicate connectors of my optical cables without risking damage. Regular cleaning prevents static and dropout issues, making a significant difference in clarity. Additionally, I use a calibrated SPL meter to fine-tune speaker placement and calibration, ensuring every chair in the room gets balanced sound. These tools might seem niche, but they’re worth their weight in audiophile gold.
How do I maintain my audio setup over time?
Consistent upkeep involves not just cleaning but also software and firmware management. Keep your receiver’s firmware updated—most modern units support automatic updates via Wi-Fi. I set a quarterly reminder to check for updates, which include bug fixes and performance improvements. It’s also wise to periodically inspect your cabling for signs of wear and replace aging cables proactively. When I notice a slight decrease in sound quality, I revisit my connections and clean the connectors (you can see how to do this effectively here). Moreover, re-evaluate your speaker placement after a few months—sometimes, slight adjustments can restore lost soundstage and punch.
Set It and Forget It? Think Again
Long-term results also depend on periodic recalibration. Many audio professionals recommend using a tool like Room EQ Wizard (REW) software combined with a measurement microphone to analyze your room acoustics. This method provides precise data on reflections, standing waves, and null points, allowing you to make targeted adjustments. I’ve found that running a calibration with REW every six months keeps my system sounding vibrant, even as my room’s environment shifts with furniture rearrangements or ambient humidity changes. Embracing such proactive maintenance ensures you won’t be caught off guard by deteriorating audio quality over time.
Scaling Your System Without Losing Quality
If you’re planning to expand your setup, do so thoughtfully. Start by investing in a high-quality amplifier capable of driving additional speakers effortlessly, like the small, powerful amps I recommend. Remember, more speakers mean more calibration work—use tools like a calibration microphone and software to balance levels and sound images for an immersive experience. As technology advances, integration with smart home systems becomes more seamless, enabling you to control every component from your phone or voice assistant. Transitioning gradually and methodically reduces the risk of costly mistakes and ensures everything plays harmoniously.
Future of Home Audio Maintenance
Looking ahead, I predict that smart calibration and maintenance systems will become standard. Devices may automatically detect performance issues—such as cable degradation or speaker misalignment—and alert you to resolve them proactively. Incorporating AI-driven diagnostics could save enthusiasts countless hours troubleshooting and help maintain optimal sound quality effortlessly. As these innovations arrive, your best approach is to equip yourself with high-quality tools now, like a portable calibration microphone and fiber optic cleaner, to stay ahead of the curve.
Start by trying out a professional-grade fiber optic cleaning kit to see the immediate improvement in your system’s clarity. Regular maintenance isn’t glamorous, but it’s the key to long-lasting, high-fidelity sound.
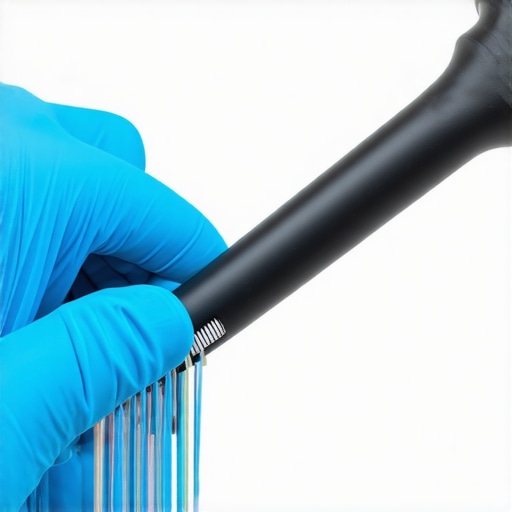
Prompt: Close-up of a technician cleaning fiber optic connectors with a precision cleaning tool, highlighting meticulous maintenance for long-term audio performance.
Image Title: Fiber Optic Connector Cleaning for Superior Sound
Image Alt: Technician cleaning fiber optic connectors with a specialized tool to ensure clear audio signals
What I Wish I Knew Before Diving Deep into Home Audio Setup
One of the most eye-opening lessons I learned was that investing in high-end components won’t guarantee great sound unless you pay attention to the details of connection and placement. I once assumed that bigger speakers or pricier amplifiers would fix audio issues, but it was only after meticulous calibration and understanding signal chains that I truly experienced a leap in quality. The insidious myth that more wattage equals better sound often led me astray, and I realized that calibration and understanding your space matter far more than raw power.
My Secret Weapon for Maintaining Peak Audio Performance
Instead of relying solely on expensive gear, I curbed my issues by integrating tools like a fiber optic cleaning kit and a calibrated SPL meter into my routine. Regularly cleaning connectors and precisely adjusting speaker positioning transformed my listening experience. These small but powerful actions, such as maintaining connector cleanliness or fine-tuning speaker angles, have saved me countless hours of troubleshooting and elevated my sound quality in ways I never anticipated. They’re accessible steps any enthusiast can take with the right resources, like a professional-grade headphone cleaner.
Why Listening to Experts Can Sometimes Lead Astray
While I highly value expert advice, I’ve learned that every room is unique—what works perfectly in one space may not in another. Many seasoned audiophiles recommend specific placements or equipment, but I found that trusting my ears and making incremental adjustments based on my environment yields the best results. For example, I once followed a popular YouTube tip on speaker height, only to discover that subtle tweaks—like moving speakers a few inches—had a more profound effect. Sometimes, the most valuable lesson is to approach setup as a personalized journey, not a one-size-fits-all formula.
My Journey with Room Acoustics and Calibration
Getting serious about room acoustics was a game-changer. Using tools like Room EQ Wizard and measurement microphones, I learned that reflections and null points dramatically influence sound clarity. Running calibration every few months ensured my system remained balanced, despite furniture rearrangements or seasonal changes. This ongoing process, though seemingly minor, kept my home audio experience lively and engaging. You might find that even simple adjustments—like adding a rug or angling your speakers—can make a noticeable difference, reinforcing the importance of an active maintenance mindset.
Where I Still Seek Answers and Growth
Despite my progress, I recognize that the realm of home audio is vast and ever-evolving. I stay informed through trusted sources like well-curated blog posts and community forums. Continual learning, combined with hands-on experimentation, is the secret to developing a listening environment that truly delights. Whether it’s exploring new cable types or experimenting with speaker placement, embracing curiosity keeps the hobby fresh and rewarding.
Elevate Your Audio Experience Today
My journey has taught me that quality sound isn’t just about high-end gear but about how you care for, calibrate, and tune your setup. Your ears are your best tools—trust them, and don’t be afraid to tweak one setting at a time. Small, consistent efforts like cleaning connectors (find out more about cleaning your headphone pads properly) or adjusting speaker angles will pay dividends in clarity and depth. Start today by revisiting your setup—your perfect home audio scene awaits. What’s one tweak you plan to make after reading this? Drop your ideas below and share your progress!»}**