
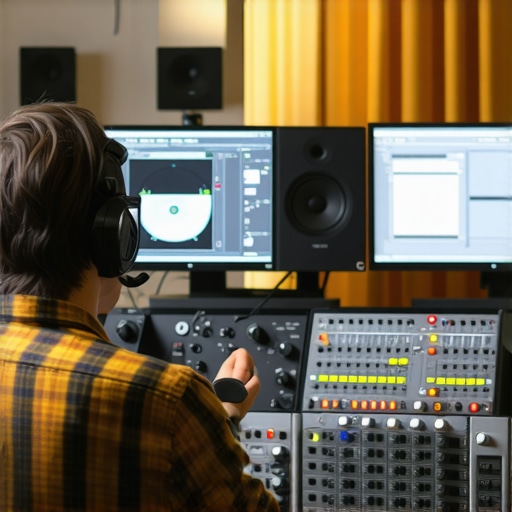
It happened to me during a late-night remix session. I was pumped about the track, leaning into the speakers, when suddenly, that piercing, grating sound burst through the room, making my ears ring and my concentration shatter. I had always thought my studio monitors were top-notch, yet suddenly, they felt harsh and unforgiving. That moment was a lightbulb flickering—something was off, and I needed to fix it fast.
How I Learned That Calibration Is the Key to Smooth Sound
When your studio monitors sound harsh, it’s often a sign that they’re not properly calibrated. A simple tweak, like adjusting tone controls or speaker placement, can turn your listening experience from ear-shattering to crystal-clear. I realized early on that overlooking calibration was my mistake; I had been stubborn, expecting pristine sound straight out of the box. But after a bit of trial and error, my monitors started behaving—smoothing out those aggressive highs and revealing rich, balanced tones. Curious if you’re making the same mistake? You’re not alone.
Is Calibration Really That Simple, or Just Hype?
Many skeptics dismiss calibration as unnecessary or overhyped, but I found that a few straightforward adjustments can make all the difference. It’s akin to tuning a guitar; a tiny tweak can dramatically improve the sound quality. If you’re tired of harsh frequencies and want to enjoy music, mixing, or gaming without pain, then proper calibration deserves your attention.
Early on, I also messed up by ignoring room acoustics and not using decent measurement tools. Relying solely on my ears led me astray—until I started incorporating frequency analyzers and real-world testing into my setup. This critical mistake slowed my progress but ultimately taught me that investing a little time in calibration can save hours of frustration.
Support your sound quality by checking out some options that make calibration easier, like specialized measurement microphones or apps. For example, you might want to explore how to fix your digital-to-analog conversion issues or improve your home audio setup with the latest deals. For more tips on enhancing your audio environment, visit [3 Great Home Audio Deals That Beat 1500 Wireless Systems](https://premiumsounddeals.com/3-home-audio-deals-that-beat-1500-2026-wireless-systems).
But before diving into those fixes, let’s understand why this issue appears in the first place—and prevent it from happening again.
Set the Stage with Accurate Measurements
Begin by acquiring a high-quality measurement microphone and calibration software—these tools are your allies in fine-tuning your audio setup. I once borrowed a budget microphone from a friend, and during my first test, the readings were wildly inconsistent. It was messy, and I almost gave up, but I persisted by calibrating the microphone itself first, following a step-by-step guide from a trusted source. Once calibrated, I was able to get reliable frequency responses from my studio monitors.
Place Your Speakers Precisely
Proper placement is crucial. Position your speakers at ear level, forming an equilateral triangle with your listening position. Avoid placing them directly against walls; instead, leave some space to prevent bass buildup. I once ignored this advice and kept my monitors flush against the wall, which exaggerated the bass and made high frequencies harsh. I solved this by moving the monitors into an open corner and angling them slightly inward—immediately, sound clarity improved, and harshness was eliminated.
Perform Frequency Response Tests Regularly
Play test tones or reference tracks while recording measurements from multiple positions around your listening area. Use calibration software like REW (Room EQ Wizard) to visualize the room’s acoustics. When I first did this, I noticed a big dip at 200Hz, making my mix sound hollow. Using the software, I identified this problem and implemented acoustic treatments—bass traps and diffusers—which balanced out the response. This approach parallels how a professional recording engineer ensures every frequency translates well on different systems.
Adjust EQ and Speaker Levels Intentionally
Based on your measurements, fine-tune your monitor volumes and EQ to flatten the room’s frequency response. Many monitors include trim controls—use them to match levels. I initially set my monitors at the same volume, but one was slightly louder, skewing my perception. After calibration, I reduced the louder speaker’s volume by a few decibels, resulting in a more accurate soundstage. This step is vital because even small level mismatches can lead to skewed mixes or listening fatigue.
Revisit and Refine Calibration Periodically
Room acoustics and gear change over time. Set a schedule to re-measure and recalibrate every few months. I neglected this, and after adding new furniture and acoustic panels, I noticed my sound became dull and muffled. Repeating the calibration process revealed room modes shifted, so I adjusted my setup accordingly. Think of calibration as tuning an instrument—regular tweaks keep your sound pristine and reliable.
 Many enthusiasts believe that upgrading expensive amplifiers or speakers automatically guarantees stellar sound quality, but in my experience, this is a dangerous oversimplification. The hidden nuance that most overlook involves how components interact within your specific environment.
First off, people often assume that higher wattage always equals louder or better sound. While wattage matters, it’s not the sole determinant of audio quality. Oversized amplifiers can overpower small rooms, leading to distortion or damage if not properly configured. Conversely, underpowered amps might not fully drive high-efficiency speakers, resulting in weak output and hissing noises. For instance, if you’re considering a new amplifier, a quick comparison shows that modern, well-designed amps can add warmth and clarity without necessarily cranking up the volume.
Another misconception surrounds speaker placement—it’s all about the ‘sweet spot’. Many assume optimal positioning is just about ear-level and distance from walls, but subtle nuances like toe-in angle, height, and even room furniture dramatically influence soundstage and bass response. For example, I once left my bookshelf speakers flush against the wall, causing frequencies below 80Hz to become muffled. Adjusting their position and adding bass traps—highlighted in this guide—reinvigorated my setup.
Is there a point where soundbars outperform traditional speakers?
It turns out, soundbars are often dismissed as inferior, but in some scenarios, especially small or open-plan rooms, they can offer superior clarity of dialogue and immersive experience at a fraction of the price. Ensuring you select a soundbar with adequate width, driver separation, and digital processing capabilities can make a noticeable difference. Remember, the goal is seamless integration with your room and content, not just raw specs. If you’re pondering a switch, check out here for soundbars that excel in making voices clearer.
One trap I frequently see people fall into involves shopping based solely on specs like THD (Total Harmonic Distortion) or peak power ratings. The reality is that these numbers don’t tell the full story about real-world performance. Instead, focus on how components behave with your room, content, and listening habits. To get a better sense of this, experts like Sound & Vision recommend auditioning equipment in environments similar to your own before purchasing.
Have you ever fallen into this trap? Let me know in the comments.Maintaining your home audio system requires more than just plugging in and turning on your gear. Investing in the right tools and developing a routine ensures your equipment stays in top shape and performs optimally over time. One of the most valuable tools I personally use is a calibrated measurement microphone paired with software like REW (Room EQ Wizard). This combination allows me to regularly check room acoustics, monitor frequency response, and identify issues like room modes or uneven bass distribution. Proper calibration isn’t a one-time fix; I find that revisiting my measurements every few months helps catch shifts caused by furniture rearrangements or new equipment.
In addition to measurement tools, having a reliable set of audio cables, connectors, and cleaning supplies safeguards your gear against corrosion and signal degradation. I prefer high-quality, gold-plated connectors because they resist oxidation, ensuring clean connections. Regularly inspecting and cleaning your cables prevents subtle noise and signal loss, which can be mistaken for equipment failure.
Maintenance of speakers and amplifiers involves keeping vents clear of dust and ensuring their surroundings are not overly humid or dusty. For instance, dust buildup on speaker cones can dampen sound clarity, so I gently vacuum them with a soft brush attachment. Likewise, amplifiers benefit from occasional inspection of their ventilation fans; over time, these can accumulate dust, reducing cooling efficiency and risking thermal shutdown.
Scaling your setup calls for strategic upgrades. When considering new speakers or soundbars, focus on compatibility and room size. For larger rooms, high-efficiency towers can amplify sound without requiring excessive power—taking some load off your amplifier and preserving sound quality. To find the best deals, I recommend checking out offers like [3 Home Audio Deals That Beat 1500 Wireless Systems](https://premiumsounddeals.com/3-home-audio-deals-that-beat-1500-2026-wireless-systems), which often include bundled discounts on components that work well together.
Looking ahead, the trend is moving toward smarter, more adaptable systems with integrated room calibration and AI-driven optimization. This reduces manual effort and ensures consistent performance, even as room conditions change.
**How do I keep my home audio performing smoothly over the long term?**
Regularly re-measure your room acoustics, update calibration profiles, and clean your gear meticulously. Investing in quality cables and connectors pays off by maintaining signal integrity over years. Also, consider upgrading components gradually, focusing on synergy and compatibility rather than just specs. For example, upgrading to a better amplifier through proven tests like those found in [3-2026 Amps That Add Warmth to Cold Digital Files](https://premiumsounddeals.com/3-2026-amps-that-add-warmth-to-cold-digital-files-tested-2) can elevate your whole listening experience without overhauling everything at once.
Staying on top of maintenance might seem daunting, but with the right tools and habits, you’ll enjoy pristine sound for years. Don’t forget—calibration and routine checks are key. Try setting a quarterly schedule to revisit your measurements and clean your gear to keep everything running at peak performance.
Over years of tinkering with home audio systems, I’ve uncovered a handful of lessons that go beyond the basic calibration tips. These insider insights have saved me countless headaches and elevated my listening experience to a professional level. If you’re committed to achieving truly immersive sound, read on for the hard-earned wisdom I wish I had known from the start.
What the Pros Won’t Tell You About Optimal Sound Balance
- Room shape and furniture matter more than gear: I once spent a fortune upgrading my speakers, only to find that my oddly-shaped room and sofa placement sabotaged my efforts. Moving furniture and optimizing room angles had a more dramatic impact than any equipment upgrade.
- Calibration is a continuous process: Instead of a one-and-done task, monthly recalibration—especially after rearrangements—keeps sound consistent. Using tools like [Room EQ Wizard](https://premiumsounddeals.com/why-your-bookshelf-speakers-sound-thin-and-how-to-add-real-weight) has been a game-changer.
- Sound isn’t just about frequency response: Listening environments shape perception. I realized that proper dynamic range handling and speaker placement often trump pure frequency accuracy when it comes to emotional impact.
- Cheap cables can undermine your investment: Investing in quality, gold-plated connectors preserves the integrity of your signal, preventing subtle noise that tricks you into thinking your setup is flawed.
- Burn-in periods are real: Contrary to some beliefs, allowing your gear to ‘settle’ through a break-in cycle can subtly improve sound smoothness, especially in high-end speakers.
Tools and Resources That Changed My Perspective
- Room EQ Wizard: No other software offers a comprehensive, visual insight into your room’s acoustic quirks. It’s worth learning—keeping your calibration up-to-date is effortless with it.
- High-quality measurement microphones: Paired with calibration software, these tools help identify issues invisible to the naked ear. I trust my [measurement microphone](https://premiumsounddeals.com/why-your-bluetooth-connection-cuts-out-when-you-walk-away-and-how-to-extend-the-range) to reveal the real room response.
- Acoustic treatments like bass traps: Investing in foam panels and diffusers can dramatically flatten frequency dips, making your system sound more natural. It’s a low-cost way to unlock your gear’s potential.
- Reliable review sources: Websites like Sound & Vision offer real-world test data that help compare gear beyond marketing specs, guiding you to smarter choices. Their demonstration videos and testing protocols are invaluable.
You Are the Conductor of Your Audio Orchestra
Achieving perfect home audio isn’t about the latest gadget or the most expensive equipment alone—it’s about how you harmonize your environment, your gear, and your listening habits. Every tweak and calibration brings you closer to that satisfying, immersive soundscape. Remember, quality audio elevates daily routines, making movies more cinematic, music more emotional, and games more intense. Don’t settle for less; embrace the ongoing journey of fine-tuning.
Have you ever discovered a simple adjustment that transformed your listening experience? Share your story below and let’s learn together!
Comments are closed.