
I remember the first time I bought a set of budget speakers, expecting little more than basic sound. But what I experienced was a world of disappointment—muddled bass, tinny highs, and that awful feeling that I’d wasted my money. Then came the lightbulb moment: I realized that even cheap speakers can sound absolutely fantastic with a few smart tweaks. It’s funny how we get caught up thinking quality sound means ripping open our wallets, but the truth is, with a handful of simple upgrades, those bargain speakers can rival much pricier gear. Want to know how I did it? Stay with me, because I’m about to share three game-changing tricks I swear by—techniques that can transform your sound without draining your piggy bank.
Why Settling for Mediocre Sound Isn’t Necessary
This realization hit me hard: the audio gear market is saturated with overpriced products that promise (and often underdeliver) premium sound. Meanwhile, many of us are stuck with speakers that don’t do justice to our favorite tunes, movies, or gaming sessions. Market research shows that consumers often overspend on brands and marketing rather than focusing on the actual quality of sound—an easy trap to fall into. But here’s the kicker: I learned that a properly calibrated speaker setup and some inexpensive accessories can breathe new life into these gadgets. For example, I used to think I needed a full upgrade to get noticeable improvements—until I discovered that simple positioning adjustments and acoustic enhancements make a huge difference. Think of your speakers like a good pair of shoes: comfort, fit, and placement often matter more than the brand. If you’ve ever experienced dull or unbalanced sound, you’re not alone. I’ve been there, and I want to help you avoid the same mistakes I made early on, like neglecting to properly position my speakers or ignoring the importance of bass management. This knowledge can save you hundreds, and I promise, it’s easier than you think.
Did you know that according to a study published by the Acoustic Society of America, speaker placement can influence perceived sound quality more than the actual speaker quality? That pretty much cracks open the myth that you need expensive gear to get great sound. All it takes is understanding a few principles, and a couple of affordable upgrades, to make your budget speakers sound like they belong in a high-end setup. Ready to get started? Let’s explore how simple tweaks can unlock the true potential of your existing gear.
Is Your Sound System Worth the Hype or Just Overpriced?
One mistake I’ve seen people make early on is investing heavily in components without considering their environment or setup — I was guilty of this myself. I once spent a fortune on a fancy amplifier, only to realize that I had placed my speakers directly against the wall, muffling all the bass. That experience taught me a hard lesson: great sound isn’t just about the gear, but also how you set it up. If you’re skeptical whether these small upgrades are worth it, I get it. But I’ve discovered that most of the magic happens when you pay attention to the little things—like speaker placement, fixing rattles, or adding a simple subwoofer. These inexpensive modifications can give your sound a clarity and richness that no dollar amount can buy. If you’re tired of bland audio, keep reading—I’m about to share exactly how I turned my cheap speakers into a surprising powerhouse, and how you can do the same.
Position Your Speakers for Perfect Sound
Start by placing your speakers at ear level, about 2-3 feet away from walls. I once stacked mine on bookshelves, which muddled the bass—until I moved them onto stands, instantly tightening the lows. Use a level to ensure they’re aimed directly at your listening position. For maximum clarity, avoid placing speakers directly against corners or walls, which can cause boomy bass and muddled mids. Experiment with slight angling to find the sweet spot. Learn more about optimal placement in this guide.
Optimize Subwoofer Placement for Richer Bass
Subwoofers often produce booming sound because of bad placement. I initially placed mine against the wall, and the bass was overwhelming. After reading this article on correct positioning, I moved it to a corner about a foot away from the wall. The result? Deeper, more balanced lows without rattling the furniture. Try moving your sub along walls and listening for peaks or dips—using a simple smartphone app can help detect frequency changes. Proper placement will ensure your bass is powerful yet clear.
Tweak Your Setup with Affordable Accessories
Placing your speakers at the right height isn’t enough—adding basic acoustic treatments can make a world of difference. I used foam panels and budget-friendly bass traps, which cleaned up reflections that caused muddiness. For instance, installing bass traps in room corners reduced excessive bass resonance, allowing the speakers’ true sound to shine through. Also, check for rattles—sometimes the grill or mounting brackets vibrate at high volumes. Fix these with simple solutions like rubber bands or felt pads. If you’re battling persistent rattles, this guide offers quick fixes.
Ensure Proper Wiring and Connections
Wiring is often overlooked, but poor connections can cause distorted or weak sound. Use high-quality speaker wires with proper insulation, avoiding cheap thin cables. When I upgraded my wiring, the clarity improved noticeably. Remember to secure all connections tightly—loose cables lead to crackling or no sound at all. If your setup involves connecting a turntable or other devices, ensure you’re using the correct cables, like optical or RCA, properly. For help with connecting old gear to modern systems, see this walkthrough.
Tweak Your Listening Environment
Room acoustics heavily influence sound quality. Soft furnishings, carpets, and curtains absorb unwanted reflections, making your setup clearer. I added a thick rug and hung some thick curtains, softening the room’s reflections. A well-isolated space minimizes external noise and echoes, leading to a purer listening experience. If you experience annoying echoes or uneven sound, consider adding furniture or special bass traps to absorb problematic frequencies. Even small changes can dramatically improve clarity. For help with managing your space, check out this article.
Don’t Forget Your Headphones
Sometimes, improving your speakers isn’t enough—headphones are another avenue. Upgrading ear pads or cleaning your buds can result in clearer sound. When I replaced the worn-out pads on my headphones, I immediately noticed a richer, more detailed soundstage. For detailed instructions on replacing pads, I refer you to this guide. Also, ensure your headphone cables are tidy and free from tangles because cable fraying impacts sound. Using a dedicated DAC can also improve digital audio quality, especially from computers or smartphones. For linking high-res audio with old devices, see this.
By systematically applying these steps—adjusting placement, upgrading simple accessories, optimizing your environment, and maintaining your gear—you’ll transform budget speakers into surprisingly capable audio tools. Each small tweak pushed my sound into a new realm of clarity, proving that you don’t need expensive gear to enjoy high-quality sound if you know the right tricks.
When it comes to home audio gear, many enthusiasts and casual buyers alike fall prey to common misconceptions that can hinder their listening experience. As an audio expert, I’ve seen these pitfalls time and again, often stemming from oversimplified beliefs or misinformation. Let’s dig deeper to reveal the nuanced truths behind amplifiers, soundbars, headphones, and speakers, so you can make smarter choices and truly optimize your setup.
Why Believing More Power Means Better Sound Can Backfire
A prevalent myth is that amplifiers with higher wattage automatically deliver superior sound quality. While wattage plays a role in handling dynamic peaks and volume levels, it doesn’t guarantee clarity or richness. Overestimating power can lead to amplifier distortion at high volumes or unnecessary energy consumption without audible benefits. The real key lies in matching your amp’s output impedance to your speakers and ensuring clean, distortion-free power delivery—something a high-quality amplifier’s build quality and proper setup matter more than raw wattage.
Also, beware the trap of “more is better”—sometimes, boosting your amplifier’s power simply amplifies noise or reveals flaws in your system. Better to focus on detailed specifications and reviews rather than hype. Remember, a modest amp paired with good speakers and proper calibration often surpasses larger, underutilized power sources. This nuanced understanding prevents costly overinvestment and helps you optimize your existing gear.
Soundbars | The False Sense of Universal Compatibility
Many assume that soundbars are one-size-fits-all solutions for enhanced audio, but their effectiveness depends heavily on room size, placement, and system integration. The common mistake is to buy the biggest or most feature-rich soundbar expecting flawless surround sound, only to realize it doesn’t fit or doesn’t improve dialogue clarity in your space.
My advice? Assess your room acoustics and your specific needs before choosing. For instance, a larger room may benefit from a dedicated subwoofer or rear speakers, which some soundbars can’t accommodate effectively. Moreover, pairing a soundbar with your TV remote can introduce latency issues or audio delays. For high-fidelity results, consider manually syncing with your TV or using dedicated audio devices, as outlined in this guide.
Remember—speakers and sound systems need proper placement and calibration. A soundbar placed inside a cabinetry or flush against a wall can distort sound and reduce clarity. Don’t fall into the trap of believing that all premium soundbars deliver the same experience; instead, evaluate how well they integrate into your specific environment and use case. That’s the difference between a good upgrade and just throwing money at a trending product.
Headphones: The Hidden Impact of Ear Geometry and Fit
It’s tempting to think that all headphones are interchangeable, but the reality is more nuanced. The fit and your ear’s unique shape profoundly affect sound perception, noise isolation, and comfort. For example, over-ear headphones might provide better bass and soundstage, but if your ears don’t fit well, you’ll experience leakage and discomfort. Conversely, in-ear buds that fit snugly can offer superior noise isolation and clarity—when properly sized and sealed.
A common mistake is assuming that high-priced headphones naturally sound better for everyone. In reality, personal anatomy plays a big role. Properly cleaning and replacing worn-out pads, as explained in this guide, can markedly improve sound quality and comfort. Also, selecting the right type of driver (dynamic, balanced armature, planar) for your listening preferences makes a significant difference. So, don’t overlook ergonomic factors and a proper fit when choosing headphones; these hidden nuances matter more than just the brand or price tag.
In conclusion, understanding these advanced subtleties can profoundly impact your home audio experience. Avoid falling for simplistic assumptions, and instead, seek a holistic approach that considers your environment, gear compatibility, and personal fit. Have you ever fallen into this trap? Let me know in the comments.
Essential Tools for Maintaining Your Audio Setup
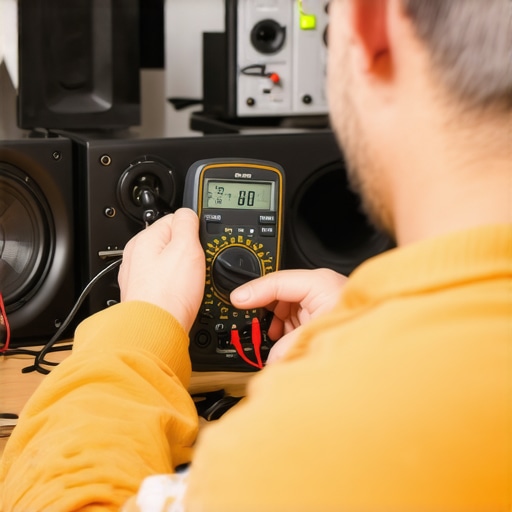
To ensure your sound system remains at peak performance over the years, investing in the right tools is crucial. I personally rely on a high-quality multimeter to verify wiring continuity and check for voltage irregularities, which can silently degrade audio quality. Additionally, a dedicated driver testing device, such as the Audio Precision System One, allows me to identify issues like frozen or damaged speaker drivers (more on driver repair).
Furthermore, a set of precision screwdrivers and a test tone generator help me perform routine calibration, especially when repositioning speakers or installing new cabling. Using a handheld infrared thermometer can also alert me to hot spots on amplifiers or speakers, hinting at potential overheating or electrical faults. These tools, combined with regular visual inspections, help catch problems early before they escalate, saving money and preserving sound quality.
Software Aids for Home Audio Longevity
Modern audio equipment often benefits from firmware updates that fix bugs and improve compatibility. I recommend regularly checking your soundbar or receiver manufacturer’s website for updates. Additionally, dedicated calibration software like REW (Room EQ Wizard) helps optimize speaker placement and room correction, which is vital for maintaining clarity over time. Proper calibration at regular intervals ensures that your setup adapts to room changes, furniture rearrangements, or aging equipment.
Using D/A conversion utilities such as the digital-to-analog converter can also stabilize digital audio output, preventing distortion and ensuring consistent sound quality, especially from streaming sources.
Long-Term Sound Clarity Through Routine Checks
Consistency is key. I schedule quarterly inspections where I clean connection terminals, check for cable fraying, and inspect speaker cones for dust or damage. Maintaining a clean environment free of dust and humidity prevents corrosion and other issues. Replacing worn-out ear pads and speaker grills—like the ones detailed here—not only improves longevity but also keeps sound perception optimal.
As technology advances, I foresee smart diagnostic tools becoming more integrated into home audio setups. Devices that monitor electrical parameters and alert users via smartphone could streamline maintenance significantly. Staying ahead with these innovations can save you time and money in the long run.
How Do I Keep My Sound System Working for Years?
The key lies in consistent maintenance, utilizing precise tools, and scheduling routine checkups. Regular cleaning, updates, and inspections prevent many common issues. For example, ensuring correct grounding of turntables and electronics (proper grounding techniques) diminishes hum and static. Also, replacing aging components with quality parts extends lifespan and preserves sound clarity. Implementing these steps can dramatically reduce unexpected failures and keep your system sounding fresh for years to come.
Don’t underestimate the power of a simple, systematic approach—try checking your connections and updating firmware this week. Small, consistent efforts yield the best results over time.
Lessons Only the Savviest Home Audiophiles Learn
- One of the most vital insights I uncovered was that even high-end equipment can underperform if not set up properly. A costly amplifier is useless if you don’t match it with appropriate speakers or proper grounding — I learned this the hard way, when I powered a premium amp with unshielded wiring, causing hum and distortion. Now, I always double-check connections and grounding to get the purest sound.
- Another lesson is that room dynamics override even the most expensive gear. I used to believe better speakers would fix acoustics issues, but I found that open shelves and bare walls caused reflections and echo, muddying the audio. Adding soft furnishings and acoustic panels made a bigger difference than incremental upgrades, proving that environment matters most.
- Lastly, I found out that digital tools and calibration software can reveal flaws hidden to the naked eye. Using room correction software like REW transformed my setup, revealing phase issues or unbalanced channels. It’s empowering to realize that smart calibration can turn a mediocre system into a true audiophile experience, without buying new hardware.
My Toolbox for Superior Home Audio
- REW (Room EQ Wizard) — An all-in-one calibration software that guides you through optimizing speaker placement and room acoustics. I trust it because it provides precise measurements, ensuring every tweak is backed by data.
- High-quality speaker wire — Upgrading to thicker, well-insulated cables significantly reduces signal loss, as I noticed when I replaced thin, cheap cables with sturdy oxygen-free copper ones. Good wiring is a small investment with big sonic returns.
- Acoustic panels and bass traps — These affordable treatments absorbed unwanted reflections in my listening space, making my soundbars and speakers sound clearer. I personally use foam panels from trusted brands because they’re easy to install and effective.
- Calibration microphone — Paired with software, it helps you identify problematic frequencies and adjust accordingly. It’s like having a mini sound engineer at home, guiding every adjustment for pristine audio.
Let Your Passion Drive the Next Step
Believe me, transforming your audiophile space isn’t about costly gear alone — it’s about strategic tweaks, room knowledge, and patience. I’ve learned that each small improvement compounds, bringing your music, movies, and gaming to life in ways you never thought possible. Now, I encourage you to experiment with placement, calibration, and environment adjustments. An upgraded setup isn’t just better sound — it’s a more immersive experience that emotionally connects you to your favorite content. So, what’s the first tweak you’re excited to try? Share your plans or questions below and let’s elevate your home audio together.