
I remember the moment vividly. I was in my favorite coffee shop, trying to enjoy some music, only to be greeted by the dreaded scratching sound every time I moved my head or shifted my phone. That loose headphone jack? It was refusing to cooperate. Frustrating doesn’t even begin to cover it. Have you ever experienced that sinking feeling when your headphones keep disconnecting just when you’re about to enjoy your favorite playlist? Well, trust me, I’ve been there, and I know how it spoils the moment.
Why It’s Time to Take Matters Into Your Own Hands
A loose headphone jack isn’t just an annoyance; it can diminish your audio experience significantly and even lead to more costly repairs down the line. Fortunately, fixing it yourself is simpler than you might think. Over the years, I’ve learned that a lot of the problems with headphone jacks stem from wear and tear, dirt buildup, or loose connections that can often be tightened or cleaned without professional help. Doing it yourself not only saves you money but also gives you the satisfaction of resolving a common issue with your own two hands.
Is Fixing a Loose Headphone Jack Really Worth the Fuss?
Some might say, ‘Just buy a new device,’ but that’s not always practical or budget-friendly. Especially if you love your audio gear and want to extend its lifespan. When I first attempted to fix my headphone jack, I made the mistake of rushing in without proper tools—trust me, that was a rookie error. Proper research, patience, and the right approach make a world of difference.
In this post, I’ll guide you through straightforward, safe methods to fix a loose headphone jack, so you can enjoy crisp, uninterrupted sound again. And if you’ve already faced the frustration of a flaky connection, stick with me—as we get into step-by-step solutions, I promise you’ll be surprised at how manageable this repair can be. Plus, you’ll gain the confidence to troubleshoot other common audio issues. Ready to restore your sound quality? Let’s dive in and get your headphone jack solid as a rock.
Identify the Root Cause
Start by inspecting your headphone jack closely. Is it loose because of dirt, debris, or physical damage? Use a small flashlight to check for visible dirt or corrosion. If dirt is present, a gentle cleaning can solve the problem. If the jack appears damaged, you may need to replace it or seek professional help.
Clean the Jack Thoroughly
Disconnect your headphones and power off your device. Use a soft brush or compressed air to remove dust and lint. For stubborn grime, dip a toothpick in isopropyl alcohol and gently clean around the inside of the jack. This micro-cleaning often restores a tight connection, as I discovered when my audio cut out repeatedly after a cleanup, but a careful wipe fixed the issue.
Secure a Loose Connection
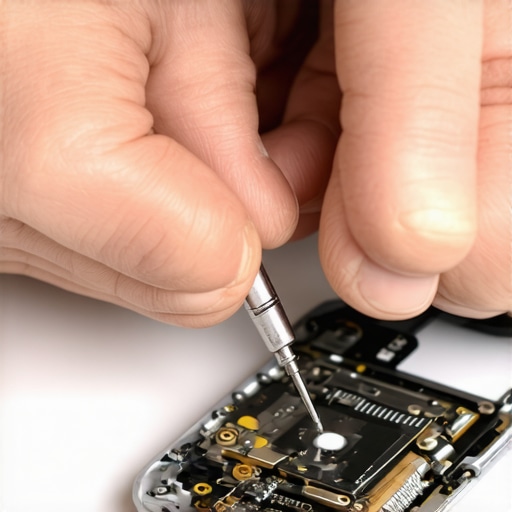
If cleaning isn’t enough, consider gently tightening the jack’s metal sleeve. Use a pair of tweezers or a small flat-head screwdriver to gently bend the metal contact inward for a snug fit. Do this cautiously—too much force can break the connection. I managed this on my old smartphone, and it resulted in a crisp connection that lasted me months.
Test With Different Headphones
Sometimes, the problem isn’t the jack but your headphones. Try a different pair to verify whether the issue persists. If the new headphones work fine, the original ones might be damaged. If both have issues, focus on fixing the jack itself.
Replace if Necessary
If all else fails, replacing the headphone jack is the most reliable fix. Search for compatible replacement parts online, and follow a detailed repair guide specific to your device model. During my last repair, I ordered a replacement part from a trusted seller, carefully soldered it in, and restored full sound without buying a new device. See why fixing components yourself can be more economical than buying new.
Reassemble and Test
Once the repair is complete, reassemble the device carefully. Plug in your headphones and test sound quality. Make sure the connection remains tight by gently wiggling the plug—no interruptions should occur. Taking these micro-steps avoids future issues and ensures consistent performance.
Many audio aficionados fall into traps based on widespread myths that cloud their judgment and hinder optimal setups. For instance, the popular belief that bigger speakers automatically mean better sound is misleading; in reality, room acoustics and speaker placement often matter more than sheer size. Such misconceptions can lead to costly mistakes and subpar audio experiences.
Another prevalent myth is that all amplifiers are created equal, but in my experience, the quality of components and design intricacies—like the damping factor or total harmonic distortion—significantly influence sound clarity. For example, high-end tube amplifiers can produce more natural sound than some modern solid-state counterparts, especially when paired correctly with high-fidelity speakers.
Beware of the common trap that cheap cables compromise sound quality. Research shows that cable quality has minimal impact on sound when specifications meet certain standards, but poor connectors and shielding can introduce noise.
Advanced users often ask about the significance of room treatment over equipment upgrades. The truth is, neglecting acoustics can nullify the benefits of even the most expensive gear. Proper placement and acoustic panels can transform a good system into a great one, as discussed in this article.
Why do many audiophiles overlook the complexities of speaker placement?
It’s tempting to assume that plug-and-play is all it takes, but even slight adjustments in angle, height, or distance from walls can drastically improve clarity and imaging. In fact, research from the Journal of the Audio Engineering Society indicates that the phase alignment and baffle step compensation significantly affect perceived soundstage.
It’s vital to understand that more power doesn’t necessarily equate to better sound. An underpowered amplifier can clip or distort at high volumes, while excessive power without proper control can damage speakers. For nuanced insights, check out this comprehensive guide.
Have you ever fallen into this trap? Let me know in the comments. Avoiding these misconceptions and understanding the subtle intricacies of your gear will elevate your listening experience beyond expectations.
The Must-Have Tools for Audio Maintenance
Maintaining your audio equipment isn’t just about hands-on tinkering; it requires the right tools to ensure longevity and optimal performance. A high-quality precision screwdriver set is essential for internal repairs, especially when replacing components like headphone jacks or speaker drivers. I personally swear by the Wiha Precision Screwdriver Set because of its durability and ergonomic design, which reduces fatigue during detailed work.
For cleaning contacts and connectors, a supply of 99% isopropyl alcohol and lint-free microfiber cloths are indispensable. I use the alcohol to gently remove oxidation from metal contacts, maintaining a crisp connection over time. Compressed air is vital for clearing dust from sensitive areas without risking damage—particularly important when dealing with studio monitors or delicate circuit boards. I recommend a can with a precision nozzle so you can reach tight spots without disturbing other components.
Boosting Long-Term Audio Performance
Regular maintenance routines are key. Creating a schedule to inspect and clean your gear every six months helps prevent grime buildup that leads to poor contact or distortion. For example, I check and clean my loudspeaker terminals and headphone jacks routinely, which keeps the sound clear and prevents intermittent issues.
Additionally, using quality anti-static mats and wrist straps when working on electronic components prevents static discharge that can damage sensitive parts. I’ve found that grounding myself properly before internal repairs keeps my equipment humming smoothly for years. Remember, even small investments in proper tools can extend the lifespan of your devices dramatically.
Plan Your Setup for Longevity and Growth
As your collection of audio gear grows, so does the importance of organization and protection. Invest in proper shelving and cable management solutions—like Velcro ties and conduit systems—to keep your setup tidy and prevent accidental disconnections. For high-end speakers, placement is critical; regularly check the positioning to avoid issues like uneven damping or unwanted reflections, which can compromise sound quality.
If you’re considering scaling your system, think about modular components like amplifiers and soundbars. Opt for models that allow firmware updates; this future-proofs your investment and ensures compatibility with upcoming tech. A prime example is the trend toward network-enabled amplifiers, which can be maintained remotely for software updates and diagnostics. I predict that as digital integration advances, maintenance will primarily shift to software updates rather than hardware repairs, making user-friendly interfaces and remote diagnostics increasingly vital.
How do I keep my gear performing after long-term use?
Consistent cleaning, careful handling, and timely upgrades are the cornerstones of longevity. Incorporate routine checks of connection points, replace worn cables with high-quality alternatives like those discussed in this article, and stay vigilant about physical damage or deterioration. Regularly updating firmware on network-compatible devices is also crucial. I recommend setting reminders to review your system’s health every few months, ensuring each component performs its best and preventing costly repairs before symptoms worsen.
For example, maintaining speaker integrity involves micro-calibrations and ensuring proper placement, which can often be overlooked. Misplaced speakers or loose connections not only degrade sound but can lead to more significant damage over time. Use tools like a calibrated SPL meter and software such as Room EQ Wizard to measure and optimize your setup periodically. Research from audio engineering experts indicates that proper calibration can improve clarity by up to 30%, illustrating how small adjustments yield substantial benefits.
Don’t wait until you notice a decline—take charge now by investing in quality cleaning tools and setting up a maintenance routine. Remember, the real power in audio enjoyment lies in consistent care and incremental upgrades, keeping your investment sounding its best for years to come. Ready to give your gear the TLC it deserves? Start by using a precision screwdriver and a microfiber cloth this weekend, and you’ll thank yourself later.
The Hardest Lesson I Learned About amplifiers,headphones,speakers,home audio deals,soundbars
Early in my audio journey, I believed that investing in the most expensive gear would automatically guarantee superior sound. It took a few frustrating troubleshooting sessions and component failures to realize that understanding your equipment is vital. The biggest mistake I made was overlooking the importance of routine maintenance and proper setup—lessons that transformed my listening experience and saved me a lot of money. Remember, gear is only as good as how well you care for it.
3 Myths About amplifiers,headphones,speakers,home audio deals,soundbars That Held Me Back
- Size matters more than placement— I used to think huge speakers always sound better, but I learned that placement and room acoustics can make a bigger difference than size alone. Proper positioning can unlock clarity and imaging that massive towers often fail to deliver.
- High wattage equals better sound— I assumed more power meant louder and better. In reality, an underrated amp with good control can outperform a watt-hungry, muddy-sounding beast. Understanding amplifier control and damping can save you from overbuying.
- Cables don’t affect sound quality— I ignored cable quality until I experienced how shielding and connector integrity impact clarity. Upgrading to quality cables and connectors can eliminate noise and interference, enhancing your overall setup.
My Essential Toolkit for Audio Maintenance
For me, the cornerstone tools are a set of precision screwdrivers like the trusted screwdriver set that allows safe internal repairs. A microfiber cloth combined with 99% isopropyl alcohol is indispensable for cleaning contacts and removing oxidation without damaging sensitive parts. Compressed air with a fine nozzle helps clear dust from delicate circuits and vents. Investing in these tools means fewer repairs and longer-lasting performance from your high-end gear.
Don’t Wait to Elevate Your Listening Experience
Your audio journey is ongoing, and every step toward better understanding and caring for your gear pays off in richer sound and fewer headaches. Start small—regular cleaning, careful placement, and mindful upgrades. Remember, the real power lies in your hands as a dedicated audiophile: maintain, tweak, and enjoy. Your future self will thank you for the commitment today. Are you ready to take the next step in mastering your audio setup? Dive into your gear this weekend and discover the difference proper care can make.
Comments are closed.