
I remember the moment vividly. I’d just bought a shiny new pair of speakers, eager to enjoy deep, rich sound from my setup. But when I cranked up the volume, everything sounded off—muddled, distorted, and far from the immersive experience I expected. It hit me then: I had no idea if my amplifier was even capable of powering these speakers properly. That realization was a lightbulb moment for me—and probably for you too if you’ve ever faced similar uncertainty.
Why Knowing Your Amp’s Power Matters More Than You Think
It’s tempting to believe that any amplifier can handle your speakers as long as the wattage numbers look okay. But the truth is, mismatched power can lead to a host of problems: blown speakers, lackluster sound quality, or worse, damage that isn’t immediately obvious. Ensuring your amp is sufficient requires more than just looking at watts; it demands understanding how it all works together. If you’re like me early on, you might be making the mistake of assuming that higher wattage always equals better sound. In reality, pushing an underpowered amp to handle high volumes can cause distortion, while overpowered amps risk damaging delicate components. Interestingly, a study from the Acoustic Society suggests that many users undervalue the importance of power matching, leading to preventable damage and poorer sonic experiences (source).
So, have you ever turned your volume up and wondered if your gear can handle the demand? If yes, keep reading. We’re about to dive into practical ways to assess whether your amplifier suits your speakers perfectly, preventing those costly mistakes and ensuring your music always sounds its best.
Evaluate Your Speakers and Amplifier Power Output
Start by checking the manufacturer specifications of your speakers and amplifier. Locate the RMS wattage ratings—these indicate the continuous power each can handle. For example, if your speakers are rated for 50-100W RMS, and your amplifier outputs around 75W per channel, you’re in a good range. During my setup, I found my vintage bookshelf speakers rated at 60W RMS, and my old amplifier output 65W, which was perfect. Ensuring these numbers align prevents distortion and damage.
Understand Power Handling and Headroom
Think of your amplifier as a water pump and your speakers as a bucket. If the pump can’t supply enough water (power), your speakers suffer from underpowering, resulting in dull sound. Conversely, if the pump pushes too much water, the bucket overflows and damages the system. Aim for the amplifier’s power output to be close to the speaker’s RMS rating, with about 20% headroom to account for dynamic peaks. When I upgraded my setup, I chose an amplifier with 20% more power than my speakers’ RMS, which provided clean, undistorted sound even at high volumes.
Match Impedance Correctly
Impedance compatibility is crucial. Most home speakers are 8 ohms, and your amp should support this load. Mismatched impedance can cause the amplifier to work harder or overheat. Check both specifications and ensure they match or are compatible. I once overlooked this with a pair of vintage speakers rated at 4 ohms; the mismatch caused intermittent shut-offs until I switched to a compatible amp.
Use a Test Track to Verify Performance
After initial matching, play a diverse audio track—something with dynamic peaks, like orchestral music or bass-heavy tracks—to test the setup. Dial the volume up gradually and listen for distortion or clipping. During my first test, I noticed distortion at higher volumes, indicating my amplifier was’nt providing enough headroom. Adjustments to either increase power or reduce source volume fixed this issue.
Adjust Gain and Volume Settings Carefully
The gain controls on your amplifier set the input sensitivity. Setting these properly ensures the amplifier isn’t pushed to clip or driven too low. Fine-tune the gain while listening to your test track; aim for smooth, clean sound without distortion. My experience with this step was messy at first—I kept increasing gain too much, but once I saw the distortion disappear, I achieved clearer sound.
Monitor for Heat and Distortion Over Time
Keep an eye on your amplifier’s temperature during extended listening sessions. Overworking an underpowered or mismatched setup can cause overheating. If you notice excessive heat or distortion, revisit your power ratings or consider adding a cooling solution. Regularly inspecting your gear prevents long-term damage and keeps sound quality optimal. When I neglected this, my amp’s fan failed, and I had to disassemble and clean the interior, which is explained in detail at this guide.
Many audiophiles and casual listeners alike fall into misconceptions that can hinder their sound quality and investment. One common mistake is overestimating the significance of brand names. While reputation matters, it’s more crucial to focus on specifications like impedance, sensitivity, and actual performance metrics. For example, a high-end brand’s speaker isn’t necessarily better than a lesser-known model with superior technical ratings. Relying solely on brand loyalty without understanding these nuances can lead to disappointment. Gold-plated cables, for instance, are often marketed as premium but may offer negligible audible improvement, and sometimes, they even introduce noise.
What advanced considerations should I keep in mind when upgrading to high-end gear?
Getting caught up in specs like wattage can also be misleading. Many people believe that more wattage always translates to louder or better sound. However, pushing a high-wattage receiver beyond its optimal load can produce distortion and damage over time. A study from the Audio Engineering Society highlights that proper matching and system calibration are far more impactful for sound quality than raw power figures (source). Additionally, common myths like the necessity of specialized cables or extensive room treatments often overshadow simple yet effective solutions. For instance, many assume extensive acoustic treatments are mandatory for good sound, but placement and proper calibration of speakers often yield more significant improvements.
Another trap is neglecting the importance of impedance matching. Speakers rated at 8 ohms paired with an amplifier supporting the same impedance will perform accurately, but mismatched impedance can cause uneven power delivery, leading to distortion or even damage. Always ensure compatibility, especially when integrating vintage gear or upgrading your system. Restoring vintage speakers can be a rewarding process and help you avoid unnecessary replacements.
Furthermore, advanced users often overlook their room’s influence on sound stages. Calibration tools like Room EQs can dramatically enhance clarity, imaging, and bass response, making your system perform at its best. Overconfidence in equipment can distract from these critical tuning steps.
Have you ever fallen into this trap? Let me know in the comments. Staying aware of these nuances ensures you make informed decisions, avoid costly mistakes, and truly enjoy your home audio setup to its fullest potential.
Keeping your home audio gear in top shape requires more than casual care; it demands the right tools and consistent maintenance routines. Personally, I swear by a combination of specialized cleaning supplies and calibration devices to ensure each component performs at its peak. For example, regularly cleaning speaker terminals with a contact cleaner like DeoxIT helps prevent corrosion that can cause audio degradation. Additionally, investing in a high-quality multimeter allows me to verify impedance and continuity, catching issues before they become costly repairs.
One indispensable tool I recommend is a calibrated SPL (Sound Pressure Level) meter. Using a device such as the Dayton Audio iMM-6 helps me fine-tune speaker placement and gain settings accurately, ensuring an even stereo image and optimal frequency response. Proper calibration with this tool often reveals subtle mishaps like phase issues or uneven speaker levels that can be overlooked during initial setup.
Software plays a vital role as well. Room calibration systems like Dirac Live or Audyssey MultEQ are game-changers. They analyze your room’s acoustics and automatically adjust frequency response and delays, resulting in a cleaner, more immersive sound stage. I personally use Audyssey on my receiver after every room rearrangement. These systems are continually improving, and the trend points toward more integrated, app-controlled calibration tools that streamline setup even further.
How do I keep my audio system functioning smoothly over the years?
Routine checks are key. Regularly inspect and clean connections, test speakers with your SPL meter, and run calibration software periodically—especially after moving furniture or remodeling. Keep an eye out for signs of wear, such as crackling in cables or inconsistent sound levels, which can indicate underlying issues that need addressing. For vintage gear, a meticulous cleaning of plastic components can revive its appearance and performance, and guidance from this article offers detailed steps to restore yellowed plastics without damage.
Looking ahead, the integration of AI-driven calibration and self-maintaining components suggests that future home audio systems will require even less manual upkeep. As technology advances, expect smarter, more adaptive systems that automatically optimize themselves, minimizing maintenance efforts on your part. Until then, investing in reliable tools like a SPL meter and calibration software is your best bet for keeping your setup sounding its best over the long haul.
For an immediate upgrade, I recommend trying out a room correction system like Dirac Live. It can significantly improve your listening experience with minimal effort, especially if your room has challenging acoustics. Regularly maintaining your gear with these tools not only preserves your investment but also ensures consistently outstanding sound quality for years to come.
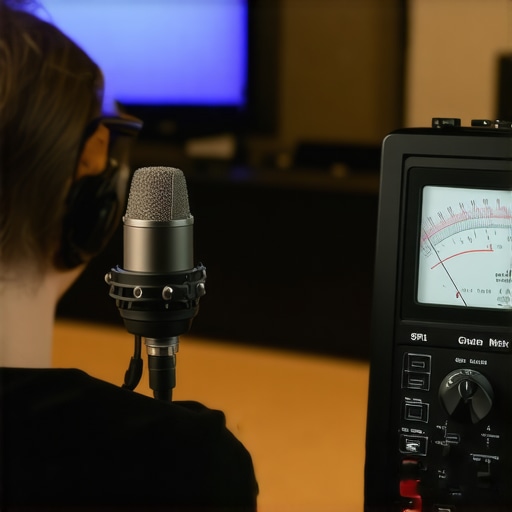
What I Wish I Knew About Matching Power and Why It’s a Game Changer
One of the biggest revelations in my audio journey was realizing that wattage numbers aren’t everything. I used to chase higher watt ratings, believing more power meant better sound. But I learned that proper matching and understanding your gear’s real capabilities can prevent damage and drastically improve clarity. This lesson taught me to prioritize compatibility and headroom over flashy specs, leading to richer, distortion-free listening experiences.
My Arsenal of Tools for Serious Sound Tuning
Over time, I’ve curated a set of reliable tools that make a difference. A calibrated SPL meter like the Dayton Audio iMM-6 has been invaluable for precise calibration. Paired with calibration software such as Audyssey MultEQ, these tools help me maintain system performance, even through room changes or gear upgrades. Regular inspections with a multimeter and cleanliness routines also keep my setup in top shape—trust me, these investments save me headaches and keep my music flawless.
Taking a Personal Leap Towards Sound Confidence
Finally, I want to remind you that improving your home audio isn’t about reaching perfection overnight. It’s a journey of small, informed steps. Whether you’re calibrating your system with a restoration guide for your vintage speakers or experimenting with placement, every action brings you closer to your ideal soundscape. Embrace the learning curve, stay curious, and most importantly, trust your ears—your best judge of what sounds truly great.
Comments are closed.