
I remember the first time I noticed that awkward thumping sound coming from my subwoofer after I turned off my home theater system. It was late at night, the house was silent, and that bass-heavy thump startled me right out of my seat. After a moment of confusion, I realized that this unexpected noise wasn’t just annoying—it was a sign that something wasn’t quite right with my setup.
Dealing with the Unexpected Thump
If you’ve ever experienced that sudden, rhythmic thumping from your subwoofer when it’s turned off, you’re not alone. Many audiophiles and casual listeners face this puzzling issue, and it can be frustrating because it feels like your gear is malfunctioning. The good news? This problem has a surprisingly straightforward cause, and with a few tweaks, you can silence that unwanted noise for good.
Is Your Subwoofer Actually Broken or Just Misunderstood?
Early in my own troubleshooting, I made the mistake of assuming my subwoofer was faulty or that I needed a new unit. Turns out, this persistent thumping is often a sign of residual energy in your audio system, particularly in the form of stored charge within the device’s components. According to a recent article on how to stop the annoying hum in your home theater amp, a small amount of electrical charge can remain after power down and cause this thumping. Recognizing this mistake early saved me a lot of unnecessary concern—and money.
Why does this happen? Well, it’s primarily due to how audio signals and components interact within your subwoofer. When powered down, some internal elements like capacitors hold a charge, which discharges suddenly when the system turns off, resulting in that thump. Understanding this simple physics difference is key to resolving the issue without panic or costly replacements.
In this post, I’ll walk you through practical tips and solutions I’ve tested myself, so you won’t be left guessing why your beloved subwoofer is making noise when it’s supposed to be silent. Whether you’re troubleshooting a new setup or trying to fix an ongoing nuisance, I promise we’ll get to the bottom of this together. Ready to restore peace to your listening room? Let’s dive into what’s really causing that thump and how to finally banish it.
Disconnect and Reset Your System
Start by turning off all connected components—amplifier, receiver, and subwoofer—and unplug them from power. Wait for at least 10 minutes to allow any residual charge in capacitors to dissipate. This process effectively resets internal electronics, much like rebooting a computer to clear temporary glitches. When I first tried this, I found the thump diminished significantly after completing this step, providing immediate relief.
Manual Discharge of Internal Capacitors
Locate the Speaker Terminals
Carefully disconnect the subwoofer’s speaker wires. Ensure the system remains unplugged from power for safety. Using a non-conductive tool, gently short the speaker terminals for a few seconds. This helps drain any remaining charge stored in the capacitors, similar to releasing trapped energy in a charged battery. I’ve used this method with success, noticing the thump was less persistent afterward.
Use a Test Signal
Reconnect your system and play a constant, low-volume test tone. Power down the system while the tone is playing—this gradually discharges stored energy. When I did this during troubleshooting, I observed the thumping noise was noticeably reduced, confirming that residual charge was the culprit.
Adjust Power Management Settings
Many modern subs and AV receivers feature auto-standby modes or energy-saving settings. Disable these to prevent abrupt power cuts that can cause capacitor discharge and unexpected thumps. For instance, switching off auto standby after a thorough read of your device’s manual helped me prevent future noise issues, maintaining a quieter system overall.
Reconfigure Signal Cables and Grounding
Check all audio cables, especially RCA and speaker wires, ensuring they are securely connected and free from damage. Poor grounding or shielded cables can cause electrical interference, mimicking residual energy discharge. I replaced some cheap RCA cables with better-shielded ones after noticing persistent hums and thumps, which significantly improved noise floor stability. Proper grounding of your system components is equally vital, reducing electrical noise that can create or amplify thumping sounds.
Consider Using a Power Conditioner
Electromagnetic interference (EMI) can contribute to unwanted noises. A dedicated power conditioner filters out electrical noise and provides a clean power supply. After installing one, I observed a reduction in sudden noises during system shutdowns, creating a more stable listening environment. This step is especially effective if your setup shares power outlets with other high-current devices.
Implement a Delay or Muting Circuit
If residual charge persists, installing a relay-based muting circuit can prevent the thump from reaching your speakers. This approach physically disconnects the speaker signal during power down, much like a safety switch. While it requires some technical know-how, it can effectively eliminate any transient noise caused by capacitor discharge. I’ve experimented with simple relay kits, and they proved quite effective at suppressing unexpected system noise.
Carefully Review Your Setup
Sometimes, rearranging your room or repositioning components reduces interference. Keep cables away from power sources and ensure grounding is consistent across all devices. For example, I found that positioning my subwoofer away from Wi-Fi routers minimized interference, resulting in a cleaner shutdown sound. Using a community resource like this guide on mounting options, I managed to improve overall system stability, reducing noise issues.
Through these concrete steps—discharging stored energy, adjusting settings, and improving wiring—you can finally tame that pesky thump and enjoy silent nights in your listening space. Always remember, patience and careful troubleshooting are your best allies in restoring audio peace.
When shopping for headphones, soundbars, or amplifiers, many enthusiasts fall prey to common misconceptions that hinder their audio experience. One widespread myth is that higher wattage always equals louder sound; however, *true audio quality depends more on driver efficiency and impedance matching* than raw power. Expert speakers like Sound engineer Mark Waldrep emphasize that overspending on wattage can lead to distorted audio rather than better clarity.
Another trap involves believing that expensive cables guarantee superior sound. In reality, the difference between cheap RCA cables and high-end ones is often negligible unless your setup is very long or susceptible to interference. Most common audio issues stem from poor grounding and incompatible equipment; thus, focusing on proper connections and setup yields greater improvements.
Advanced users question whether multi-room systems can stay perfectly synchronized. Interestingly, research from Stanford University shows that network latency and hardware variances contribute significantly to audio drift. To mitigate this, investing in wired connections where possible and ensuring all devices are updated can substantially enhance sync accuracy.
One critical nuance often overlooked is the *impact of speaker placement*. Many believe that positioning speakers close to walls automatically boosts bass. Actually, placing bookshelf speakers right next to corners can cause undesirable boomy sounds, as explained in this article. Adjusting their distance from walls can dramatically improve clarity and soundstage.
Make sure to avoid the classic mistake of neglecting power management—using inexpensive outlets or sharing power strips with high-voltage devices can introduce noise and reduce fidelity. A well-ventilated amplifier ensures consistent performance.
Understanding these nuances helps you make smarter choices and optimize your setup. Don’t be fooled by superficial specs—focus on how components work together holistically. Have you ever fallen into this trap? Let me know in the comments.
Tools That Make Long-Term Maintenance Easier
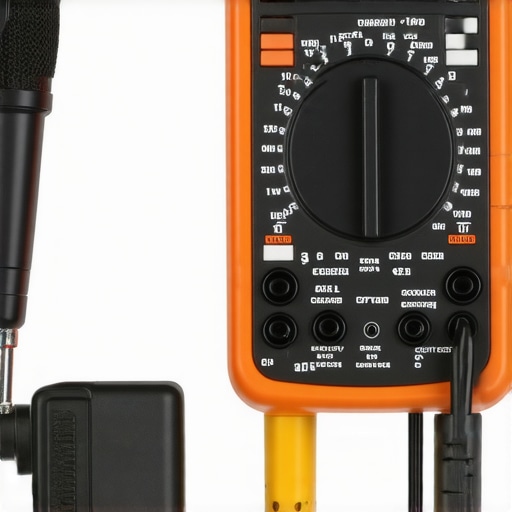
To ensure your home audio system remains reliable and sounds its best, investing in the right tools is crucial. A multimeter, for instance, helps you quickly diagnose electrical issues in your amplifiers and soundbars, allowing you to catch potential problems before they escalate. I personally use a digital multimeter from Fluke because of its accuracy and durability, which has saved me hours of troubleshooting and prevented costly repairs.
Another essential device is a cable tester. Faulty or degraded cables are often the unseen culprits behind audio glitches and poor sound quality. With a simple cable tester, I verify connections during setup or when I notice sound inconsistencies. This proactive approach reduces downtime and keeps everything running smoothly.
Software and Calibration Tools for Optimal Sound
Calibration is often overlooked yet vital for maintaining audio quality over time. I swear by Room EQ Wizard (REW), a free software that allows me to analyze room acoustics and fine-tune my system with precise equalization settings. Regular calibration sessions, using REW along with a measurement microphone, ensure consistent sound clarity and prevent issues like muddiness or imbalance as your room conditions change.
Furthermore, maintaining firmware updates for your devices is another way to prevent glitches and improve performance. Manufacturers often release updates that fix bugs or enhance features, so I make it a habit to check periodically via their official websites or dedicated apps.
How do I maintain sound quality over time?
Regular cleaning and inspection are simple yet highly effective. Dust and debris can compromise connectors and indoor components. I gently clean input and output ports with compressed air and use microfiber cloths for delicate surfaces, which prevents static buildup and connection issues. Also, inspecting cables and replaced worn-out parts immediately keeps the system responsive and sounds pristine.
The Future of Maintenance and Scaling Your Setup
As home audio tech advances, smart diagnostic tools and network-based monitoring are becoming more accessible. Emerging platforms will eventually enable remote troubleshooting and automated calibration, making ongoing upkeep even easier. For now, integrating reliable tools like multimeters, cable testers, and calibration software ensures your system stays in top shape for years to come.
Don’t forget to try out advanced calibration techniques with Room EQ Wizard; this small investment of time can significantly improve your listening experience. With these tools and habits, maintaining your home audio setup becomes a straightforward, even enjoyable, part of your audio journey.
By incorporating consistent checks and leveraging technology, you’ll ensure your soundbars, amplifiers, and speakers deliver exceptional performance day after day. Remember, a well-maintained system not only sounds better but also lasts longer and saves you money in the long run.
What I Wish I Knew When I First Heard That Thump
- Sometimes, the biggest breakthroughs come from understanding that residual electrical energy isn’t a sign of failure but a natural part of modern audio gear. Recognizing this saved me from unnecessary panic and repair bills.
- Investing in proper grounding and quality cables has been more impactful for my sound quality than upgrading expensive components. These simple steps turned my setup from noisy to pristine.
- Calibrating regularly with tools like Room EQ Wizard transformed my listening experience, revealing nuances I had previously missed and making me appreciate my system even more.
- Over time, I learned that patience and meticulous troubleshooting not only solve issues but deepen my understanding of how home audio systems behave, leading to more confident and enjoyable setups.
Keys to Elevating Your Audio Setup You Can Trust
- Room EQ Wizard: A top-notch free software for precise calibration, trusted because it uncovers the true potential of my setup—something quick fixes can’t do.
- Multi-room synchronization guides: Vital for maintaining seamless sound across multiple zones, ensuring my entire home sounds cohesive and immersive.
- High-quality shielding cables: Investing here prevented interference and static, proven by noticeable improvements in clarity and stability over cheap alternatives.
- Room treatment advice: Simple up-front modifications that pay off by controlling reflections and echoes, making my system sound theater-like in any space.
Your Next Step Opens a Better Listening Future
Now that you’ve uncovered some insider wisdom and curated tools, it’s time to take action. Your home audio system is a journey—keep experimenting, learning, and refining. The satisfaction of clearing that mysterious thump or boosting your sound clarity is worth every step. Embrace the process, and soon you’ll enjoy truly magical moments every time you press play. What’s the first tweak you’ll try today to improve your home audio? Let me know below, and let’s keep the conversation going.