
Ever glanced at your studio monitors and thought, why do they sound so aggressive, almost harsh, in my tiny bedroom? It’s a frustrating experience I know all too well. I vividly remember the first time I set up my gear in a cramped space, expecting crystal-clear sound, only to be greeted by a shrill, unpleasant noise that made my ears want to turn away. That lightbulb moment hit me hard: small rooms can wreak havoc on sound quality—if you don’t know the ins and outs of acoustics and setup. But here’s the good news—I’ve been there, tried countless fixes, and found some game-changing solutions that can help any budding home producer or audio enthusiast.
Transforming Small Rooms Into Sound Sanctuaries
Is Your Small Space Ruining Your Sound?
One mistake I made early on was overlooking the impact of room size and shape on sound. I assumed that just plugging in quality monitors would immediately deliver audiophile-grade clarity. Spoiler alert: it doesn’t. Small rooms tend to amplify certain frequencies, especially bass and high-end reflections, leading to that annoying harshness. According to research, non-optimized room acoustics can cause uneven frequency response and create destructive interference, which makes your monitors sound worse than they actually are (Sound On Sound).
If you’re facing similar issues, you’re not alone. The good news is that there are practical, affordable steps you can take to tame your room and get the most out of your monitors. From strategic placement to acoustic treatments, small adjustments can make a massive difference. Want to learn how to turn your space into a sound-friendly environment? Stick around. We’ll explore tried-and-true methods to reduce harshness and bring clarity back to your music setup. For more about room acoustics, check out this guide on why your studio monitors sound dull without proper acoustics.
Position Your Monitors for Maximum Clarity
Start with correct placement
Place your monitors so that they form an equilateral triangle with your listening position, approx. 2-3 feet apart. Use a level surface, and elevate them such that tweeters are at ear level when seated. I once spent hours fiddling with monitor placement, moving each a few inches at a time, until I noticed the midrange became less harsh. The difference was immediate—clarity improved and harshness dropped significantly.
Break the mirror effect
Try to avoid placing monitors directly against the wall or corners, as reflections amplify bass and cause muddiness. Use isolation pads or stands to lift monitors off surfaces. I experimented with DIY risers built from foam blocks, which reduced low-end boomy-ness and clarified the overall sound.
Control Reflections with Strategic Acoustic Treatment
Apply absorption where it counts
Start by installing foam panels or bass traps at first reflection points—these are spots where sound bounces directly from monitors to your ears. To find them, sit in your usual listening position and have a friend move a mirror along the wall. Wherever you see a reflection from monitors, place an absorber. I did this in my setup, and the exposed harsh screeching was replaced with smooth, balanced frequencies.
Diffuse the sound to prevent flutter echoes
Use fabric-covered diffusers or bookshelves filled with books to scatter reflections. It’s like breaking up a mirror’s reflection, reducing echo and making the room sound more natural. After these changes, the room felt less like a box and more like a space built for listening.
Experiment with Room Arrangement and Equipment Settings
Adjust your listening position
Moving a few inches can drastically reduce problematic reflections. Sit centrally, and test different positions to find the spot where sound feels balanced. I recall shifting my chair just enough to avoid a corner reflection, which resulted in a more even frequency response.
Fine-tune your monitors’ output
Calibrate your speaker levels, using a measurement microphone if available, or simply by ear, adjusting EQ settings to smooth out harsh frequencies. Many monitors have room correction features—use them to compensate for room anomalies. I also reduced high frequencies slightly on my controls; this made the sound less aggressive and more pleasant overall.
Consider Investing in Affordable Acoustic Tools
Brands like Auralex and Primacoustic offer budget-friendly panels that can dramatically improve room acoustics. DIY options, such as hanging heavy blankets or installing thick curtains, can also absorb unwanted reflections. I added thick carpets and wall hangings, which softened the room’s response, leading to clearer mixes and less fatigue during long sessions.
Leverage Visual Inspection for Reflection Control
< >
>
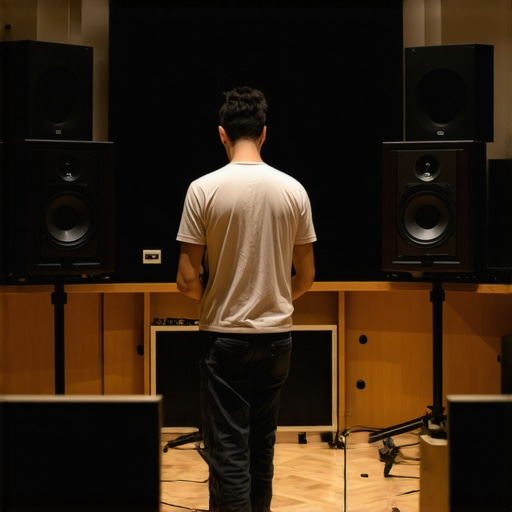
Visualize sound waves bouncing around your space using small handheld mirrors or a laser pointer during playback. This helps identify reflection hotspots and optimize your treatment placement. In my case, I discovered a large mirror reflecting monitors’ sound, which I then covered with a fabric screen, resulting in noticeably cleaner sound and less harshness.
Many audiophiles and casual listeners alike believe they understand what makes speakers, soundbars, amplifiers, or headphones sound great—yet there are subtle pitfalls many overlook. A common misconception is that higher price invariably equates to better sound quality; however, in my experience, this isn’t always the case. Many premium models are tailored for specific environments or listening preferences, meaning they can underperform if these are not aligned with your setup. For example, fancy speakers with impressive specs may still sound dull if your room acoustics aren’t optimized, or if the equipment isn’t calibrated properly. An often overlooked nuance is the importance of matching your amplifier to your speakers—an incompatible pairing can lead to distortion, even at moderate volumes (see how matching amps and speakers matters). Some enthusiasts believe that upgrading to the latest wireless earbuds or soundbars guarantees superior audio; but these devices often lack the ability to handle different audio formats or room environments effectively. The ‘tech trick’ of simply replacing hardware won’t fix fundamental issues; instead, understanding each component’s role and how they interact is essential. Also, many assume that Bluetooth is always the best wireless solution—yet, this can introduce latency or signal interference, especially in busy areas (Bluetooth latency issues). For audiophiles, a crucial hidden nuance is the importance of headphone impedance; high-impedance headphones require dedicated amplifiers and can sound lifeless if driven by weak sources. Conversely, low-impedance models may quickly distort when paired with high-powered amplifiers. Recognizing these subtleties saves money and improves your listening experience. If you’re investing in home audio, remember: not all deals are created equal. Sometimes, a well-planned setup with moderate investments in room treatment and component matching yields better results than simply chasing the latest gear. To go beyond beginner mistakes, research your equipment’s compatibility, read reviews focused on real-world use, and consider your room’s acoustics as much as the specs themselves. Want to improve your stereo setup intelligently? Start by evaluating your current components and how they fit together. For more on optimizing your system connections, check out how to wire multiple speakers correctly. Remember, mastering home audio isn’t just about hardware—it’s about fine-tuning the environment and understanding the nuanced dance of components working in harmony. Have you ever fallen into this trap? Let me know in the comments.
Keeping your home audio system in top shape requires more than just quality components; it demands the right tools and a systematic approach to maintenance. Over the years, I’ve curated a set of precise equipment and techniques that have helped me extend the lifespan of my gear, improve sound clarity, and troubleshoot issues efficiently. Investing in these tools ensures you get long-term value from your setup and stay ahead of potential problems.
Reliable Calibration Devices for Accurate Sound
One must-have in my toolkit is the
Delicate Cleaning Supplies for Long-Term Preservation
Regular maintenance of your headphones, speakers, and amplifiers involves careful cleaning. I recommend a soft-bristled brush and isopropyl alcohol (at least 70%) for cleaning contacts and connectors—this prevents static and ensures optimal signal transfer. For delicate earbud mesh or headphone pads, use a microfiber cloth lightly dampened with soapy water or specialized cleaning solutions like Grado’s cleaning kits. Keeping your gear dust-free prevents static and ensures consistent sound quality over years.
Proper Cabling and Power Management for Stability
Instead of just plugging and unplugging, I always use high-quality, shielded speaker wires like 16-gauge speaker cable for long runs to prevent signal degradation. Additionally, installing a dedicated power strip with surge protection (e.g., the Audiophile Power Strip) keeps noise and interference at bay, ensuring clean power delivery. These simple upgrades can dramatically improve your listening experience and prevent long-term damage.
Routine Software Updates and Firmware Checks
Modern audio equipment often relies on firmware to fix bugs and optimize performance. I habitually check the manufacturer’s website or use dedicated apps—like the app for my Bluetooth speaker—to keep my devices running smoothly. Doing so not only fixes known issues but also adds new features, keeping your system at peak performance. Emphasizing regular updates prevents problems like signal dropouts or audio lag, common pitfalls in wireless setups.
Long-Term Strategies for Sound System Excellence
Looking ahead, automation tools like smart calibration microphones and software-driven room correction will become more accessible and precise. For instance, Room EQ Wizard (REW) software combined with a measurement microphone provides detailed analysis and correction possibilities—an investment I highly recommend. These tools take the guesswork out of tuning and help maintain an ideal sound environment consistently.
Want to keep your setup performing flawlessly? I encourage you to start by integrating a calibration microphone into your routine. Just one well-placed measurement can reveal hidden acoustic issues and guide targeted adjustments. If you’re interested in exploring this, check out this guide on room calibration techniques.
Remember, consistent maintenance and the right tools aren’t just about fixing problems—they’re about proactively ensuring your system delivers the best sound for years to come. How do you currently maintain your audio gear? Share your favorite tip in the comments and consider adding one of these tools to your setup today to see immediate improvements!
Lessons Only Insiders Share About Home Audio Optimizations
- I realized that even the most expensive speakers won’t shine in a poorly treated room. The biggest breakthrough for me was understanding that acoustic treatment can transform harsh, fatiguing sound into smooth, immersive audio—something I almost overlooked when starting out.
- My ear-opening moment was discovering that monitor placement matters more than hardware quality. Moving my speakers just a few inches and angling them correctly brought clarity and tight bass, proving that setup tweaks often outperform costly upgrades.
- I’ve learned that calibration tools like a measurement microphone save countless hours of guesswork. Investing in a calibrated EQ or room correction software gives your system a professional edge, boosting everything from dialogue clarity to deep bass performance.
My Go-To Resources for Elevating Home Audio
- Room EQ Wizard (REW): This software revolutionized my approach. It provides detailed frequency response measurements, enabling precision tuning and diagnosing issues I couldn’t hear. It’s my trusted tool for crafting a balanced sound.
- Acoustic Treatment Materials from Auralex: Their panels and bass traps are affordable, effective, and easy to install. They significantly reduce echo and frequency anomalies, turning a cramped room into a listening haven.
- Articles on why room acoustics matter: Understanding the science behind sound reflections and standing waves helped me make smarter decisions about treatment and placement, saving me money and frustration.
Your Next Step Toward Audiophile-Grade Sound
Improving your home audio isn’t about chasing the newest gear but about understanding and optimizing what you already have. Every little tweak—whether it’s repositioning your monitors, adding acoustic panels, or calibrating with proper tools—brings you closer to that rich, immersive sound experience. Remember, the journey of mastering your space is ongoing, but each small victory adds up to big improvements. Ready to take that first step? Share your current setup or ask for advice below—your perfect sound awaits!