
Have you ever sat in front of your studio monitors, headphones deep into your ears, and felt a strange sense of… disappointment? Maybe you’ve spent hours tweaking your setup, only to find the sound flat, uninspiring, and miles away from the lush, vibrant tones you hear from high-end Hi-Fi speakers in a showroom. That moment of realization can be almost deflating, especially after investing so much into your audio gear.
Why Your Studio Monitors Just Don’t Hit the Mark
From my own experience, I used to think that all speakers, especially those labeled as “studio” or “professional,” would deliver accurate, flat sound that was perfect for mixing. But what I discovered was that they often lack the engaging qualities that make music or movies truly immersive. Why is that? The truth is, studio monitors are designed with a specific purpose in mind: accuracy and neutrality, not entertainment or warmth. They aim to reproduce sound as transparently as possible, revealing every flaw rather than smoothing things over.
Contrast that with Hi-Fi speakers, which are crafted to deliver a pleasing listening experience—boosted bass, smooth highs, a touch of coloration that feels more musical and less clinical. The difference is like comparing a medical diagnostic tool to a luxurious spa treatment. Both are valid, but they serve different needs.
This distinction is crucial because many newcomers make the mistake early on—assuming that studio monitors should sound exciting or full with the same richness as their favorite hi-fi gear. I did this myself, and honestly, it led to frustration until I understood the true role of studio monitors. If you’re feeling unsatisfied with your setup, it might be because you’re expecting them to perform like Hi-Fi speakers, which they weren’t designed to do.
Understanding this means you can better tune your expectations and find ways to improve the listening experience without overhauling your gear. Things like speaker placement, room acoustics, and even adding a subwoofer can bridge the gap. For example, if you’re battling harsh high frequencies or boomy bass, check out these high-end speakers that naturally deliver deeper bass without added gear.
So, if you’re nodding along, thinking, “Yes, that’s exactly my problem,” you’re in the right place. Today, we’ll explore not just why your monitors sound so boring, but how to turn that flat, sterile sound into something more lively and satisfying—without wasting your hard-earned money or unnecessary upgrades. Ready to dive into the practical steps that bring your audio to life? Let’s go!
Optimize Your Room for Better Sound
Start by assessing your listening environment. Hard surfaces reflect sound, causing harsh reflections, while soft furnishings absorb certain frequencies. Use rugs, curtains, or acoustic panels to reduce unwanted echoes. I once placed a thick rug and some foam panels in my small room, which immediately softened the harshness and expanded the soundstage, making my monitors sound more lively.
Adjust Speaker Placement for Smarter Sound
Find the Sweet Spot
Position your monitors so they form an equilateral triangle with your listening position. Keep them at ear level and about 3-4 feet apart. I experimented by moving my monitors closer and further, noticing how the imaging improved when I sat precisely at 38 inches from each speaker—akin to tuning a camera until the focus is just right.
Avoid Room Boundaries
Place speakers away from walls and corners to prevent excessive bass build-up. If placement is constrained, consider adding bass traps or EQ to compensate. I once pushed my monitors into the corners, which resulted in exaggerated bass; a few centimeters back made the bass tighter and more controlled.
Implement EQ and Calibration Techniques
Use room correction software or manually adjust EQ to compensate for room anomalies. Many monitors lack built-in EQ, so invest in a calibrated audio interface or external EQ unit. I applied gentle boosts and cuts based on measurements, which turned my flat monitors into more engaging speakers, revealing details I hadn’t heard before.
Upgrade and Enhance with Subwoofers and Amplifiers
Adding a subwoofer can fill in the deep bass that monitors often lack. Choose a sub that complements your monitors—some high-end speakers deliver impressive bass without one, like these high-end speakers. For power, pairing your speakers with a suitable amplifier, such as those from this list, ensures they reach their full potential.
Manage Interference and External Factors
Reduce electromagnetic interference and floor vibrations. For instance, I learned that my phone kept pinging my monitors, causing noise until I turned it off or moved it away. Additionally, if your monitors pick up signals or humming, consider using shielded cables or placing them on isolation pads. I installed isolation pads under my monitors, which eliminated rattling and clarified the sound.
Fine-tune for Your Specific Needs
Finally, trust your ears. Play familiar music and tweak placement, EQ, and settings until it sounds right. Remember, system tuning is an iterative process—what worked in my space may differ for you. Patience and experimentation are key to turning your flat monitors into lively, engaging speakers without costly upgrades.
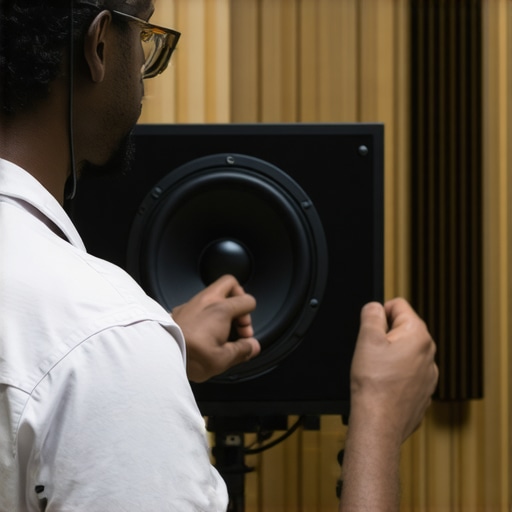 Many audiophiles and home audio enthusiasts often fall prey to common misconceptions about headphones, amplifiers, soundbars, and speakers. While it’s easy to get distracted by flashy features or high wattage ratings, the real depth lies in understanding nuanced details that are frequently overlooked. For instance, most people believe that pairing a high-power amplifier with any set of speakers guarantees better sound, but in reality, matching impedance and ensuring adequate damping control are critical for clarity and bass control. Using an excessively powerful amp on low-sensitivity speakers can lead to distortion and damage, counterintuitive to popular belief.
Myth of the More Power, The Better
Contrary to common assumption, louder isn’t always clearer or better. Experts suggest that the reliability and quality of the amplification system matter more than raw wattage. An underpowered or mismatched amplifier can cause clipping, which not only degrades sound quality but also risks damaging sensitive components. Always check the matching specifications before upgrade decisions, as overestimating your gear hampers performance more than underutilizing it.
Similarly, many assume that soundbars can replace dedicated speakers seamlessly. While soundbars are convenient, their placement, driver quality, and the room’s acoustics hugely influence their effectiveness. A common trap is positioning a soundbar too close to a wall or in a corner, causing exaggerated bass and echoey voices. For better clarity, consider proper placement and acoustical adjustments—sometimes enhancing with a subwoofer or room treatment makes all the difference. Discover more about this here.
Why do some high-end headphones still sound disappointing?
This question often puzzles seasoned listeners. High-quality headphones can be compromised by a variety of factors: poor cable connections, inadequate fit, or even the source device’s low-quality audio output. Even the best drivers won’t perform well if the damping and seal aren’t optimal. It’s a mistake to assume that a hundred-dollar upgrade alone will fix sound issues; rather, paying attention to fit, the quality of the cable, and proper amplification can unlock much better sound. Also, beware of false
Maintaining your audio equipment isn’t just about avoiding breakdowns; it’s about ensuring consistent, high-quality sound over years of use. I personally rely on a few specialized tools and methods that have proven their worth in my setup, and they can do the same for you. Regular upkeep can prevent costly repairs, improve your listening experience, and extend the lifespan of your gear.
Invest in a DeoxIT Spray for Contacts
Over time, connectors, switches, and potentiometers can develop oxidation, leading to crackles, loss of channels, or diminished sound clarity. I use DeoxIT to clean these contacts. A quick spray and some gentle movement of knobs or plugs restore their conductivity. It’s an inexpensive way to maintain the inner health of your gear and guarantees reliable performance during critical mixing or listening sessions.
Use a Digital Audio Level Meter for Calibration
Precision matters when calibrating speakers and amplifiers. I highly recommend a professional-grade digital level meter like the TT-18 from Class 3. This stunning device helps you balance volume levels accurately and spot peaks that could cause distortion. Regular calibration ensures your sound remains consistent, whether you’re editing tracks or enjoying movies at home. It’s a small investment that pays dividends in sound quality.
Maintain Room Acoustics with Foam and Diffusers
Beyond the gear itself, the listening environment plays a huge role. I always keep a set of acoustic foam panels and diffusion diffusers handy. When I notice sound becoming dull or overly harsh, a quick rearrangement or addition of these panels dramatically improves clarity and imaging. Keep in mind, room treatment isn’t a one-and-done thing; periodic adjustments keep your setup singing. For a detailed guide, see this article.
Handle Cables with Care and Proper Storage
Cables are the arteries of your audio setup. I store mine coiled with Velcro ties and avoid tight bends that can degrade the copper wiring over time. Regular inspection for wear or corrosion ensures that connections remain clean and secure. A damaged cable not only hampers sound but can also cause intermittent noise or even damage your gear. Remember, investing in quality cables and keeping them organized simplifies maintenance and prevents unexpected failures.
Predict Future Trends and Staying Ahead
As digital audio technology evolves, tools like hardware-assisted room correction software and smart patching systems are becoming more accessible. I anticipate that automated calibration devices will become standard in professional setups, making long-term maintenance even easier. Staying updated with these innovations ensures your gear stays compatible and performs optimally in the years ahead.
How do I keep my sound system performing well over time?
Consistency in maintenance, using the right cleaning agents like DeoxIT, regular calibration with a digital level meter, thoughtful room treatment, and careful cable management are key. Additionally, schedule periodic check-ups—just like with a car—to replace worn components proactively. Implementing these practices now will save you headaches and tremendous costs later. For instance, did you know that adjusting your subwoofer placement can significantly improve punch and clarity? Check out this guide for expert insights.
Try incorporating a dedicated cleaning routine with DeoxIT and see how much cleaner and more reliable your connections become. Remember, a well-maintained system isn’t just about longevity—it’s about consistently stellar sound quality that makes every listen a pleasure.
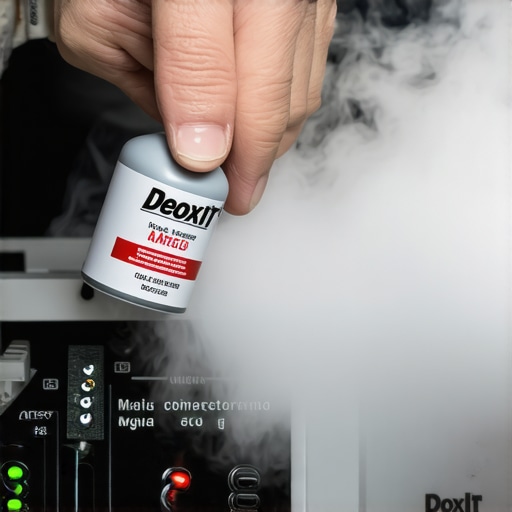
Image description: A hands-on shot of a technician cleaning audio connectors with DeoxIT spray, emphasizing careful maintenance practices for audiophile equipment.
What I Wish I Knew About Sound Before Diving Deep
- Listening to high-end equipment taught me that true audio magic happens when I disregard the marketing hype and focus on how gear interacts with my room and listening habits. Real clarity comes from understanding the synergy, not just specs.
- The most undervalued aspect of audio setup is room acoustics; investing in simple treatments like foam panels or placement tweaks can elevate your sound beyond expensive upgrades.
- Patience is underrated—tuning a system is an ongoing process that rewards careful experimentation. Giving yourself time to learn what works transforms frustration into mastery.
- Promises of bent frequencies from fancy cables or gold-plated connectors are often illusions—trust your ears, not advertising claims.
- Regular maintenance, like cleaning contacts with DeoxIT, isn’t just about longevity; it ensures your sound remains crisp and vibrant, preventing subtle degradations that rob energy from your music.
Tools and Resources That Changed My Perspective
- Room EQ Wizard (REW): This free software allowed me to visualize my room’s frequency response and make targeted adjustments, turning flat monitors into lively speakers.
- Class-D Digital Level Meter: Precision calibration with trusted tools ensures balanced sound across all channels, especially essential for home theater setups.
- Acoustic Treatment Guides by Real Homes Audio: Practical advice on simple room treatments that I applied without breaking the bank but gained huge clarity benefits.
- Trusted Brands and Forums: Engaging with passionate communities exposes you to real-world experiences, helping avoid costly mistakes and discover hidden gems.
Your Next Step Toward Sonic Clarity
Embrace the excitement of refining your sound system—small adjustments can unlock a world of richness and depth you never knew your gear could offer. Don’t settle for flat or uninspiring audio; the journey is well worth the effort. Remember, every tweak brings you closer to an immersive auditory experience that elevates your favorite tunes, movies, and even daily conversations. Start today by experimenting with placement or calibration, and see where your curiosity leads you. Your perfect sound awaits—are you ready to discover it?