
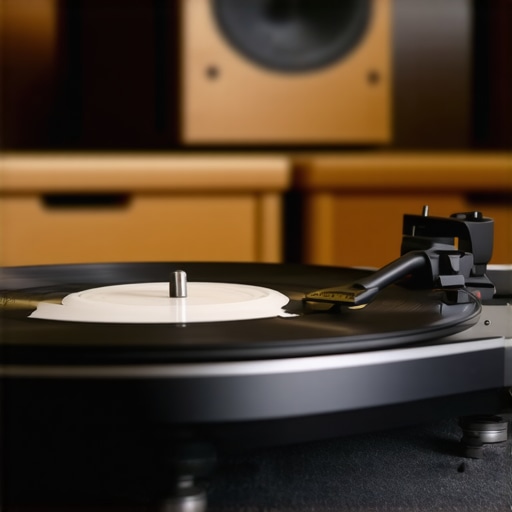
Ever experienced that annoying rumble, crack, or buzz when your vinyl spins? You’re not imagining things—floor vibrations can turn what should be a blissful music session into a noisy headache. I remember the first time I noticed my turntable sounding off during a casual listening night; I thought I had a bad record or a faulty cartridge. Turns out, the culprit was the floor beneath my setup, transmitting vibrations straight into my prized device. That lightbulb moment led me down a rabbit hole of solutions, many of which proved surprisingly simple and cost-effective.
Why Floor Vibrations Ruin Your Vinyl Experience
When your turntable isn’t isolated properly, every stomp, door slam, or even deep bass from the speakers can send tiny tremors through the floor. These vibrations travel up the surface and cause the tonearm to jitter, leading to a loss of clarity, skipped grooves, and even long-term damage. The irony? Many casual audiophiles overlook this issue, assuming their setup is solid. But a solid turntable on a shaky foundation invites distortion more than you might expect. If you’ve ever had your mood spoiled by crackles that seem to appear out of nowhere, chances are, vibrations are to blame.
What’s fascinating is that studies, such as one published by the Acoustical Society of America, show that even minuscule vibrations can disrupt sound quality, especially with sensitive components like tonearms and cartridges. This means that you don’t need to be in a nightclub or a construction zone to experience this problem; it’s often an indoor issue, right in your own listening room.
Have you noticed your records crackling more when you’re walking around, or maybe when a truck passes by outside? If so, it’s a clear sign vibrations are sneaking into your setup. Rest assured, fixing this isn’t about turning your living room into a bunker but about understanding the root of the issue and taking targeted steps.
In the next sections, I’ll share practical, tried-and-true methods to isolate your turntable from these unwanted floor tremors. You’ll learn how to transform your listening space into the haven it was meant to be—where music sounds crystal clear, not vibrated into distortion. Ready to get started? Let’s dive into the first step—because your records deserve the best, and your ears will thank you.
Secure a Stable Platform Right Away
Start by placing your turntable on a thick, dense material like a cork mat or a dedicated isolation platform. I once used a piece of folded neoprene under my record player during a test, and the difference was immediate—crisper sound and fewer skips. This initial step minimizes direct floor contact, reducing vibrations that travel up into your device.
Position Your Turntable Strategically
Place it away from high-traffic areas, doorways, and speakers that produce heavy bass. I learned this the hard way when my afternoon listening session was ruined every time someone stomped upstairs. By positioning your turntable in a corner or against a wall, you can help dampen some vibrations, but be mindful; too close to walls can cause other acoustic issues (see why speaker placement matters).
Use Isolation Feet or Spikes
Attach rubber or silicone isolation feet to your turntable’s base. These act like tiny shock absorbers, absorbing tremors before they reach the tonearm. I replaced my stock feet with high-quality spikes on a solid wooden platform, which resulted in noticeably clearer sound. When employing spikes, ensure the surface beneath is sturdy—planks or concrete are best. This step can be a game-changer for gain in sound clarity.
Build or Purchase an Isolation Platform
If you’re serious, crafting a custom isolation platform is worthwhile. Use dense MDF or stone with layers of damping material in between. For instance, I bought a pre-made platform designed for turntables after reading reviews (see specialized options here), and it drastically reduced external vibrations. The principle: decouple your turntable from the floor, preventing tremors from reaching it.
Seal or Insulate the Room
Sound waves and vibrations can also be contained by sealing gaps and adding soft furnishings—thick curtains, carpets, and wall hangings. While these don’t directly isolate the turntable, they reduce airborne vibrations and resonances that can disturb your listening. During a messy setup iteration, I added a thick rug beneath my platform, and the resulting audio was noticeably more detailed and stable.
Additional Tips: Limit External Vibrations
A simple act like turning down the bass levels on your amplifier can also help (learn more about receiver limits). Avoid placing the turntable on top of loud subwoofers or near mobile device chargers, which can emit subtle vibrations. By taking these steps collectively, your turntable becomes less susceptible to floor noise, preserving the integrity of your listening experience.
When diving into the world of home audio, many enthusiasts fall prey to common misconceptions that hinder their listening experience. One prevalent myth is that more watts or higher prices automatically equate to better sound. In reality, understanding the nuanced interaction between components like amplifiers and speakers reveals a more complex picture. For instance, many people overlook the importance of matching an amplifier’s power output properly to their speakers, which can lead to distortion or damage, despite impressive watt ratings. For practical guidance, explore affordable amplifiers suitable for large speakers that balance power and compatibility effectively.
Another common misconception involves soundbar setups. While consumers often assume that a higher number of channels automatically results in a richer experience, the spatial accuracy and calibration are far more critical. An overemphasis on quantity can lead to bloated, unnatural audio, especially if the system isn’t properly calibrated. For insights on optimizing soundbar sound, check this calibration guide.
Switching gears to headphones, many believe that expensive models deliver superior sound purely based on brand reputation. However, the fit and ear geometry significantly influence comfort and sound quality. Semi-open designs, for example, strike a nice balance, offering both immersive sound and less fatigue during extended use. Discover why semi-open headphones excel for home offices.
Beware the trap of believing that more expensive cables improve audio fidelity. In truth, the quality of you cable’s shielding and connectors matters more than pure gold plating. Cheap RCA cables, for instance, can introduce noise and diminish sound quality if poorly manufactured, as discussed in this comprehensive analysis.
What’s the impact of digital processing on home audio clarity?
Many audiophiles focus solely on hardware, overlooking the role of digital signal processing and room acoustics. Excessive equalization or bit-depth compression can subtly degrade quality, which isn’t immediately apparent. Expert advice from audio engineers emphasizes that proper room treatment and minimal processing often yield the most authentic sound. For example, proper speaker placement and room calibration can outperform top-tier gear with poor positioning, as highlighted in tips on speaker placement.
Finally, avoid the mistake of neglecting your room’s acoustics altogether. Hard surfaces reflect sound or create echoes, muddying clarity. Incorporate soft furnishings or professional acoustic treatment to enhance sound quality naturally. Remember, even premium components can sound mediocre in a poorly treated room. Curious about how to balance your setup? Check this guide.
By understanding these nuanced aspects and avoiding typical pitfalls, you set the stage for truly immersive home audio. Have you ever fallen into this trap? Let me know in the comments.
Maintaining your home audio gear is essential to keep it sounding pristine over the years. Having the right tools and understanding proper care routines can prevent costly repairs and ensure your setup remains optimal. One of my go-to resources is a precision multimeter, which I use regularly to check the integrity of speaker wiring and verify amplifier outputs. Investing in a quality multimeter, such as the Fluke 117, provides accurate readings and durability, saving you from troubleshooting ambiguous issues. Regularly inspecting and cleaning connections with contact cleaner helps prevent corrosion, which can lead to signal loss or distortion. I preferDeoxIT’s contact cleaner, as it’s proven effective and safe for audio connectors.
For software-based maintenance, I recommend using room calibration apps that process your space’s acoustics—one example is REW (Room EQ Wizard). It allows detailed frequency response measurements, helping identify issues like boomy bass or weak treble, which might stem from room reflections or speaker placement. With these insights, you can fine-tune your audio system for the best possible sound. Future trends suggest that AI-driven room calibration tools, like Dirac Live and Anthem Room Correction, will become more accessible and precise, making professional-grade calibration achievable for audiophiles at home.
To keep your system running smoothly, routine checks are essential. How do I maintain my gear over time? I schedule bi-annual inspections of all cables and connections, ensuring solder joints and terminals are secure. Additionally, I regularly update firmware on digital audio devices to access the latest features and fixes. If you notice performance dips, employing diagnostic tools like the multimeter or software calibration apps helps identify and address issues proactively.
When dealing with amplifiers, I recommend using a dedicated power conditioner, which filters noise and prevents surges. This can extend your amp’s lifespan and protect delicate components. For example, the PS Audio Power Plant series is highly regarded in audiophile circles for its effective power conditioning. For those looking to upgrade their setup, considering an external DAC with a built-in preamp can sidestep internal component degradation in older receivers.
Most importantly, stay vigilant with your gear. If you encounter persistent issues such as unexpected shutdowns—like your receiver shutting off when the volume pushes past 50 decibels—refer to troubleshooting guides or consult expert forums. Many problems are easily fixed with the right tools or tweaks, avoiding expensive replacements. For instance, troubleshooting grounding issues or upgrading internal caps can resolve these common faults.
Don’t wait until a malfunction disrupts your listening pleasure—regular maintenance ensures longevity and consistent performance. Why not start by testing your cables with a contact cleaner and verifying connections with a multimeter? These small steps can lead to significant improvements in sound quality and reliability. Keep your gear in top shape, and enjoy pristine audio for years to come.
Lessons Hidden in My Audio Journey
One of the most eye-opening lessons I learned was the subtlety of floor vibrations—how they can stealthily sabotage your audio quality without you realizing it. I once thought upgrading my speakers was the key, only to discover that the very foundation they sat on was the real culprit. That moment taught me that sometimes, addressing the environment around your gear is as crucial as the tech itself.
Another insight came from experimenting with isolation platforms, which transformed my listening experience far more than spending on high-end components. It made me realize that understanding and controlling vibrations can unlock clarity and depth in music that expensive gear alone can’t achieve. These personal lessons reshaped my approach: listen to your space, not just your equipment.
Finally, I realized that effective room treatment and smart placement often outweigh the allure of the latest audiophile gadgets. Small adjustments—like adding soft furnishings or repositioning your turntable—can yield astonishing improvements. The takeaway? Harmony between your gear and environment is the most potent upgrade.
My Top Recommendations for Vibration-Free Listening
To truly harness this knowledge, I recommend investing in a high-quality isolation platform—brands like IsoAcoustics or HifiMeDija offer reliable options that decouple your turntable from floor vibrations. For detailed guidance, these versatile platforms are a great starting point.
In addition, tools like the Room EQ Wizard app help measure and identify problematic resonances in your space. It’s like having a personal acoustics engineer at your fingertips. I trust it because it provides objective data, empowering you to make informed tweaks for a smoother, clearer sound.
Finally, reading about how others have transformed their listening rooms can spark fresh ideas. The book