
I remember the moment I realized I’d been chasing audiophile dreams that, frankly, didn’t need chasing. Sitting in my living room, fiddling endlessly with my high-end DAC, trying to squeeze just a little more clarity out of my music—only to realize that the difference was so subtle I had to strain to hear it. It was a lightbulb moment. I’d spent hours and hundreds of dollars chasing details that most ears just can’t perceive, especially in everyday listening environments.
Match Your Gear to Your Ears: When Is a Budget DAC Actually Enough?
In my experience, many people assume that a pricier DAC automatically means better sound. But here’s the thing: for 90% of listeners, a budget DAC delivers all the quality you need to enjoy your favorite tunes without frustration or disappointment. Whether you’re a casual listener or someone who enjoys tinkering, understanding where your
Start with a Clean Slate: Inspect Your Equipment
Before tweaking settings or investing in new gear, examine your existing setup. Check your cables for damage or loose connections—bad connections often cause muffled or distorted sound. If your speakers or headphones have visible dust or debris, clean them gently with a soft cloth. For example, I once found my headphone jack slightly dirty, which caused intermittent audio; a quick clean fixed the issue immediately. Regularly inspecting your gear ensures you’re starting from a solid foundation.
Adjust Your Position for Optimal Sound
Place Speakers at Ear Level
The positioning of speakers can make or break your audio experience. Aim to have your bookshelf speakers, for instance, at ear level when seated. Mismatched height often results in muddled vocals or weak bass. I once experimented by elevating my speakers on books, and the clarity improved dramatically—dialogues became sharper, and bass tightened.
Avoid Obstructions
Make sure your speakers are not blocked by furniture or objects; soundwaves need space to disperse freely. In my setup, a bookshelf speaker was initially hidden behind a plant, dulling the sound. Moving it to an open spot restored full vibrancy. For home theater systems, positioning your soundbar correctly—centered and unobstructed—ensures clear dialogue and immersive surround effects.
Tweak Your Settings for the Room
Equalize to Your Space
Use your receiver’s equalizer or a dedicated app to adjust bass, midrange, and treble. Rooms with lots of soft furnishings absorb bass, making it sound weak; hard floors reflect sound, creating harshness. During a recent room setup, I boosted the bass slightly while trimming treble, resulting in a balanced tone that filled the space without distortion. Small adjustments make a big difference.
Calibrate for Balance
Run calibration tools if available. Many receivers have auto-calibration features that analyze speaker levels and distances, optimizing sound automatically. When I first set up my system, running an auto-calibrate helped me avoid manual misconfigurations, saving hours of trial and error. If your equipment lacks this feature, manually adjust speaker volumes for even sound distribution.
Experiment with Acoustic Treatments
Sometimes, the room’s acoustic properties color your sound. Adding rugs, curtains, or wall panels can absorb or diffuse sound reflections. I added foam panels to my living room, noticing clearer vocals and tighter bass. For a more in-depth solution, consider using diffusers or bass traps, especially in larger or irregularly shaped rooms.
Test with Real Content and Fine-Tune
Use familiar media—your favorite song, a movie scene, or a podcast—to assess your adjustments. Listen critically; if certain frequencies dominate or vocals seem Lost, revert or further refine your settings. I remember tuning my bookshelf speakers while listening to a jazz track, making small tweaks until the cymbals sparkled and drums felt tight. Hands-on testing brings the setup to life.
Remember, small changes often lead to the biggest improvements. Don’t hesitate to experiment, and revisit your setup periodically, especially if you move to a new room or upgrade gear. For deeper fixes, exploring options like replacing faulty components or upgrading your amplifier can further enhance sound quality. Need help troubleshooting specific issues? Check this guide or explore battery replacements for portable devices.Many audiophiles fall into traps by taking common beliefs at face value. For example, the idea that expensive soundbars automatically provide superior surround sound overlooks the importance of proper placement and room acoustics. In reality, a well-calibrated budget system can outperform a high-end setup if the fundamentals are neglected.
Why do many audiophiles mistakenly believe that adding more equipment always yields better sound?
Often, it’s because of marketing myths that suggest bigger or more expensive means better. But seasoned enthusiasts know that pairing gear correctly and understanding room interaction are crucial. For instance, placing rear speakers at ear level or using acoustic treatments can significantly improve perceived sound quality, regardless of price point. One common mistake is ignoring impedance compatibility between speakers and amplifiers, which can lead to distortion or damage. External sources highlight that understanding the technical specifications prevents costly errors. Furthermore, many assume all headphones with high sensitivity are suitable for quiet environments, but without proper noise isolation, they may leak sound or let ambient noise interfere. Advanced users often recommend in-ear monitors for clarity and isolation, especially in noisy settings. Remember, dedicated troubleshooting—such as cleaning your headphones or replacing worn components—can make a notable difference. Overlooking these nuances can lead to persistent issues or unmet expectations. To deepen your setup knowledge, explore this detailed guide. Have you ever fallen into this trap? Let me know in the comments.
Keep Your System Running Smoothly with the Right Equipment and Methods
Maintaining your home audio setup over time requires a blend of proper tools, consistent routine, and a bit of technical know-how. I personally rely on precision cleaning kits like the audio-specific cleaning tools to keep connectors and ports free of dust and debris. These small but essential devices prevent static, distortion, and connection issues, ensuring your gear performs at its best for years.
Investing in a quality
calibration microphone such as the <<
Why Regular Checks Save You Time and Money
Routine inspections include visual assessments of cables, connectors, and speaker drivers—looking for signs of wear, corrosion, or damage. I check my speaker cones and crossover points quarterly, which helps me catch early signs of deterioration. For example, replacing worn foam surrounds in my vintage bookshelf speakers, guided by technical specifications and maintenance guides, restored their clarity without breaking the bank. Keeping a record of these inspections minimizes unexpected failures.
Tools I Recommend for Consistent Performance
Beyond basic cleaning, I recommend a few advanced tools like the digital SPL meter for measuring speaker output and room acoustics—ensuring balanced sound across different listening positions. For those interested in high-fidelity upgrades, phase testers help verify wiring correctness, preventing issues like mono playback or weak imaging. Additionally, a sturdy cable tester like the Southwire M3000 ensures your interconnects and speaker wires are properly functioning before they cause lingering problems.
Anticipating the Future of Home Audio Maintenance
Looking ahead, I predict a rise in smart calibration tools that seamlessly integrate into home Wi-Fi networks, providing real-time diagnostics and alerts. Imagine an AI-powered app that analyzes your setup’s health and suggests specific tweaks—saving time and avoiding guesswork. Already, some platforms like smart battery monitors are paving the way for this.
How do I keep my home audio system working perfectly for years?
Consistent maintenance, using the right tools, and staying proactive with inspections are key. I challenge you to try out a professional calibration mic or a dedicated cable tester this month; small investments with big payoffs. Remember, the goal isn’t just peak performance but reliability and peace of mind over the long haul. For more on troubleshooting common issues, explore this comprehensive guide.
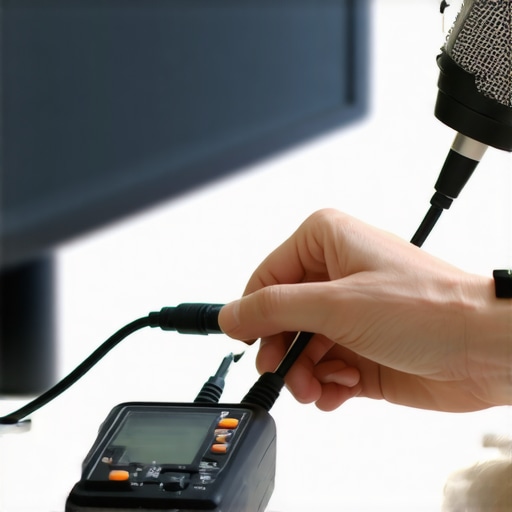
Over the years, I’ve come to realize that much of the wisdom about home audio isn’t something you find in manuals or online reviews. It’s born from hands-on experimentation, mistakes, and those sudden aha moments that elevate your listening experience. The most valuable lessons often come from facing unexpected issues or realizing that what worked for others might not suit your space or taste. Embracing this personalized journey transforms setup from a chore into an engaging pursuit.
What I Wish I Knew Before Digging Into Complex Adjustments
- Beware of Over-Tweaking: I once spent hours fine-tuning equalizer settings only to realize I had disrupted the natural tone of my room. Sometimes, less truly is more—trust your ears more than the numbers.
- Room Acoustics Trump Gear Specs: Upgrading equipment is exciting, but understanding how your room influences sound—like echoes or dead spots—is where the real magic lies. Simple treatments like rugs or soft furnishings can dramatically improve clarity.
- Legitimately Clean Connectors Matter: Dirty or loose connections can cause subtle distortions that are easy to overlook. Regularly inspecting and cleaning your cables and ports prevents elusive issues from sabotaging your sound quality.
- Positioning Is Everything: Moving a speaker a few inches can change the entire listening experience. Elevate your speakers to ear level, and avoid obstructions—sometimes, the simplest adjustments are the most impactful.
- Calibration Isn’t Just for Pros: Using calibration tools like a dedicated mic or apps such as Room EQ Wizard made a noticeable difference in balancing my system. It’s a step worth trying if you want accurate, room-specific sound.
My Go-To Resources for Elevating Home Audio
- Troubleshooting guides: When something sounds off, these step-by-step instructions save time and frustration, guiding you through common fixes like cleaning or re-pairing your gear.
- Technical specifications: Understanding impedance, sensitivity, and power handling helps in making informed upgrades and avoiding compatibility issues.
- Product reviews: Hands-on reviews and comparisons guide you toward quality gear that fits your budget, ensuring you don’t overspend for marginal gains.
- Acoustic treatment ideas: From bass traps to diffusers, these tips help optimize your room’s sound without breaking the bank.
Gear Up to Make Your Sound Truly Personal
Improving your home audio setup is an ongoing process—each change offers new insights. Dive into troubleshooting, experiment with placement, and embrace calibration as part of your routine. These steps don’t just refine your sound; they deepen your appreciation for music and audio technology. Remember, the journey to perfect sound is uniquely yours, shaped by your space, your ears, and your dedication. Start small, stay curious, and relish every improvement along the way.
What unexpected tweak or discovery transformed your home audio experience? Share your story below—I’d love to hear how your understanding of sound evolved!