
Ever had that frustrating moment where you excitedly unbox your new laptop, eager to enjoy some music or a podcast, only to discover your Bluetooth speaker refuses to connect? I remember these moments all too well—it’s like trying to make two friends compatible, and they just won’t get along. One minute, the device is discoverable; the next, it vanishes into the digital ether. It can feel personal, as if your gadgets are conspiring against you. But trust me, you’re not alone, and this is a common tech hiccup with straightforward fixes.
Why Your Bluetooth Speaker Won’t Connect to Your Laptop
The issue might seem complicated at first glance, but often it’s just a matter of understanding what’s happening behind the scenes. My own lightbulb moment came early on when I learned that many pairing problems stem from simple mistakes or overlooked settings. For example, I once tried to connect a vintage Bluetooth speaker, only to find it kept dropping the connection. It turned out I hadn’t reset the device properly after previous pairing attempts. This experience taught me the importance of starting fresh and double-checking basic compatibility and settings.
Is All the Fuss About Bluetooth Compatibility Overhyped?
Initially, I thought my new laptop was defective—perhaps I bought a model with Bluetooth issues. But after some digging, I realized that many problems are caused by outdated drivers, interference, or pairing misunderstandings. The good news? These are easily fixable with some simple troubleshooting, rather than assuming the worst. In fact, I found that many people overlook the importance of updating their Bluetooth drivers; a simple update can restore compatibility. If you’re feeling wary about trying these fixes, remember that sometimes, it’s just a small setting that needs a nudge. Want to learn how to identify whether your device is properly configured? Check out this helpful guide on Bluetooth troubleshooting.
Now, with this warm-up behind us, let’s dive into the practical steps to get your speaker talking to your laptop without fuss.
Ensure Your Devices Are Ready for Pairing
Start by turning on Bluetooth on your laptop. On Windows, go to Settings > Devices > Bluetooth & other devices, then toggle it on. On Mac, open System Preferences > Bluetooth and ensure it’s active. Next, put your Bluetooth speaker in pairing mode—usually by holding a specific button until a flashing light appears. I had a moment where I thought my speaker was broken because it wouldn’t appear; then I realized I hadn’t activated pairing mode. Once in pairing mode, your laptop should detect the device, ready for the next step.
Refresh and Reset Before Pairing
If your device isn’t showing up, toggle Bluetooth off and on again. Sometimes, simply restarting Bluetooth can fix detection issues—think of it as giving your gadgets a quick mental reset. If your speaker still doesn’t appear, forget the device from previous pairings: on Windows, remove it from the Bluetooth device list; on Mac, select the device and choose Remove. This is akin to clearing old contacts in your phone before adding a new one. Clearing previous connections often solves subtle conflicts that prevent successful pairing.
Update Your Bluetooth Drivers or Firmware
Outdated drivers can be like trying to speak a language your device no longer understands. Visit your laptop manufacturer’s website or device manager to check for driver updates. If you have a dedicated Bluetooth adapter, updating its firmware might improve compatibility. I once fixed a persistent disconnect problem by updating my driver, which is a step many overlook. For built-in Bluetooth chips, a quick Windows update often does the trick. This proactive step ensures your laptop’s Bluetooth stack is current, eliminating many connectivity hiccups.
Check for Interference and Optimize Positioning
Electromagnetic interference can disrupt signals—think of it as trying to have a quiet conversation in a noisy room. Keep other wireless devices, Wi-Fi routers, and microwave ovens away from your speaking area. Place your laptop and speaker within a clear line of sight; obstacles like walls or metal objects can weaken the signal. I once moved my laptop closer and removed a metal bookcase between me and the speaker, which dramatically improved connection stability. Positioning is crucial for maintaining a strong, reliable connection.
Test with Different Devices or Cables
If pairing still won’t happen, test your speaker with another device, like a smartphone, to ensure it functions correctly. Conversely, try connecting your laptop to a different Bluetooth speaker—this helps isolate whether the issue lies with the laptop or the device. Knowing this saved me hours when I discovered my old speaker’s Bluetooth module was defective, prompting me to repair or replace it. This step confirms whether the problem is with the hardware or your settings.
Adjust Settings for Better Compatibility
Some laptops have energy-saving features that disable Bluetooth or limit its performance. Disable any power-saving modes that may throttle Bluetooth performance. On Windows, navigate to Power Options > Change plan settings > Advanced settings > Wireless Adapter Settings, and set Energy Efficient to Maximum Performance. On Mac, ensure no Battery Saver modes are affecting Bluetooth. These tweaks can make a notable difference, especially with older or budget laptops. Think of it as telling your devices, “Now’s the time to communicate without holding back.”
Research Compatibility and Consult Resources
If you’re using vintage or specialized speakers, verify compatibility—some older Bluetooth versions or codecs may cause issues. For example, older speakers might not support recent Bluetooth standards, leading to pairing failures. Visit the manufacturer’s site or trusted tech forums for guidance. For instance, I checked my vintage Bluetooth speaker’s specs and realized I needed an extension or upgrade to get it working smoothly. You can also explore dedicated troubleshooting guides like this resource for practical tips.
Apply Firmware or Hardware Upgrades if Necessary
When all else fails, consider hardware upgrades such as replacing an outdated Bluetooth module or integrating external adapters. For vintage speakers, replacing aging foam surrounds can improve sound quality and compatibility, as explained here. Modern adapters often support newer Bluetooth profiles, making pairing more straightforward. Upgrading can be a game-changer, turning a frustrating experience into a seamless connection. Sometimes, it’s the small investment that restores reliable Bluetooth performance and harmony between your devices.
When it comes to home audio gear, many enthusiasts and casual listeners alike fall into misconceptions that can hinder their listening experience. One prevalent myth is that spending more money always guarantees better sound quality. While high-end equipment often offers improvements, the reality is that proper setup and matching components matter just as much—sometimes more—than price. For instance, pairing a powerful amplifier with speakers that have incompatible impedance can lead to distortion or damage, regardless of how much you paid. To avoid such pitfalls, consult detailed guides like the checklist for buying used amps. Another misconception is that soundbars can perfectly replicate surround sound. In reality, their spatial performance is often limited, and their effectiveness heavily depends on room acoustics. A smarter choice might be investing in vintage receivers, which can outperform many modern soundbars and add a nostalgic touch to your setup—more information can be found here. The ‘bigger is better’ approach is another trap—oversized speakers or multiple subwoofers don’t always translate to quality if they aren’t correctly calibrated. The nuance lies in understanding speaker placement, crossover points, and phase alignment. For example, incorrect positioning of floorstanding speakers can cause phase cancellation, diminishing bass response—a mistake easily avoided with proper setup. Additionally, many assume that all high-res audio files sound distinctly better. While some recordings reveal subtleties only high-resolution formats can capture, studies show that playback equipment and room acoustics influence perceived quality more than file resolution alone, as noted by audio experts. An overlooked aspect is cable quality, often considered a marketing ploy by manufacturers. However, premium cables can prevent signal degradation, especially with long runs or high-impedance setups. Be cautious, though—do your research using resources like this guide on dodging fakes. Lastly, the placement of your sound equipment plays a critical role. Surface reflections, furniture, and room shape all influence sound clarity. Simple adjustments, like adding acoustic panels or repositioning speakers, can dramatically improve your listening experience, making a more significant difference than upgrading hardware. Remember, real expertise in home audio comes from understanding these nuances and avoiding the traps that many get caught in. Have you ever fallen into this trap? Let me know in the comments.
Tools I Recommend for Maintaining Your Audio Equipment
Maintaining your home audio setup requires more than just patience; it depends on having the right tools at hand. Personally, I swear by a few specialized items that ensure my gear remains in top shape and performs reliably over the years. One indispensable item is a precision screwdriver set, which is crucial when opening up your amplifiers or speakers for cleaning or repairs. For example, when I replaced the foam surrounds in my vintage speakers, a high-quality screwdriver made the process effortless and prevented damage to delicate components.
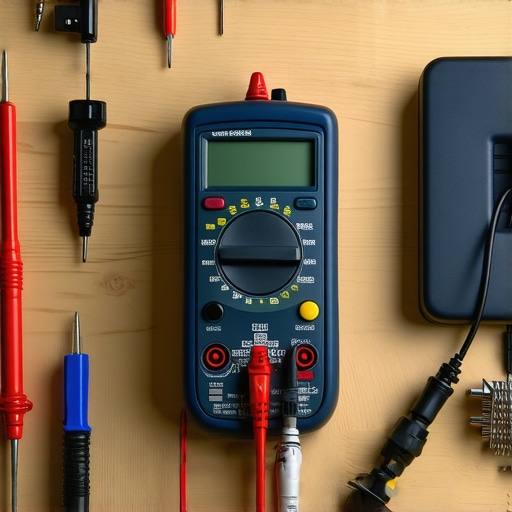
Another essential tool is a digital multimeter. I use mine to check the impedance of speakers, diagnose wiring issues, or verify the integrity of cables. I’ve found that a multimeter helps detect subtle issues before they turn into costly damage, especially in complex setups involving multiple components. If you plan to test or troubleshoot audio equipment beyond basic checks, investing in a digital multimeter with audio-specific features is a smart choice.
In addition, keeping a bottle of compressed air is invaluable. Dust buildup can wreak havoc on sensitive parts like switches, relays, or ventilation vents. Regularly blowing out dust prevents overheating and electrical faults. I do this every few months, especially in humid climates where grime accumulates faster. For cleaning circuit boards and delicate surfaces, a static-free brush combined with compressed air yields best results.
Why Upgrading Your Tools Matters for Long-Term Results
Using high-quality, purpose-built tools not only makes repairs more straightforward but also extends the lifespan of your equipment. For instance, cheap screwdrivers can strip screws in delicate components, leading to worse damage. Similarly, a decent multimeter with precise readings can help you catch issues early, avoiding expensive repairs or replacements down the line. As technology advances, so do the tools—think of replacing basic cleaners with anti-static brushes or investing in a headphone repair kit that includes micro-soldering equipment.
Looking ahead, I predict that smart diagnostic devices integrated with detailed apps will become more common, making home maintenance even more accessible. Imagine a device that interfaces with your amplifier or soundbar to run diagnostics and suggest fixes automatically—that’s where the trend is heading.
How do I keep my audio gear functioning for years to come?
Establish a regular maintenance routine that includes cleaning, inspecting cables and connectors, updating firmware, and testing with proper tools. Don’t neglect the simple tasks like replacing worn foam surrounds—these are critical for preserving sound quality. For example, my vintage receivers benefited greatly from periodic foam replacements, which I detailed here. Additionally, keep your cables in check by inspecting for fraying and avoiding fake high-end models—use this guide to spot fakes. I recommend periodically testing connections with a multimeter to ensure optimal performance. One advanced tip is to invest in specialized cleaning solutions for connectors, which can remove oxidation and improve conductivity. Try applying contact cleaner to your audio jacks and cables—it’s a small step that yields big benefits.
By systematically maintaining your gear with the right tools and techniques, you’ll enjoy consistent sound quality and avoid costly repairs. Remember, well-maintained equipment isn’t just about longevity—it’s about experiencing the best possible audio now and in the future.
If you haven’t already, pick up a quality digital multimeter and start checking your cabling and connections today—your ears will thank you!
The Hardest Lesson I Learned About Home Audio
One of my most humbling discoveries was realizing that even premium equipment can underperform without proper setup. I once invested in a high-end amplifier and speakers, expecting instant audiophile bliss. However, I struggled to get clear, balanced sound. It was only when I delved into placement, acoustics, and calibration that I unlocked their true potential. This taught me that gear alone isn’t magic—it’s how you bring it into harmony that makes all the difference.
The Myth That Nearly Ruined My Sound Experience
I used to believe that using the most expensive cables guaranteed the best sound. It turned out that I was falling for a common misconception. After reading reliable sources, including trusted guides on cable authenticity, I realized quality cables are important, but not necessarily high-cost or boutique. The key is proper connection and avoiding fakes—every detail counts in delivering pristine audio.
How Room Shape Changed My Setup Strategy
Initially, I ignored the impact of room acoustics and focused solely on equipment. The moment I added simple acoustic panels and repositioned my speakers, the clarity and depth of my sound improved dramatically. It made me appreciate that environment often outweighs hardware specs. Next time you feel underwhelmed, consider room treatment; it’s a cost-effective step that transforms listening.
Embracing Patience Over Quick Fixes
My temptation was always to chase the latest gear or quick solutions. But I learned that consistent maintenance and patience yield stability. For example, regularly cleaning contacts and inspecting cables prevented many issues. This proactive approach, paired with a good set of tools like a multimeter, has kept my setup performing optimally over years. Advances in diagnostics make it easier, but patience remains key.
My Go-To Resources for Home Audio Enthusiasts
Over time, I found some trusted sources that truly accelerate learning. The checklist for used amplifiers helped me avoid pitfalls when upgrading. In addition, forums like AVS Forum provided practical advice from seasoned enthusiasts. Investing in good resources saved me from costly mistakes and deepened my understanding of how all components interconnect.
Take Your Listening Experience to Heart
Every upgrade, tweak, and lesson took my home audio from good to exceptional. If you’re passionate about sound, remember that knowledge, patience, and environment are your best allies. Start small—adjust speaker placement, check cables, and explore resources—before rushing into costly upgrades. Your potential to enjoy rich, immersive audio is within reach; all it takes is a willingness to learn and refine. So, are you ready to experiment with your setup and discover what’s truly possible? Let me know your biggest challenge below, and let’s troubleshoot together.