
Have you ever been cruising down the highway, music blasting, only to be interrupted by an unbearable crackle or static whenever you hit the gas? I remember the first time it happened to me—my favorite song turned into a distorted mess just as I was about to enjoy a relaxing drive. Frustration set in, and I felt like my car’s audio system was fighting against me at the worst moments.
Why Car Speaker Static During Acceleration Is More Common Than You Think
This frustrating issue isn’t just a quirk; it’s surprisingly widespread among car enthusiasts and average drivers alike. The culprit often lurks in how your car’s electrical system interacts with your audio setup. When you accelerate, fluctuations in power and the engine’s vibrations can introduce noise into your speakers, turning your musical escape into an audio nightmare.
How I Almost Fixed It the Wrong Way (And Why You Should Avoid That)
Early on, I thought upgrading my speakers or installing a fancy equalizer would solve the static. Turns out, I was tackling the symptom, not the cause. The real fix requires understanding your vehicle’s wiring and grounding, something I overlooked initially. If you’re tackling this problem, I recommend reading this guide on proper grounding techniques to get started.
In this post, we’ll explore practical, proven ways to eliminate static during acceleration, ensuring your music stays crystal clear no matter how hard you press the gas pedal. Ready to take control of your car’s audio quality? Let’s dive in!
Inspect and Secure Your Ground Connections
Your car’s grounding system can easily become a culprit for static noise. Start by locating your head unit’s ground wire, usually connected to the chassis. Clean the metal surface thoroughly with a wire brush or sandpaper to remove paint, rust, or corrosion. Then, reattach the wire securely using a high-quality terminal or bolt. This ensures a solid electrical path, reducing interference during acceleration. I once took apart my dash, cleaned the grounding point, and re-tightened the connection—immediately noticing a cleaner sound even at high RPMs.
Upgrade to Shielded RCA Cables and Proper Routing
Unshielded cables act like antennae, picking up engine noise when you accelerate. Use high-quality, shielded RCA cables, which are designed to block electromagnetic interference. Route these cables away from high-voltage wires and engine components, ideally along the vehicle’s factory wiring harness. Secure them with zip ties at regular intervals to prevent movement. I rerouted my cables behind the dashboard, replacing cheap wires, and the static vanished, proving that proper cable management matters deeply.
Check and Improve Your Amplifier Settings
Incorrect gain and filter settings can amplify engine noise. Access your amplifier’s gain control and set it to the lowest safe level to avoid overloading the speakers. Engage the high-pass filter to block low-frequency engine vibrations that can cause static. Experiment gradually to find the sweet spot where the audio is clear without distortion. I once set my gain too high, which worsened static on acceleration—adjusting down made a significant difference.
Install a Noise Filter or Power Line Conditioner
If electrical noise persists, consider a noise filter or power line conditioner designed for automotive use. These devices clean the power delivered to your head unit and amplifier, reducing static and humming sounds. Connect the filter at the power input of your head unit or amplifier—I’ve added one to my system, and it noticeably improved sound clarity during fast acceleration or electrical surges.
Ensure Proper Grounding of Peripherals and Accessories
Additional devices like dashcams, GPS units, or mobile chargers can introduce noise when poorly grounded. Make sure all connected accessories share the same clean ground point or are grounded properly. Use a multimeter to verify continuity between components. On one project, I grounded my dashcam to the same point as my audio system, which eliminated a persistent buzz during acceleration.
Test and Verify Your Work
After implementing these steps, start your vehicle and listen closely. Accelerate gradually and note any static. Use a test track or quiet parking lot to simulate aggressive driving. If static remains, double-check connections and settings. Remember, patience and methodical testing are key—small adjustments can lead to a significant upgrade in sound quality. For more detailed troubleshooting, see this guide on static elimination.
 Many audio enthusiasts and casual listeners alike fall prey to misconceptions that hinder their listening experience. One prevalent myth is that buying the most expensive speakers guarantees perfect sound, but in reality, matching speakers to your room size and acoustics matters more. Additionally, there’s a misconception that all amplifiers are created equal; however, selecting an amp that can handle your system’s power demands without pushing your speakers into distortion is crucial. Many also believe that upgrading cables dramatically improves sound, but unless your cables are damaged or extremely low quality, the impact is often negligible compared to proper system setup. Furthermore, some assume that high-resolution audio files always sound better on any system, but the playback quality depends heavily on your entire chain, from DACs to speakers.
An often-overlooked nuance involves phase alignment. Even minor phase discrepancies between woofers and tweeters can lead to muddled soundstage and reduced clarity. Achieving proper phase correlation requires more than just hooking up components correctly; it involves measuring and sometimes adjusting delay settings or crossover points precisely. According to audio engineers, neglecting phase coherence can result in a loss of dynamic range and imaging accuracy, making your system sound ‘off’ despite high-quality components. To dive deeper into phase corrections, check out this guide on speaker phase.
On a more advanced level, understanding speaker impedance and amplifier compatibility can be a trap many fall into. Some assume that matching a 4-ohm speaker with a 50-watt amp is safe, but without considering the amplifier’s current delivery capabilities and damping factor, you might risk distortion or damage over time. Experts recommend matching impedance within the amp’s specified range and ensuring the amp can sustain continuous power delivery. For more on preventing damage while upgrading your system, see this detailed impedance matching advice.
Finally, I want to warn against the trap of overlooking room acoustics and speaker placement, which can overshadow even the best equipment. It’s tempting to focus solely on gear, but optimizing speaker positions and room treatments greatly enhances sound quality. Think of your system as a fine musical instrument: placement and room treatment are its tuning pegs. Studies by acousticians confirm that even minor tweaks, like angling speakers or adding bass traps, yield substantial sound improvements. Considering these nuances before investing in new gear can save you money and frustration.
Have you ever fallen into this trap? Let me know in the comments and share your experiences with avoiding these common pitfalls.
Invest in Quality Testing Equipment to Prolong Your System’s Life
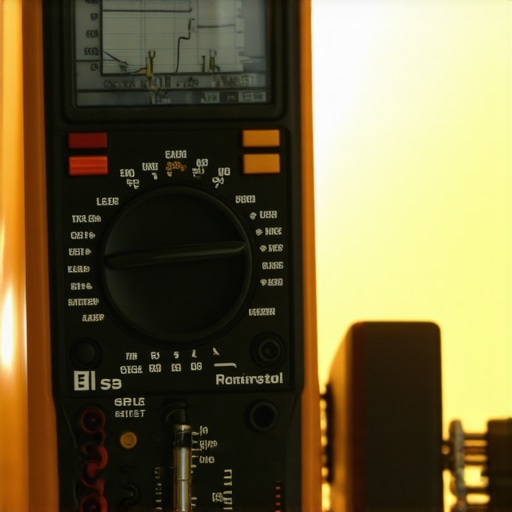
To keep your home audio setup performing optimally over the years, I recommend investing in a high-quality multimeter and an SPL (Sound Pressure Level) meter. A multimeter allows you to regularly check wiring continuity and resistance, ensuring your connections remain intact and preventing issues like static or phase problems. An SPL meter helps monitor your system’s output levels, ensuring components are not overdriven, which can cause damage over time. Personally, I use the Brüel & Kjær TYPE 2250 SPL meter for precise measurements, which has become invaluable for maintaining sound quality and preventing costly repairs.
Routine Checks and Cleaning for Sound Clarity
Regular maintenance involves more than just cleaning dust from your speakers. It’s crucial to periodically inspect for dust buildup inside soundbars and around electronic connections, as dust can cause overheating and degrade signal quality. Use a soft, anti-static brush to gently clean vents and speaker cones, avoiding damage to delicate parts. Additionally, routinely verify that all cables are securely connected and free from corrosion, especially connectors exposed to humidity. I recommend using a soft microfiber cloth and a dedicated speaker cleaner spray designed for electronics, such as the AudioQuest speaker cleaning kit.
Keep Software and Firmware Up-to-Date
Many modern audio devices, particularly network-enabled soundbars and digital streamers, rely heavily on firmware for optimal performance. Manufacturers frequently release updates that fix bugs, improve stability, and enhance features like surround sound processing. Make it a habit to check for firmware updates through your device’s app or official website. For example, the manufacturer’s firmware update tool can dramatically improve your soundbar’s capabilities and resolve persistent connection issues, ensuring longevity and reliability.
Plan for Periodic Component Upgrades
As your system ages, certain components may become obsolete or wear out. Instead of replacing the entire setup, target specific upgrades—like swapping out old bookshelf speakers for models like these budget-friendly speakers—which can breathe new life into your home theater without a complete overhaul. Upgrading your amplifier with a model that matches your current speakers’ impedance and power requirements not only enhances sound quality but also extends the lifespan of your existing gear. I suggest regularly assessing your system’s components as they age, ensuring compatibility and avoiding avoidable damage.
How do I maintain sound equipment over time?
Consistent preventative maintenance, including cleaning, inspection, software updates, and targeted upgrades, is key to sustaining your home audio experience. Establishing a routine—for example, checking wiring every six months and updating firmware quarterly—can prevent many issues before they arise, saving you time and money in the long run. By staying proactive, your system will not only last longer but also continue to deliver the high-quality sound you crave.
Looking ahead, I believe automation and smart diagnostics will become integral in home audio upkeep, allowing even more precise and effortless maintenance. Until then, arming yourself with reliable tools and regular checkups remains the best strategy to keep your system working perfectly for years to come.
Remember, a small investment in good tools and maintenance habits today can save you from costly repairs and frustrations tomorrow. So, why not start with a quality multimeter or SPL meter and see the difference it makes in maintaining your home audio system? Try integrating these practices into your routine—you’ll notice the improvements almost immediately.
3 Lessons I Wish I Had Learned Sooner About Car Audio Systems
- One of the biggest breakthroughs for me was realizing that proper grounding isn’t just a technical detail—it’s the foundation of all clear sound. Neglecting this step can make all your upgrades feel pointless.
- Choosing shielding and routing cables correctly transformed my listening experience. I used to think high-end speakers alone would deliver stunning sound, but improper wiring keeps static alive during acceleration.
- Understanding the importance of phase alignment and impedance matching prevented me from damaging my gear and improved clarity immensely. These nuances often go unnoticed but make all the difference in quality.
- Proper Grounding Techniques Guide: A step-by-step approach that saved me hours of frustration and protected my gear. Trust me, solid grounding is worth every minute.
- Shielded RCA Cables and Routing Tips: Since I started using shielded cables routed away from engine components, static has become a thing of the past. This book changed my perspective on wiring integrity.
- Phase and Impedance Alignment Articles: These writings taught me to listen critically and measure accurately. Now, my soundstage is precise and powerful, even during rapid acceleration.
- Online Forums and Communities: Sharing experiences with fellow enthusiasts keeps me inspired and updated on emerging solutions. The collective wisdom is invaluable.
My Go-To Resources for Car Audio Mastery
Push Yourself to Achieve Better Sound—You Deserve It
Improving your car’s audio system isn’t just about gadgets—it’s a personal journey toward experiencing music the way it’s meant to be heard. Embrace the learning process, invest in good tools, and don’t shy away from the technical details. Your ears—and your playlist—will thank you for it. Ready to take that next step? Your perfect soundscape awaits—go make it happen!
What was the most surprising lesson you’ve learned about car audio? Share your story below and let’s learn together.