
There was a night I seriously questioned my audio setup. I had just invested in a sleek, compact soundbar, excited to enjoy movie nights with crisp visuals and decent sound. But as soon as the explosions started, I realized something was missing — that deep, thunderous bass that you feel in your bones. My small soundbar couldn’t deliver it no matter how loud I turned the volume. Frustrating, right?
Craving That Rich, Deep Bass Without Bulk
Ever since I started exploring home audio upgrades, I kept hearing about how crucial a subwoofer is for full-bodied sound. But let’s face it: not everyone wants or has space for a bulky sub. That’s where I was — stuck with a tiny soundbar that promised big audio but fell short on the low end. I knew there had to be a way to enhance bass response without adding a giant subwoofer. And spoiler: there is. Today, I’ll share actionable tips from my personal journey that can help your small soundbar punch well above its weight.
Is Deep Bass from a Small Soundbar Really Achievable?
Before I discovered these tricks, I fell into the trap of thinking that only expensive, massive setups could produce satisfying bass. I also made an early mistake of playing with the soundbar’s EQ settings without understanding how most of them boost midrange rather than true bass. That oversight limited my results and made me think I needed a big sub. According to audio expert Dr. Floyd Toole, properly tuning and component placement can significantly improve perceived bass without extra hardware (source). The good news? You don’t need to break the bank or clutter your space—it’s about making smarter adjustments.
Now, onto the practical steps. Don’t worry; these are simple to implement and backed by experience. If you’ve faced similar issues, you’ll want to stick around. We’re about to unlock some secrets that will make your little soundbar sound like it has a secret weapon up its sleeve.
Tuning Your Sound Settings for Better Bass
Begin by accessing your soundbar’s equalizer (EQ) settings. Many models allow manual adjustment via remote or app. Crank up the bass frequencies—usually around 80 Hz to 200 Hz—while reducing midrange muddle. I once spent an afternoon toggling these sliders, and by small increments, I noticed a richer, deeper sound emerging. Remember, avoid boosting everything; focus on the low end to prevent distortion.
Test with Specific Music or Movie Scenes
Use familiar content that emphasizes bass, like action scenes with explosions or bass-heavy music. This helps you gauge adjustments accurately. For example, I played the opening of a recent action film and gradually increased bass until the deep rumbles sounded satisfying without booming into distortion. If your soundbar lacks EQ controls, consider positioning it differently or adding a simple external equalizer or digital audio processor compatible with your setup.
Optimize Physical Placement to Amplify Bass
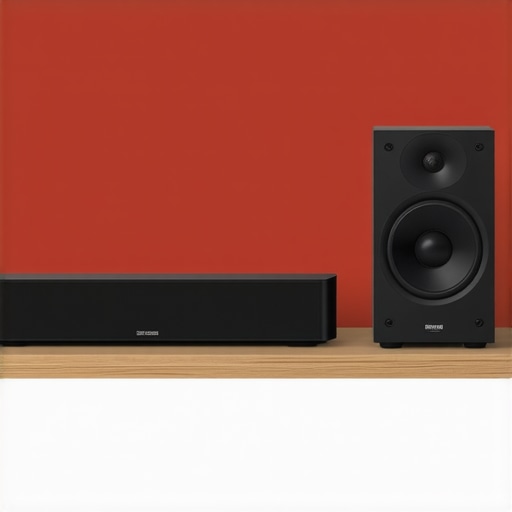
Placement is critical. Position your soundbar slightly away from the wall—about 4-6 inches—to reduce high-frequency reflections and enhance perceived bass. I experimented with different placements, initially placing it flush against the wall, which muted bass. Moving it forward a few inches in a corner amplified the low end noticeably. Think of it as giving your sound an open stage to resonate better.
Use Room Acoustics to Your Advantage
Soft furnishings—like rugs, curtains, and plush furniture—absorb treble and midrange, letting bass stand out more clearly. During my setup, adding a rug directly in front of my TV reduced echo, making the bass more prominent. For smaller or reflective rooms, consider strategically placing acoustic panels or bass traps in corners. These materials trap standing waves, providing a cleaner, deeper bass response.
Limit External Interference and Adjust Volume
Ensure no competing sounds are interfering. Turn off other electronic devices that might cause electromagnetic interference. Also, check your device connections—if you’re using a digital coaxial or HDMI ARC connection, make sure cables are secure and high quality. Sometimes, switching to a wired connection improves stability, allowing you to set a consistent volume level that emphasizes bass without distortion.
On the topic of wiring, avoiding braided or tangling cables can reduce signal degradation. For more tips, see this guide. Additionally, if you’re considering amplifiers to support your setup, choose models that won’t overheat in confined spaces—details are in this article.
Many enthusiasts and even seasoned audiophiles often fall prey to oversimplified beliefs about headphones, speakers, soundbars, and amplifiers. One prevalent myth is that paying more guarantees superior sound quality. While high-end gear offers advantages, factors like proper setup and room acoustics can make a more noticeable impact. An often-overlooked nuance is the importance of impedance matching. Many assume that any amplifier can drive any speaker equally well, but mismatched impedance can lead to distortion or even damage. According to audio engineer Ethan Winer, impedance mismatch is a subtle yet crucial detail that can significantly alter sound output (source).
Is Your Home Audio Setup Truly Optimized or Falling Into a Common Trap?
One common mistake is neglecting the influence of room acoustics. Many buyers focus solely on specifications like wattage or frequency response, but the environment often dictates how good that gear will sound. For instance, a powerful amplifier paired with poorly placed speakers can produce muddy or unbalanced audio. Moreover, many overlook the significance of cable quality and routing. Using cheap or tangled cables can introduce static or reduce clarity, a mistake that can be easily avoided by proper wiring practices. For practical tips, see this guide.
Another hidden nuance involves the ‘break-in’ period for speakers. Some believe that new speakers sound best after several hours of use, but recent studies suggest differences may be marginal or perceived due to psychological biases. As emphasized in this article, ensuring proper setup and room conditions offer more tangible improvements than simply waiting for the equipment to ‘warm up.’
Advanced Tip: How to Achieve True Clarity with Budget-Friendly Gear
For those aiming to maximize sound clarity without splurging on high-end equipment, paying attention to equipment synergy is key. Matching the impedance of your speakers with your amplifier, using high-quality but affordable cables, and implementing strategic room treatments can rival the performance of pricier setups. Be cautious of common pitfalls—like overusing EQ to compensate for poor placement—which can introduce distortion and reduce audio fidelity. As Dr. Floyd Toole advocates, proper room calibration and thoughtful placement have a more pronounced effect than chasing marginal hardware upgrades (source).
Remember, achieving great sound isn’t solely about the gear but how you optimize and maintain it. Do you know how your specific components might be working against each other? Have you ever fallen into these traps? Let me know in the comments!
Keeping Your Home Audio Gear in Peak Condition
To ensure your investment continues delivering stellar sound, routine maintenance is key. Start by regularly cleaning your equipment with a soft, lint-free cloth to remove dust and debris that accumulate over time, which can impair performance. Pay particular attention to connectors and ports; a buildup of grime can cause signal degradation. For detailed cleaning, I recommend using a gentle electronic contact cleaner like DeoxIT, which safely restores connectivity without damaging sensitive components. Incorporating a few minutes of preventive care now can prevent costly repairs later, ensuring your setup remains vibrant and functional for years to come.
Invest in Reliable Maintenance Tools
Personally, I swear by a anti-static brush and compressed air cans. The anti-static brush helps remove dust from delicate speaker cones and electronic contacts without risking static buildup, which could damage circuits—a risk if you use improper cleaning methods. Compressed air, on the other hand, allows you to blow dust out of hard-to-reach areas like ventilation holes and internal components of amplifiers or AV receivers. These inexpensive tools have saved me countless trips to repair shops and kept my gear sounding clear and detailed. Remember, always power down and unplug your equipment before cleaning to avoid electrical hazards.
Monitor and Calibrate Sounds Periodically
Regularly checking your system’s sound output ensures you catch any drift in performance early. Use a calibrated microphone like the UMIK-1, paired with free software such as Room EQ Wizard (REW), to analyze your room response and speaker positioning. This tool provides detailed frequency response graphs, allowing you to identify peaks or dips that may have developed over time. I perform a calibration session every six months, which helps me adjust EQ settings or reposition speakers for optimal sound clarity. This proactive approach keeps my setup balanced, preventing small issues from turning into noticeable quality declines.
Long-Term Benefits of Consistent Maintenance
Beyond maintaining pristine sound quality, regular care extends the lifespan of your equipment. Clean contacts prevent corrosion, and proper placement reduces strain on drivers, avoiding premature wear. Plus, staying vigilant with updates—whether firmware for modern soundbars or driver software for digital interfaces—ensures compatibility with new devices and features. As technology advances rapidly, keeping your setup current helps you enjoy the latest innovations without hefty upgrades. Soon, with consistent upkeep, you’ll find your home audio system performing flawlessly for years to come.
Planning for Scale and Evolution
If you’re considering expanding your system or upgrading to high-resolution audio, plan ahead. High-quality tools like dedicated power conditioners can filter noise and provide stable energy, safeguarding sensitive components. Smart amplifiers with thermal protection and auto-shutdown features prevent overheating in enclosed spaces—see this article for options. Long-term, investing in modular components that support future upgrades can save you money and hassle. I recommend assessing your needs periodically and staying informed about the latest in home audio tech, so your setup evolves seamlessly with your listening habits.
Anticipating Future Trends in Maintenance Tools
Looking ahead, I predict advances in AI-powered calibration systems will make routine maintenance even easier. Future gadgets might automatically detect performance issues and suggest precise adjustments, eliminating guesswork. Additionally, smarter cleaning devices with gentle, targeted vibration or ultrasonic cleaning could keep delicate drivers in top shape without disassembly. Embracing these innovations will keep enthusiasts and casual listeners alike enjoying optimal sound without the tedious manual efforts of today.
As a practical next step, try integrating a calibration microphone like UMIK-1 with REW to set baseline measurements for your room. It’s straightforward, and the insights gained can dramatically improve your listening experience. Regularly scheduled checks and using the right tools will ensure your home audio remains fulfilling and trouble-free for years to come.
The Hidden Lessons That Transformed My Home Audio Journey
One of the most valuable insights I gained was that great sound isn’t solely about high-end gear; it’s about smart setup and room awareness. I learned the hard way that positioning, acoustics, and tweaking settings can make a modest soundbar outperform expectations, saving me thousands of dollars in upgrades.
Another revelation was that impedance matching and cable quality often fly under the radar but have a tangible impact on clarity and bass depth. Investing in proper cables and understanding your equipment’s specs can prevent distortion and preserve sound integrity, proving that small details truly matter.
Lastly, I discovered that regular maintenance and calibration aren’t optional—they’re essential. I now routinely analyze my room response using tools like REW, which uncovers issues invisible to the naked eye and allows precise adjustments for optimal performance. These lessons have turned my home into an audio haven, and they can do the same for you.
My Go-To Tools for Superior Home Audio
- Room EQ Wizard (REW): An indispensable free software for analyzing and tuning my listening space, helping me spot frequency dips and peaks that I wouldn’t notice otherwise.
- UMIK-1 Calibration Mic: Paired with REW, it provides accurate room response measurements, ensuring my adjustments are data-driven and effective.
- High-Quality Cables: I trust Mogami and Monoprice for reliable, affordable wiring that prevents signal degradation and maintains the richness of sound.
- Acoustic Treatment Materials: Using affordable foam panels and bass traps, I’ve optimized room reflections to enhance bass response without cluttering my space.
Your Next Step in Sound Excellence
Embarking on the journey to perfect your home audio setup is both exciting and rewarding. Remember, small tweaks and consistent maintenance can unlock a deep, immersive sound experience—even with a modest soundbar. Don’t be afraid to experiment, learn, and invest in the right tools. Your ears—and your wallet—will thank you.
What’s the one adjustment you’re excited to try first? Share your plans below, and let’s elevate our sound game together!