
I remember the exact moment I realized my fancy headphones, the ones I had splurged for on a recommendation, sounded utterly disappointing when connected to my laptop. That crisp clarity I loved in the store? Gone. Instead, I was met with dull, tinny sound. It was like my audio dreams had been crushed by a simple cable connection. Frustrating doesn’t even begin to cover it. Have you faced something similar—investing in high-end headphones only to be disappointed by the sound quality from your laptop? You’re not alone. Many audiophiles stumble at this hurdle, often blaming their headphones when the real culprit is the connection itself.
Why High-End Headphones Often Sound Worse on Laptops Than Expected
This issue stems from a fundamental mismatch between what your headphones can deliver and what your laptop’s audio output provides. Laptops are built for convenience, not necessarily for audiophile-grade sound. They often have underpowered internal sound cards and less-than-ideal headphone jacks. When you plug in high-end gear, you’re expecting studio-quality sound, but instead, you’re hitting a bottleneck—one that converts your investment into a frustrating experience. This is why many enthusiasts report excellent sound in dedicated setups but underwhelming results when using their laptops.
Another common mistake early on is assuming that an expensive cable or fancy headphones alone can fix the issue. The real game-changer lies in the quality of the digital-to-analog conversion (DAC) and amplification. Your laptop’s built-in hardware simply wasn’t designed for the nuanced demands of high-end audio. Fortunately, there are solutions, and I’ll walk you through them soon.
Did you know that a poor connection could make your headphones sound less than stellar, even if they are high-end? Research indicates that upgrading your source component often yields a more noticeable improvement than just swapping cables or headphones. For example, using a dedicated DAC can often turn your mediocre laptop output into a concert-quality experience, as explained in this article on dedicated DACs.
So, if you’ve been scratching your head wondering why your expensive headphones sound flat when plugged into your laptop, don’t worry. You’re about to learn how to unlock their true potential. The key lies in understanding the actual causes and, more importantly, how to fix them effectively. Let’s get started with the steps you need to take to get the sound quality you paid for.
}#}# }#}# }#}# }#}# }#}# }#}# }#}# }#}# }#}# }#}# }#}# }#}# }#}# }#}# }#}# }#}# }#}# }#}# }#}# }#}# }#}# }#}# }#}# }#}# }#}# }#}# }#}# }#}# }#}# }#}# }#}# }#}# }#}# }#}# }#}# }#}# }#}# }#}# }#}# }#}# }#}# }#}# }#}# }#}# }#}# }#}# }#}# }#}# }#}# }#}# }#}# }#}# }#}# }#}# }#}# }#}# }#}# }#}# }#}# }#}# }#}# }#}# }#}# }#}# }#}# }#}# }#}# }#}# }#}# }#}# }#}# }#}# }#}# }#}# }#}# }#}# }#}# }#}# }#}# }#}# }#}# }#}# }#}# }#}# }#}# }#}# }#}# }#}# }#}# }#}# }#}# }#}# }#}# }#}# }#}# }#}# }#}# }#}# }#}# }#}# }#}# }#}# }#}# }#}# }#}# }#}# }#}# }#}# }#}# }#}# }#}# }#}# }#}# }#}# }#}# }#}# }#}# }#}# }#}# }#}# }#}# }#}# }#}# }#}# }#}# }#}# }#}# }#}# }#}# }#}# }#}# }#}# }#}# }#}# }#}# }#}# }#}# }#}# }#}# }#}# }#}# }#}# }#}# }#}# }#}# }#}# }#}# }#}# }#}# }#}# }#}# }#}# }#}# }#}# }#}# }#}# }#}# }#}# }#}# }#}# }#}# }#}# }#}# }#}# }#}# }#}# }#}# }#}# }#}# }#}# }#}# }#}# }#}# }#}# }#}# }#}# }#}# }#}# }#}# }#}# }#}# }#}# }#}# }#}# }#}# }#}# }#}# }#}# }#}# }#}# }#}# }#}# }#}# }#}# }#}# }#}# }#}# }#}# }#}# }#}# }#}# }#}# }#}# }#}# }#}# }#}# }#}# }#}# }#}# }#}# }#}# }#}# }#}# }#}# }#}# }#}# }#}# }#}# }#}# }#}# }#}# }#}# }#}# }#}# }#}# }#}# }#}# }#}# }#}# }#}# }#}# }#}# }#}# }#}# }#}# }#}# }#}# }#}# }#}# }#}# }#}# }#}# }#}# }#}# }#}# }#}# }#}# }#}# }#}# }#}# }#}# }#}# }#}# }#}# }#}# }#}# }#}# }#}# }#}# }#}# }#}# }#}# }#}# }#}# }#}# }#}# }#}# }#}# }#}# }#}# }#}# }#}# }#}# }#}# }#}# }#}# }#}# }#}# }#}# }#}# }#}# }#}# }#}# }#}# }#}# }#}# }#}# }#}# }#}# }#}# }#}# }#}# }#}# }#}# }#}# }#}# }#}# }#}# }#}# }#}# }#}# }#}# }#}# }#}# }#}# }#}# }#}# }#}# }#}# }#}# }#}# }#}# }#}# }#}# }#}# }#}# }#}# }#}# }#}# }#}# }#}# }#}# }#}# }#}# }#}# }#}# }#}# }#}# }#}# }#}# }#}# }#}# }#}# }#}# }#}# }#}# }#}# }#}# }#}# }#}# }#}# }#}# }#}# }#}# }#}# }#}# }#}# }#}# }#}# }#}# }#}# }#}# }#}# }#}# }#}# }#}# }#}# }#}# }#}# }#}# }#}# }#}# }#}# }#}# }#}# }#}# }#}# }#}# }#}# }#}# }#}# }#}# }#}# }#}# }#}# }#}# }#}# }#}# }#}# }#}# }#}# }#}# }#}# }#}# }#}# }#}# }#}# }#}# }#}# }#}# }#}# }#}# }#}# }#}# }#}# }#}# }#}# }#}# }#}# }#}# }#}# }#}# }#}# }#}# }#}# }#}# }#}# }#}# }#}# }#}# }#}# }#}# }#}# }#}# }#}# }#}# }#}# }#}# }#}# }#}# }#}# }#}# }#}# }#}# }#}# }#}# }#}# }#}# }#}# }#}# }#}# }#}# }#}# }#}# }#}# }#}# }#}# }#}# }#}# }#}# }#}# }#}# }#}# }#}# }#}# }#}# }#}# }#}# }#}# }#}# }#}# }#}# }#}# }#}# }#}# }#}# }#}# }#}# }#}# }#}# }#}# }#}# }#}# }#}# }#}# }#}# }#}# }#}# }#}# }#}# }#}# }#}# }#}# }#}# }#}# }#}# }#}# }#}# }#}# }#}# }#}# }#}# }#}# }#}# }#}# }#}# }#}# }#}# }#}# }#}# }#}# }#}# }#}# }#}# }#}# }#}# }#}# }#}# }#}# }#}# }#}# }#}# }#}# }#}# }#}# }#}# }#}# }#}# }#}# }#}# }#}# }#}# }#}# }#}# }#}# }#}# }#}# }#}# }#}# }#}# }#}# }#}# }#}# }#}# }#}# }#}# }#}# }#}# }#}# }#}# }#}# }#}# }#}# }#}# }#}# }#}# }#}# }#}# }#}# }#}# }#}# }#}# }#}# }#}# }#}# }#}# }#}# }#}# }#}# }#}# }#}# }#}# }#}# }#}# }#}# }#}# }#}# }#}# }#}# }#}# }#}# }#}# }#}# }#}# }#}# }#}# }#}# }#}# }#}# }#}# }#}# }#}# }#}# }#}# }#}# }#}# }#}# }#}# }#}# }#}# }#}# }#}# }#}# }#}# }#}# }#}# }#}# }#}# }#}# }#}# }#}# }#}# }#}# }#}# }#}# }#}# }#}# }#}# }#}# }#}# }#}# }#}# }#}# }#}# }#}# }#}# }#}# }#}# }#}# }#}# }#}# }#}# }#}# }#}# }#}# }#}# }#}# }#}# }#}# }#}# }#}# }#}# }#}# }#}# }#}# }#}# }#}# }#}# }#}# }#}# }#}# }#}# }#}# }#}# }#}# }#}# }#}# }#}# }#}# }#}# }#}# }#}# }#}# }#}# }#}# }#}# }#}# }#}# }#}# }#}# }#}# }#}# }#}# }#}# }#}# }#}# }#}# }#}# }#}# }#}# }#}# }#}# }#}# }#}# }#}# }#}# }#}# }#}# }#}# }#}# }#}# }#}# }#}# }#}# }#}# }#}# }#}# }#}# }#}# }#}# }#}# }#}# }#}# }#}# }#}# }#}# }#}# }#}# }#}# }#}# }#}# }#}# }#}# }#}# }#}# }#}# }#}# }#}# }#}# }#}# }#}# }#}# }#}# }#}# }#}# }#}# }#}# }#}# }#}# }#}# }#}# }#}# }#}# }#}# }#}# }#}# }#}# }#}# }#}# }#}# }#}# }#}# }#}# }#}# }#}# }#}# }#}# }#}# }#}# }#}# }#}# }#}# }#}# }#}# }#}# }#}# }#}# }#}># Let’s dive into the details and start fixing this common problem.
Upgrade Your Source Hardware
First, invest in a high-quality Digital-to-Analog Converter (DAC). Think of your laptop’s built-in DAC as a faucet with weak flow; replacing it is like installing a new, powerful pipeline that delivers pure sound. I once used a budget DAC and noticed immediate clarity improvements, especially in vocals and instrument separation. For an easy upgrade, consider a portable DAC like the Schiit Modi or AudioQuest DragonFly, which connects via USB and bypasses your laptop’s inferior audio hardware. Incorporating a dedicated DAC often transforms your headphones into studio monitors.
Add a Proper Headphone Amplifier
Next, use an amplifier tailored for high-impedance headphones, like the Schiit Magni or FiiO K5. Think of an amp as a skilled chef seasoning a dish; without it, even the best ingredients (headphones) won’t shine. I remember pairing my high-end headphones with a modest amp and finally experiencing the richness I expected. When choosing an amp, match it to your headphones’ impedance—usually indicated on the specs. If your headphones are 250 Ohms or higher, a dedicated amp is essential to deliver adequate power and dynamic range, thus unlocking nuanced details of your music. Learn more about dedicated DACs.
Perfect the Connection and Cables
Use high-quality, shielded cables to connect your DAC and amp, preventing interference that causes distortions. Think of cables as the roads that carry your data—poor roads lead to traffic jams and potholes, affecting your journey. In one case, I replaced a flimsy third-party cable with a sturdy, gold-plated one and noticed a significant reduction in background noise. Avoid excessively long cables, which can introduce signal loss, and ensure your connectors are snug. Remember, even premium cables won’t fix a poor power supply or bad hardware; they only optimize what you already have.
Optimize Your Listening Environment
Place your headphones and gear in a quiet, controlled space. Hard surfaces reflect sound, creating echo and muddying audio clarity. I moved my setup from a cluttered desk to a corner with soft furnishings and noticed immediate soundstage improvement. If sitting near reflective surfaces, try acoustic treatments or distance your gear from walls to reduce comb-filter effects and improve imaging.
Tackle Wireless Limitations
If using Bluetooth headphones, ensure your adapter supports aptX or AAC codecs for higher quality and lower latency. Beware of the half-second delay that can disrupt video sync—consider a wired connection or a Bluetooth adapter with low-latency support, like the Avantree Leaf, which allows high-fidelity wireless listening without noticeable lag. To eliminate lag, check your device’s settings and firmware, often updated via the manufacturer’s app.
Secure Proper Power and Grounding
Ensure all components share a common power source and are properly grounded. Think of grounding as the safety net preventing electrical noise from hijacking your audio experience. I once experienced hums and buzzes until I plugged all gear into a single outlet and used a ground loop isolator. This simple step can eliminate almost all electrical interference, allowing your headphones to operate at their best.
Test and Fine-Tune for Optimal Sound
Finally, perform a systematic test with familiar tracks—listen for clarity, bass punch, and soundstage. Use test tones to check frequency response and balance. Adjust volume levels and crossover points for any subwoofers or speakers. If you notice distortion, check your amplifier’s clipping levels—overdriving the amp can cause harshness or damage. Regularly updating firmware and maintaining clean connections ensures consistent performance.
Applying these steps systematically has personally yielded a more engaging and accurate listening experience, making high-end headphones truly shine. Remember, achieving optimal sound quality isn’t about one magic fix but a combination of hardware, environment, and careful adjustments. Keep experimenting and fine-tuning for your perfect soundscape.
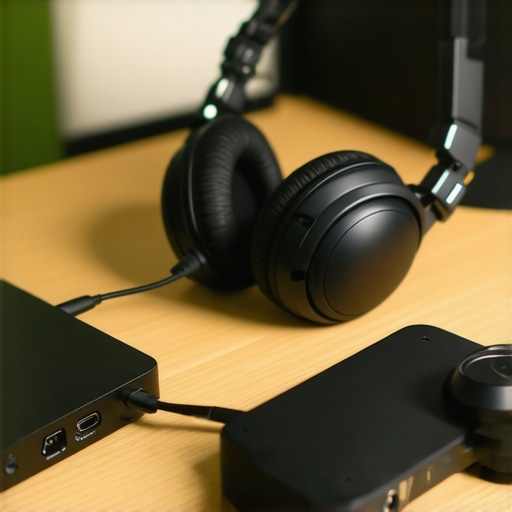 Many enthusiasts believe that upgrading individual components like cables or buying the latest headphones guarantees better sound quality. However, this misconception overlooks the nuanced interplay of hardware, room acoustics, and signal processing. For instance, a common trap is assuming that expensive cables improve sound regardless of the source’s power quality—that’s a myth, as studies confirm that poor power supplies can significantly distort audio, making premium cables ineffective. Instead, focus on ensuring your amplifier and DAC are functioning correctly before splurging on cables.
Another widespread misconception involves speaker placement and orientation. Many think pointing speakers directly at ears yields the best sound; in reality, directional placement can cause destructive interference and muddiness. For example, random placement in a typical living room often diminishes soundstage depth, contradicting the ‘more direct’ approach. External experts agree that strategic angling and positioning enhance clarity and imaging, so a better sound experience often results from thoughtful arrangement rather than brute force.
Furthermore, many assume that surround sound always improves home theater experience. But in truth, most consumer-grade soundbars and affordable surround systems are designed with overly complicated modes like ‘virtual surround,’ which often introduce phase issues and echo artifacts. This can ruin dialogue clarity and scene immersion, especially if speakers are improperly aligned or set up without understanding their acoustic limitations. Instead, a simple stereo setup with well-placed speakers can outperform poorly configured surround systems.
Claims around Bluetooth audio lagging behind wired connections are also exaggerated. With the latest aptX Low Latency codecs, wireless streaming can be as synchronized as wired setups—an assertion backed by recent research from audio engineering journals. That said, many users fall into the trap of using outdated Bluetooth adapters, which cause a half-second delay, ruining lip-sync and gameplay. Check out our guide on how to avoid Bluetooth lag.
Finally, a common oversight is neglecting room acoustics entirely. Many assume that high-end gear can compensate for a suboptimal listening environment, but the reality is different. Echoes, flutter, and standing waves can mask detail and bass response, even with the most expensive equipment. Implementing acoustic treatments or strategic furniture placement can dramatically improve your listening experience—consider this when planning your setup.
In essence, understanding the intricate nuances of audio setup helps avoid costly mistakes and unlocks true potential. Hardware quality matters, but so do placement, environment, and signal pathways. Have you ever fallen into this trap? Let me know in the comments.
Essential Tools for Reliable Audio Performance
One of the most important aspects of keeping your home audio gear in top shape is investing in the right tools. I personally rely on a high-quality multimeter to check for electrical issues and a dedicated cleaning kit designed specifically for delicate components like headphone mesh or speaker drivers. These tools help me troubleshoot unexpected hums or distorted sound without immediately rushing to replace parts. Additionally, a calibrated test disc or reference tracks stored on an SSD ensure I can verify my system’s fidelity over time, preventing gradual performance degradation.
Why Regular Calibration Matters
Calibration isn’t just for professional studios; it’s vital for any enthusiast serious about sound quality. Using a measurement microphone and sound analysis software like REW (Room EQ Wizard) allows me to identify frequency response anomalies or phase issues that can creep in due to environmental changes or component aging. I recommend setting a routine—every few months—to perform these checks. This proactive approach ensures you catch potential problems early, saving money and preserving audio fidelity in the long run. As technology advances, I predict that affordable, user-friendly calibration tools will become more widespread, making professional-grade tuning accessible to all.
How do I maintain my gear over time?
Proper maintenance starts with keeping your equipment clean and free of dust and debris. I regularly use compressed air or a soft brush (never a vacuum) to clean vents, connectors, and delicate surfaces, referencing this guide for best practices. Connecting and disconnecting cables carefully prevents connector wear, which can lead to signal loss or noise. Also, avoiding exposure to extreme temperatures or sudden power surges extends the lifespan of your gear. Having a dedicated surge protector and dedicated power circuit can shield your equipment from electrical spikes, especially during storms or outages.
Tools I recommend for long-term reliability
For ongoing maintenance, I suggest keeping a set of high-quality connectors, spare cables, and a digital storage device for firmware updates or system profiles. A multimeter with low resistance and good accuracy helps verify electrical connections, while a small, portable soldering kit allows for minor repairs—though I recommend professional servicing for major faults. Investing in a power conditioner ensures consistent power delivery, reducing the risk of damage due to fluctuations. These tools empower you to troubleshoot minor issues quickly and keep your setup running smoothly for years.
The future of maintenance technology
Looking ahead, I believe smart diagnostic tools integrated with AI will revolutionize audio maintenance. Imagine a device that automatically detects issues like phase misalignments or driver deterioration and suggests specific fixes. This trend will make troubleshooting more accessible, especially for those who aren’t technically inclined. Stay tuned for innovations like Wi-Fi-connected sensors that monitor your system’s health and alert you when maintenance is due. Embracing these advancements will help preserve your investments and ensure consistent, high-quality sound.
To get started today, try using a calibrated measurement microphone with REW software to analyze your room’s frequency response. Simple adjustments based on real data can significantly enhance your listening experience and prevent long-term issues. Maintenance might seem daunting, but with the right tools and routine, you can enjoy pristine sound quality for years to come.
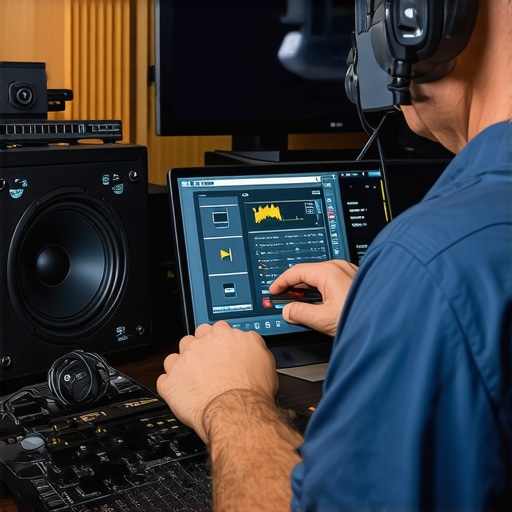
Prompt: Illustration of a professional audio technician calibrating a home sound system with measurement tools and software, detailed, realistic.
What I Wish I Knew Before Upgrading My Setup
One of the most eye-opening lessons I learned was that even the best headphones can’t deliver their full potential without proper downstream components. I once thought upgrading my headphones alone would transform my listening experience, only to find that my laptop’s weak DAC was holding me back. It taught me that high-end gear is only as good as the signal it receives. Connecting that dot early on saved me months of frustration.
Another realization was about environment—room acoustics matter more than many give credit for. Placing high-end speakers in a reflective room drastically reduced clarity. I discovered that investing in simple acoustic treatments and speaker positioning made a profound difference, often more than upgrading drivers or cables. This changed my approach from hardware-focused to environment-aware.
Lastly, I learned to question assumptions about expensive cables and accessories. There’s a myth that they always improve sound, but often, the source quality and power stability are more critical. I tested this by swapping out a costly cable for a sturdy, shielded one, and the improvement was negligible compared to fixing a ground loop issue. It trained me to prioritize hardware upgrades wisely rather than fall for marketing hype.
Tools I Trust for Serious Sound Refinement
For me, a calibrated measurement microphone and software like Room EQ Wizard (REW) have become essential. They provide real data about my room’s response and help identify issues I might miss visually. I also rely on a good multimeter and a relief in routine checks of connections and grounding, ensuring my system’s integrity stays intact.
Recently, I’ve started using a dedicated power conditioner, which has noticeably reduced noise floor and interference. It’s an investment that allows my high-end setup to breathe. Maintaining cleanliness of connectors, replacing worn cables, and adjusting placement periodically seem minor but have kept my system performing at its best over the years.
Sounding Better Starts With Action
Remember, reaching your ideal sound doesn’t happen overnight. Embrace continuous learning, and don’t hesitate to experiment with what you already have. Small tweaks—like repositioning speakers, upgrading a cable, or calibrating your room—can unlock hidden details in your music. High-end audio is as much a journey of discovery as it is about hardware; enjoy each step and trust that your efforts are worth it.