
Ever had that moment where you finally get comfortable with your favorite headphones, only to notice the sound quality declining? Maybe it’s that muffled bass or the faint crackle during your daily commute. Sounds familiar, right?
One of the sneakiest culprits behind muffled or distorted sound is grime buildup on the headphone mesh. But here’s the kicker: if I scrub too hard or use the wrong approach, I risk pushing all that dirt further inside, making the problem worse. That lightbulb moment hit me during a particularly stubborn cleaning attempt, where I realized that not all cleaning methods are created equal. Today, I want to share my personal insights and proven techniques to help you keep your headphone mesh spotless without risking internal damage.
The Art of Gentle Cleaning: Protecting Your Headphones While Removing Grime
Keeping your headphones sounding fresh doesn’t mean you have to be rough or guesswork. With the right tools and techniques, you can combat built-up dirt efficiently and safely. Think of it like giving your sneakers a deep clean without turning them inside out—you want that just-left-the-shoe-shop shine, not a torn lace. I found that using soft brushes, like a small, clean paintbrush, combined with gentle cleaning solutions, can make a world of difference. When I started employing these methods, I noticed not only quieter, clearer sound but also a longer lifespan for my gear.
Before diving into the specifics, ask yourself: Have I ever tried to clean my headphones and ended up with worse audio quality afterward? If yes, you’re not alone, but the good news is that there’s a way to fix that, and it’s simpler than you might think.
Is Overzealous Cleaning Worth It?
Some folks swear by aggressive scrubbing, but I’ve learned the hard way that this often pushes grime deeper into the mesh, making subsequent cleaning efforts more complicated. Early in my journey, I tried to use toothpicks, cotton swabs, and even compressed air—all with mixed results. The mistake I made? I didn’t realize that delicate, targeted cleaning yields the best results. According to audiophile experts, improper cleaning can lead to loss of sound detail or damage to the mesh itself, which is why a gentle approach is always recommended (see here for more tips).
Now, I stick to methods that respect the delicate fabric and the internal components, ensuring my headphones stay in top shape for longer. Ready to see how you can do the same? Let’s move past the myths and get into practical, safe cleaning techniques that really work.
Start with the Right Tools
Gather a soft-bristled brush, like a clean paintbrush or a dedicated headphone cleaning brush, and a microfiber cloth. Avoid using rough materials or paper towels that can damage delicate mesh fibers. During my first attempt, I tried an old makeup brush, which proved gentle yet effective in dislodging dirt from hard-to-reach areas.
Apply Gentle Cleaning Solutions
Use a small amount of isopropyl alcohol diluted with water or a specialized electronics cleaner. Lightly dampen your brush or cloth; never saturate. I once sprayed straight alcohol onto the mesh, which caused some fibers to fray—lesson learned: minimal moisture is key. Think of this step like cleaning a camera lens — gentle is better to prevent damage.
Target Grime Without Pushing It In
Gently brush the mesh in circular motions, focusing on accumulated dirt. Imagine patting a dusty surface rather than scrubbing it like a stubborn stain. I remember a time I used a cotton swab vigorously, which pushed grime deeper, leading to muffled sound. Instead, a light, consistent touch kept my headphones sounding crisp and clear.
Use Compressed Air Sparingly
If there’s loose dust, a quick puff of compressed air can help. Hold the can upright and keep it at a distance to avoid moisture spraying out. I once sprayed directly into the mesh, which caused moisture to settle internally—definitely avoid this. Use compressed air as a finishing touch, not a primary cleaning method.
Regular Maintenance To Keep Sound Clarity
Incorporate this gentle cleaning routine weekly or bi-weekly, especially after workouts or outdoor use. Think of it like tuning a musical instrument — consistent care preserves sound quality. Regular upkeep prevents heavy grime buildup, which can be challenging to remove if ignored, similar to how a neglected speaker requires more intense cleaning or even repair.
Additional Tips For Long-Term Care
Store headphones in a clean, dry place away from dust and direct sunlight. Avoid using chemical cleaners not designed for electronics, as they can degrade mesh material. For stubborn dirt, consider professional cleaning services or replacement if sound quality diminishes significantly. Proper handling and routine care extend your headphones’ lifespan, saving you money and frustration in the long run.
Remember, always approach cleaning with patience and care. Rushing or applying excessive force can damage sensitive components and ruin your listening experience. By treating your headphones like precision instruments, you’ll enjoy crisp sound and comfort for years to come.
When shopping for home audio gear, many enthusiasts are swayed by common beliefs that aren’t entirely accurate. One prevalent myth is that higher price always guarantees superior sound quality. While premium brands often offer excellent products, there are surprisingly many budget-friendly options that outperform expensive counterparts—so don’t dismiss affordable gear without a thorough audition. Moreover, many assume that the latest technology is automatically better. For instance, newer soundbars with ‘DTS:X’ or ‘Dolby Atmos’ might sound impressive in a showroom, but real-world listening depends heavily on room acoustics and proper placement. A study published in the Journal of the Audio Engineering Society indicates that environmental factors influence perceived audio quality more than hardware specs, so focus on your setup as much as the gear itself.
Another common misconception involves the simplicity of connecting home audio components. Many believe that any amplifier can drive any speaker, but this isn’t true. Mismatch in impedance or power ratings can lead to subpar sound or even damage. To avoid these pitfalls, learn the distinctions between active and passive speakers—since each has different requirements—by reviewing this guide. Additionally, some consumers overlook the importance of room acoustics, thinking new speakers will compensate for poor positioning. This often results in disappointing sound, despite having top-tier equipment. Remember, even a high-end speaker can’t perform optimally in an unsuitable environment.
Are Soundbars Worth the Hype or Just a Shortcut?
Many assume that soundbars are a seamless replacement for multi-component surround systems. While they can significantly improve TV audio, they often fall short of delivering a true cinematic experience. This misconception stems from marketing claims that tout immersive sound everywhere in the room. However, the actual performance heavily depends on factors like speaker placement, room size, and acoustics. For example, a poorly placed soundbar might produce uneven soundstage or muddled dialogue, undermining its advantages. In fact, professional reviews suggest that for serious listening, dedicated speakers and proper calibration outperform all-in-one solutions. So, before investing in a soundbar, consider your room’s characteristics and whether you’re willing to set up a more detailed system. Combining high-quality speakers with room treatment can yield a richer experience than most soundbars can offer. If you’re curious how to elevate your setup, reviewing tips on speaker placement or room acoustics can make a visible difference.
Be cautious of the misconception that the latest gadgets automatically surpass older, proven models. Vintage amplifiers, for instance, still hold their ground against many modern digital counterparts, especially in terms of warmth and musicality, as highlighted in this comparison. Understanding the nuances of your gear and environment can save you from costly mistakes and help you craft a truly satisfying listening space. Have you ever fallen into this trap? Let me know in the comments.
Keep Your Gear Running Smoothly with Precision Tools
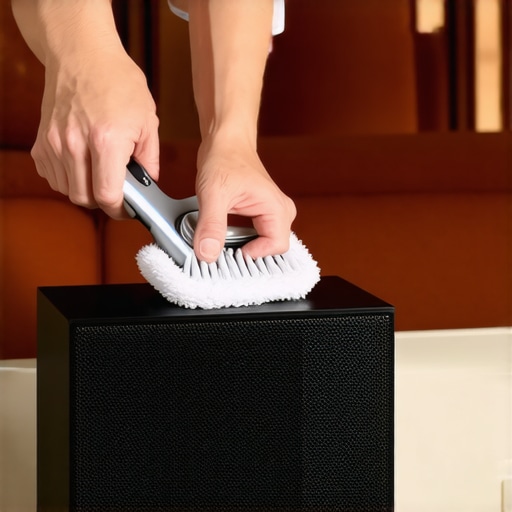
Maintaining your home audio equipment isn’t just about gentle cleaning; it also involves using the right tools that ensure longevity and optimal performance. Personally, I swear by a few dedicated accessories that have become indispensable in my routine. For instance, a well-crafted, anti-static microfiber cleaning cloth is perfect for wiping down speakers and soundbars without leaving residue or static, which can attract more dust over time.
Another underrated tool is a small, precision anti-static brush. This allows me to gently dislodge dust from internal components and vents, especially in amplifiers or AV receivers where dust can cause overheating or audio degradation. I prefer brushes with soft, densely packed bristles—anything coarser risks damaging sensitive circuits.
Select Quality Software for Calibration and Diagnostics
Beyond physical tools, software solutions are critical for maintaining a pristine sound profile over time. I recommend a program like Room EQ Wizard (REW). It helps detect issues like phase mismatch or frequency response anomalies, ensuring your setup remains balanced. When I first started using REW, I was shocked to find how even minor adjustments could significantly improve clarity—it’s like giving your system a tune-up from the comfort of your chair.
Streamline Maintenance for Long-Term Gains
Developing a routine with these tools makes your job easier. For example, I dedicate 15 minutes every other week to dusting, testing connections, and running quick calibration checks with REW. This proactive approach prevents minor issues from snowballing into costly repairs or replacements. Additionally, keeping a log of your maintenance sessions helps identify recurring problems, guiding you to target the root causes more effectively.
Looking ahead, I predict that the integration of smart diagnostics—powered by AI—will become standard for home audio systems, alerting you instantly about degradation or misalignment. Some high-end speakers already feature self-calibration, but for now, combining manual tools like specialized brushes and calibration software offers the best results.
How do I maintain my home audio setup over time?
Start by investing in quality, purpose-built tools like anti-static brushes and microfiber cloths—these are proven to be gentle yet effective. Incorporate regular software diagnostics, such as running acoustic tests with REW, to catch issues early. Consistency is key; set a maintenance schedule and stick to it, just as you would with a car’s service routine. Over time, this discipline ensures your gear remains in peak condition, delivering rich, clean sound for years. For an extra boost, try calibrating your system using advanced software—over time, you’ll notice a tangible difference in clarity and depth that simply can’t be achieved through basic setup alone.
Ready to elevate your maintenance game? Incorporate a precision microfiber cloth and run a calibration check with REW today—small steps that make a big impact!
< >
>