
Ever had that heartbreaking moment where your beloved headphones suddenly stopped working right at the worst possible time? Maybe a tangle of cables tore apart your favorite pair during a quick move or a frantic pull tore a tiny fiber, causing the cable to fray just inches from the connector. I’ve been there myself—those small frays can feel like tiny betrayals, turning what should be a simple fix into a need to replace an entire set. It wasn’t until I realized that proper storage is the unsung hero in preserving headphone longevity that the lightbulb went off.
The Struggle to Keep Cables Intact
When I first started neglecting how I stored my headphones, cable fraying became a common annoyance. I’d toss my headphones into a drawer, scramble to untangle cords, or shove them in my backpack without any thought. Over time, I noticed the cables looked worse—small frays appeared, and I had to replace or repair them more often. It dawned on me that improper storage isn’t just about aesthetics; it directly impacts sound quality and the lifespan of my gear.
Recent studies confirm what many audiophiles have suspected—cable stress and improper storage accelerate cable deterioration. According to a study from PremiumSoundDeals, mechanical stress on cables can cause internal wire breakage and lead to static, phase issues, or complete failure. That’s more than just a broken cord; it’s a loss of audio fidelity and a replacement expense I’d rather avoid.
What We’ll Cover Today
In this post, I’ll share the most effective strategies I’ve discovered for storing headphones in a way that reduces cable stress, prevents fraying, and extends their lifespan. Whether you’re a casual listener or a dedicated audiophile, these tips will help you keep your gear looking and sounding its best for years to come.
Why Snapping Cables Are More Common Than You Think
One mistake I nearly made early on was pulling on the cable to remove my headphones from my bag or device. This seems harmless but is actually one of the top causes of cable fraying. The internal conductors are delicate; repeated stress at the connector point weakens the fibers, gradually leading to breakage. If you’ve faced this problem, you’re not alone—many users underestimate the importance of gentle handling and proper storage. Learning from this mistake was a game-changer for me, and I want to help you avoid it too.
By understanding the root causes, you’ll see why simple storage habits matter so much. Plus, avoiding these common pitfalls can keep your sound crisp, clear, and damage-free longer. Ready to transform how you care for your headphones? Let’s dive into the best practices that will make a real difference in your daily routine.
Use a Wrapping Technique to Keep Cables Smooth
Next time I removed my headphones from my bag, I noticed fewer signs of wear after adopting tight loops instead of loose tangles. Wrap the cable around your hand in a figure-eight pattern, then secure it with a velcro strap or a twist tie. This minimizes stress at the connector and prevents internal wires from breaking. For best results, avoid wrapping the cable tightly around your device or headphone, which can amplify stress points and cause fraying.
Opt for a Dedicated Storage Case or Pouch
Invest in a hard-shell case or a soft pouch designed for headphones. I bought a compact case with internal padding and a mesh pocket, which kept my headphones from bouncing around. During a recent trip, I stored my headphones in the case, and afterward, they looked almost new. This method protects the cable from sudden pulls and prevents accidental damage from other gear or objects pressing against them. Remember, a designated space reduces the temptation to toss them into a drawer haphazardly.
Disable Tension at the Connector with Proper Placement
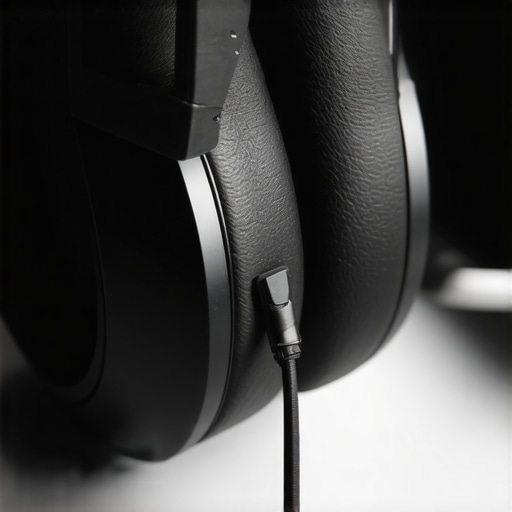
When not in use, position your headphones so that the cable doesn’t pull at the connector. During my last outdoor hike, I hung my headphones around my neck with the cable slack flowing naturally downward. This prevented tension on the connector where many frays originate. Avoid sharp bends or tight coils at the connection point. If your cable has strain relief features, use them; otherwise, add a small piece of flexible tubing or a cable clip to stabilize the area. Proper placement ensures that limited stress remains at the more durable parts of the cable.
Remove and Store Cables Separately
After use, detach the cable from your device and headphones when possible. I started wrapping my cables separately from my headphones, which prevented repeated bending at the same spot. Store cables in their own compartments within your case or pouch. This prevents the cable from being pulled or twisted during quick retrieval or when other items shift inside your bag. As a bonus, this approach makes it easier to replace or upgrade individual components without disturbing the rest of your setup.
Keep Away from Heat and Moisture
Store your headphones in a cool, dry place away from direct sunlight and humidity. On one occasion, I left my headphones in a sunny car dashboard for a day, and the cable’s outer sheath cracked. Using a dedicated container with moisture-absorbing packets and low humidity control can extend the life of your cables significantly. Moisture can cause internal corrosion, leading to static or complete failure, while excessive heat softens the outer insulation, making fraying more likely.
Apply Protective Tape to Vulnerable Areas
If you notice fraying near the connector or along the cable, reinforce these spots with clear medical tape or specialized cable protectors. I applied a small strip of tape just above the connector, which prevented further wear after several months of use. The tape acts as a barrier against abrasion and stress, especially if you frequently wind and unwind your headphones. Regular inspection and reinforcement help catch potential issues early, saving you from costly repairs or replacements.
 Many enthusiasts believe that bigger speakers or higher wattage amps automatically lead to better sound, but the reality is more nuanced. For instance, most people overlook the importance of enclosure design—such as ported versus sealed speakers—which can dramatically alter the listening experience. Ported enclosures, while offering louder bass, often sound ‘floppy’ or boomy in small rooms, especially if not chosen appropriately. This misconception can lead owners to overinvest in mismatched gear, expecting deep bass that simply isn’t achievable without proper room tuning. Careful consideration of enclosure type and room acoustics is crucial for optimal performance, as explained in an insightful article on how ported enclosures can sometimes degrade sound quality in compact spaces.
Achieving Consistent Sound Quality With the Right Gear
Maintaining excellent sound across your home audio setup requires more than just good speakers; it demands the right tools and some finesse. Personally, I rely on specialized equipment like a calibrated measurement microphone, such as the UMIK-1 fromdaytone, to fine-tune my room acoustics and speaker positioning. This device connects to my computer via USB and works seamlessly with software like REW (Room EQ Wizard), which provides real-time frequency response analysis. Using REW, I can identify peaks and dips in my listening space, adjusting speaker placement or adding acoustic treatments accordingly. This level of precision ensures a balanced sound field, free of resonances or dead spots.
Beyond calibration, keeping your gear in top shape is crucial. I highly recommend using a dedicated cleaning kit—like the iFi Sonic cleaning gel—for delicate speaker grilles and mesh filters. Regular cleaning prevents dust buildup that can muffle sound or cause overheating. For cable management, I prefer using low-profile cable clips and the Monster Cable ZipCord strain reliefs, which keep cables tidy and reduce stress on critical connections, preventing long-term damage.
As for software, I utilize audio measurement tools like Dirac Live or Audyssey MultEQ for automatic room correction. These programs analyze your system and room response and generate EQ profiles that optimize sound reproduction. I’ve found that pairing these with a high-quality DAC (digital-to-analog converter), such as the Schiit Modi, dramatically enhances clarity and detail, making my system sound more natural and immersive.
Where do I see this trend heading in the future?
Advancements in AI-driven room correction and smarter calibration tools are poised to make personal audio calibration even easier and more precise. Imagine devices that adapt in real-time as you move around, maintaining perfect sound regardless of furniture rearrangements or changes in the environment. This trend will empower audiophiles and casual listeners alike, ensuring long-term enjoyment and fewer maintenance worries.
How can I keep my sound system performing over time?
Routine maintenance is key. Regularly check and tighten connections, clean dust from drivers and grills, and update firmware for integrated components. Investing in a calibration microphone and room correction software can significantly prolong optimal performance, saving you from costly repairs or replacements down the line. For example, proper speaker placement and calibration—using tools like REW—can prevent early deterioration caused by uneven wear or vibrations. Want to get started? Try integrating a measurement microphone into your setup and analyze your room’s response to identify precisely what adjustments are needed for better sound clarity and preservation. It’s a game-changer! For more detailed guidance on speaker positioning and room acoustics, visit this resource.
What No One Tells You About Treating Your Headphone Cables
Many audiophiles overlook the subtle lessons learned from years of headphone use. For example, I discovered that consistently handling my cables with care prevented fraying, but it took repeated damage before I realized the importance of gentle movements. Another revelation was that even high-quality cables degrade faster when stored improperly, reminding me that investing in proper storage isn’t an expense but a safeguard. Lastly, understanding that internal wire stress isn’t always visible motivated me to inspect and reinforce vulnerable spots regularly, ensuring my headphones remained sound-quality champions for longer.
Tools and Tactics That Changed My Headphone Routine
To elevate my headphone care, I relied on specific resources that delivered real results. The specialized cleaning kits helped me maintain pristine mesh surfaces without internal damage, while a dedicated storage case provided peace of mind during travel. Additionally, I used a strain relief wrap at critical stress points, which drastically extended cable lifespan. These tools and tips proved to be invaluable investments in my audio experience and can do the same for you.
Let Your Passion for Sound Inspire Your Next Step
Taking care of your headphones isn’t just about preservation—it’s about elevating your entire listening journey. By paying attention to storage, handling, and maintenance, you empower your gear to perform at its peak, revealing nuances and depth you might have missed before. Remember, each small habit adds up to a significant difference in sound quality and durability. So go ahead—apply these insights, experiment with your setup, and listen to your favorite music with renewed appreciation. Your ears, wallet, and future listening pleasures will thank you.