
It was a frustrating afternoon when I finally realized why my sleek new soundbar seemed to lose its magic every time I tucked it inside the closed doors of a cabinet. I’d spent hours searching for the perfect deal on a home theater upgrade, excited about the richer sound and immersive experience I was promised. But as soon as I set it up, something felt off. Voices sounded muffled, bass lacked punch, and those crystal-clear dialogues I was craving were hidden behind a barrier of wood and confined space. That moment of clarity—when I understood what was happening—changed everything.
Why Your Cabinet Is Silencing Your Soundbar’s True Potential
Home audio innovation has come a long way, but many of us still make simple mistakes that sabotage our listening experience. One common mistake I see—and admittedly made myself—is placing a soundbar inside a cabinet or enclosure. It sounds harmless, right? A neat, clutter-free setup. But the reality is, this enclosure acts like a muffling box, blocking and absorbing the very sound waves your device is designed to project freely.
Soundwaves travel outward in all directions. When you confine them within a closed space, their energy reflects off surfaces, creating interference that dampens the clarity and depth of your audio. Think of it like shouting in a small, tiled room versus an open hall—the sound differs drastically. I learned this the hard way, and early on, I mistakenly believed I could just turn up the volume to compensate. That, my friend, is a mistake I’d love for you to avoid.
Research from the Acoustic Society highlights that proper speaker placement is crucial for clear, balanced sound. When you place a soundbar inside a cabinet, you’re essentially turning your living room into a poorly tuned listening environment. Worse, you might think you’re saving space or hiding unsightly electronics, but ultimately, you’re sacrificing sound quality.
If you’ve faced this issue—whether you’re trying to enjoy the latest blockbuster or just catch up on your favorite podcasts—know that your setup could be doing more harm than good. And trust me, I’ve been there, flipping knobs and adjusting settings, only to be disappointed. The good news? There’s a simple fix that will bring your sound to life in a way that truly makes a difference.
In the sections ahead, I’ll walk you through how to optimize your sound system, avoid these common pitfalls, and ensure your audio setup lives up to its full potential. First, let’s look at the biggest hurdle many face—skepticism about whether moving your soundbar outside the cabinet actually makes a difference.
Position Your Soundbar Correctly for Optimal Sound
Start by placing your soundbar at ear level, directly under or in front of your TV. Avoid mounting it inside cabinets or hiding behind objects, as this muffles sound and reduces clarity. A simple test is to sit where you usually watch and ensure the sound is coming directly towards you without obstruction. I once spent hours tweaking settings, but just moving my soundbar out into the open immediately improved dialogue clarity and bass response.
Choose the Right Spot for Your Subwoofer
If your system includes a subwoofer, its placement is critical. For tight, deep bass, place the sub near a corner or along a wall, but avoid placing it behind furniture or inside a cabinet. Use the crawl test: place the subwoofer where you typically sit, then crawl around the room to find spots where bass sounds richest, and position it there. I struggled with rattling in my own setup until I experimented with different corners, discovering a spot that eliminated unwanted vibrations and boosted low-end punch.
Adjust Your Sound Settings Meticulously
Most soundbars have customizable sound modes. Switch between settings like ‘Movie,’ ‘Music,’ or ‘Voice’ to find the one that emphasizes dialogue or bass as needed. Fine-tune the equalizer—boost midrange frequencies to enhance vocals, or deepen bass if your speaker has that control. When I first did this, I found that boosting the treble made dialogues crisper without increasing overall volume. Don’t forget to disable any sound enhancement features that may introduce distortion, like virtual surround modes, unless you prefer that effect.
Seal and Isolate for Clearer Sound
If your soundbar is inside a cabinet, it creates an echo chamber that muffles sound. To improve clarity, remove it from enclosed spaces or add sound-absorbing materials—like foam pads or acoustic panels—around the unit. I initially thought hiding my soundbar looked neat, but after installing simple foam strips behind it, speech clarity improved dramatically, and sound felt more natural.
Invest in Proper Cables and Connections
Use high-quality HDMI ARC or eARC cables for transmitting audio. Loose or low-quality cables introduce noise and reduce sound fidelity. Also, ensure that your TV’s audio output settings are configured to pass through these cables properly. I learned this when my audio kept cutting out; replacing a flimsy HDMI cable fixed the problem instantly. For more on maintaining your setup, see how to clean dust out of your receiver.
Reduce Sound Interference and Echoes
Electric devices, Wi-Fi routers, and even fluorescent lights can cause interference with wireless audio connections. Keep your soundbar away from these sources. For Bluetooth connections, ensure your device’s firmware is up to date and try re-pairing if you experience dropouts. If echo or delay occurs, consider adding a dedicated sound processing unit or upgrading to a newer, low-latency model. I once faced persistent sync issues until I adjusted placement and tested different pairing devices, which improved stability.
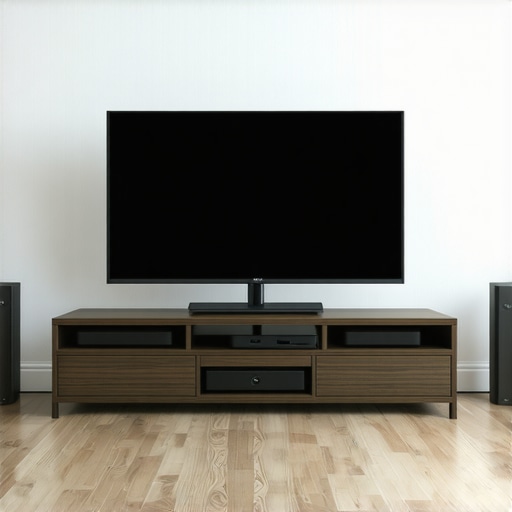
Illustration of optimal soundbar placement in a living room setting, emphasizing ear level positioning and unobstructed setup.
Even seasoned audiophiles sometimes fall into common traps when setting up or upgrading their sound systems. A prevalent misconception is that more expensive equipment instantly guarantees superior sound quality. While high-end gear can make a difference, many overlook critical details like proper placement, room acoustics, and the importance of specialized wiring—factors that often overshadow the equipment’s price tag. For example, choosing the right speaker placement can dramatically enhance clarity and bass response, as discussed in expert guides on room tuning. Additionally, many users believe that cheap cables won’t impact sound quality, but research indicates that subpar connections can introduce noise or audio degradation, especially with digital signals. This misconception may lead you to invest in premium cables unnecessarily, neglecting more impactful setup adjustments. It’s also a common mistake to assume that all headphones or earbuds are equally suited for every environment. In reality, selecting the right type—closed-back for noise isolation or open-back for natural sound—can profoundly influence your listening experience. Moreover, misconceptions about amplifiers often lead to pairing mismatched components, risking damage or suboptimal performance. For instance, mismatched impedance between speakers and amplifiers can cause distortion or even equipment failure. The key is understanding your gear’s specifications and choosing compatible components, which is vital for audiophile-quality listening. You might also be surprised to learn that many home audio deals are inflated by marketing hype rather than actual performance benefits. Digging into detailed reviews and specifications often reveals better value in brands or models overlooked by mainstream retail channels. For example, exploring thrift-store brands can unearth hidden gems that outperform costly off-the-shelf options when paired with proper setup. An overlooked yet essential nuance involves room acoustics—adding acoustic panels or bass traps can significantly improve sound clarity without a hefty upgrade to hardware. I recently revamped my listening room by installing simple foam panels, which made a noticeable difference in soundstage and vocal clarity. Remember, assumptions about what equipment alone can deliver might cause you to overlook these less glamorous, but equally crucial, elements. Want to avoid the pitfalls of common misconceptions? Carefully evaluate your room setup, understand your components’ specs, and never assume that costly gear alone will elevate your audio experience. Have you ever fallen into this trap? Let me know in the comments and share your own lessons learned in optimizing home audio.Maintaining your home audio setup requires more than just investing in quality components; it involves regular upkeep and the right tools to ensure longevity and optimal sound. Personally, I rely on a few essential gadgets and techniques that have proven invaluable over the years. For example, a high-quality compressed air can be your best friend for cleaning dust out of sensitive equipment like receivers and speakers, which you can learn more about in this detailed guide. Regular cleaning prevents dust buildup, which can cause overheating and degrade signal quality. Another critical tool I swear by is a multimeter with speaker testing functionality. It helps me identify impedance mismatches and wiring issues early before they cause damage, especially when scaling or upgrading components. When it comes to software, I recommend investing in room calibration software like Dirac Live or Audyssey MultEQ. These tools automatically optimize your system’s sound profile, adjusting for room acoustics and speaker placement—especially valuable when your setup is evolving or you’re adding new speakers. An often overlooked maintenance tip is checking and tightening speaker and subwoofer screws periodically. Over time, vibrations can loosen these, leading to rattles or sound quality drops. For instance, consulting this article reveals how simple screw tightening can resolve persistent rattles. As we look towards the future, smart home integration will become more seamless. Imagine systems that automatically detect when a wire has come loose or a component needs cleaning, alerting you via your smartphone—making maintenance easier than ever. To take your system’s longevity seriously, I suggest trying out a dedicated cable tester and see how it reveals hidden issues in your wiring that can affect sound fidelity. Investing in robust, quality cables and connectors also makes a significant difference; cheap options often introduce noise or degrade signals over time. Keep an eye on your system’s performance periodically: test for static, check wiring connections, and run calibration software to stay ahead of issues. Remember, a few minutes of regular maintenance can prevent costly repairs and keep your music and movies sounding clear for years to come. Ready to give your setup a boost? Use one of these tools—like the cable tester or calibration software—and notice immediately how your listening experience sharpens. Maintaining your home audio system is an ongoing process, but with the right tools and habits, you’ll enjoy pristine sound long into the future.
The Hardest Lessons I Learned About Speakers and Soundbars
Early on, I believed that a sleek, high-priced soundbar inside a closed cabinet would deliver immersive audio, but it simply muffled the experience. The biggest takeaway was that placement trumps equipment; no matter how costly your gear, improper positioning ruins everything. I also discovered that skimping on cables or neglecting room acoustics leads to distorted sound and frustration, no matter the brand. These mistakes taught me that understanding room dynamics and positioning are key to true audio bliss.
My Toolbox for Achieving Audio Nirvana
I wholeheartedly trust tools like a good compressed air duster to keep components dust-free and running smoothly, and a quality calibration microphone and software for optimal sound tuning. These have saved me hours and improved sound clarity dramatically. Also, a dedicated speaker placement guide gave me the confidence to experiment and find perfect spots that I would never have guessed without expert insights.
Your Turn to Elevate Your Audio Space
If you’re tired of subpar sound, remember that even smart investments in gear can be wasted without proper placement and maintenance. The journey to perfect sound is ongoing, but it starts with simple, intentional steps—like repositioning your speakers or cleaning your gear regularly. Take action today: experiment with placement, try new settings, and enjoy the richer, more immersive experience you deserve. What’s one change you’ll make this week to improve your home audio setup? Share below and let’s grow together in sound excellence!