
I sat there, staring at my expensive new gear, feeling like a total fraud. I’d spent months saving up for decent monitors, thinking they’d magically turn my bedroom into a pro studio. Instead, everything I played sounded congested, like the singer had a cold and the drummer was trapped in a closet. I was convinced I’d bought ‘lemons’ or that my ears were somehow broken. It took me a frustrating week of troubleshooting to realize the speakers weren’t the problem—my wall was. If you have ever felt that suffocating, ‘boxy’ pressure in your ears while trying to mix, you are not alone, and it is likely not your speakers’ fault.
That Annoying Boxy Sound Isn’t Your Gear’s Fault
The truth is, even the best gear can’t fight physics. When you jam a speaker right against a wall, you’re triggering a phenomenon known as boundary gain. Those low-end frequencies that usually wrap around the back of the speaker hit the wall and bounce right back at you, often out of phase and severely bloated. It is a similar physical struggle to why your studio monitors don’t have enough bass for hip-hop or why they sound like a muddy mess in a corner. According to the acoustics experts at Genelec, placing a monitor against a solid wall can increase the low-frequency output by up to 6 decibels, which completely masks the delicate midrange where the ‘life’ of your music lives. I made the classic rookie mistake of thinking closer was better for space-saving, and I paid for it with months of terrible-sounding mixes.
Is My Small Room Just Too Far Gone for Good Sound?
You might be thinking that unless you have a 2,000-square-foot dedicated tracking room, you’re doomed to ‘boxy’ audio forever. I certainly felt that way. I almost gave up and went back to mixing exclusively on headphones because I couldn’t get my monitors to behave. But here is the secret: you don’t need a professional studio; you just need to understand how sound waves interact with your drywall. Just like learning how to stop the hissing sound in your studio monitors, fixing boxiness is about isolation and placement. Have you ever noticed your speakers sounding completely different just by moving your head a few inches? That is your room talking to you. We are going to silence that chatter today. Have you struggled with your mixes sounding ‘small’ or ‘muddy’ the second you listen to them in your car? Let me know in the comments if that sounds familiar, because we are about to pull those speakers out of the mud.
Stop Hugging the Wall to Kill the Mud
The first thing you need to do is give your monitors some literal breathing room. I’m talking about creating a physical gap between your speakers and the back wall. Think of your speaker as a person shouting; if they shout directly into a bucket, the sound is muffled, boomy, and ‘boxy.’ By pulling the monitors away from the wall—ideally 8 to 12 inches at the very minimum—you allow those low frequencies to dissipate rather than reflecting instantly back into your ears. This is the exact same logic behind why you should stop placing your speakers directly on the floor for better bass. When I was in my first apartment, I had my setup shoved into a corner to save room for a couch. The result was a low-end nightmare that made every kick drum sound like a wet cardboard box. Once I pulled the desk out just ten inches, the ‘cloud’ around the music lifted and I could finally hear the notes. 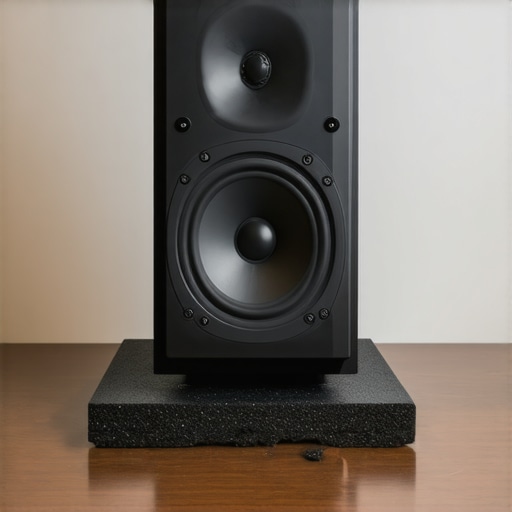
Your Desk Is a Secret Bass Trap
Second, we have to talk about decoupling. If your speakers are sitting directly on your desk, your desk has effectively become part of the speaker cabinet. Every time the woofer moves, it sends mechanical energy into the wood of your desk, which then vibrates and creates its own muddy frequencies. It’s a similar principle to why your subwoofer rattles your neighbors’ walls—it is about energy transfer. To fix this, you need isolation. I remember using stacks of heavy textbooks in a pinch, which actually worked surprisingly well to stop the desk from humming along with my basslines. However, dedicated foam pads or isolation pucks are among the 3 budget upgrades that make cheap speakers sound expensive because they force the sound to come only from the drivers, not your furniture.
Height Is More Important Than Price
If your monitors are pointing at your chest instead of your ears, you are missing half the detail. High frequencies are extremely directional; if they aren’t hitting your ears directly, they are getting lost in your lap or bouncing off the floor. Just as your center channel should always be at ear level in a home theater, your studio monitors need to be elevated so the tweeters align with your ears. I once spent a whole afternoon building a DIY solution because I couldn’t afford brand-name stands, and learning how to build your own speaker stands for under twenty dollars was a total game-changer for my mixing. By getting the tweeters level with my head, the ‘boxiness’ vanished because the high-end clarity finally had a clear, unobstructed path to my eardrums. You don’t need a degree in acoustics to hear the difference—you just need to stop burying the sound in your desk.
Stop Chasing Watts Like They Are Magic
We often fall into the trap of thinking a bigger number on the box means a cleaner sound. I used to be that guy, hunting for the highest wattage amplifier I could find on a budget, thinking I was giving my speakers ‘more room to breathe.’ In reality, I was just courting distortion. The contrarian truth is that under-powering your speakers is often more dangerous than over-powering them. When an under-powered amp struggles to drive a heavy woofer, it ‘clips,’ sending a squared-off signal that can fry your tweeters in seconds. Instead of obsessing over raw power, you should be looking at current delivery and thermal stability. This is exactly how to choose the right amplifier power for your desktop speakers without falling for the marketing fluff. If your amp is running so hot you can’t touch it, you aren’t hearing ‘warmth’; you’re hearing a circuit on the edge of failure, which is a common reason why your new amplifier gets hot after only twenty minutes. Have you ever fallen into this ‘more is better’ trap? Let me know in the comments.
Is Your Phone Secretly Bottlenecking Your High-End Headphones?
Many audiophiles argue that you need a multi-thousand dollar stack to enjoy high-fidelity audio, but the nuance is more subtle. While the truth about using your phone to power high-end headphones is that it often lacks the voltage swing for high-impedance gear, a $100 dongle DAC can often outperform vintage rack gear. The ‘Oops’ factor here is ignoring the output impedance. If your source has a high output impedance, it will physically change the frequency response of your headphones, making them sound bloated or thin regardless of the ‘quality’ of the file. Dr. Floyd Toole, a renowned expert in acoustics, has famously noted through extensive double-blind testing that most listeners cannot distinguish between high-end cables, yet they can immediately spot the frequency shifts caused by poor impedance matching or room reflections. 
Gold Tips and Silver Wires Are Just Expensive Jewelry
If you are still buying into the hype of boutique cables, it is time for a reality check. I have seen people spend more on their interconnects than on their room treatment, which is like putting racing tires on a car with a broken engine. In the world of home audio, why expensive speaker cables are mostly a marketing trick becomes obvious once you look at the physics of conductivity. Unless you are running cables over fifty feet, standard oxygen-free copper will perform identically to silver-plated boutique brands. It is the same story with connectors; the truth about gold-plated audio connectors for home stereos is that gold is actually less conductive than copper or silver; it is only used because it doesn’t corrode. If you’re chasing a cleaner signal, stop looking at the wire and start looking at your interference. For instance, why your phono preamp needs to be far away from the power amp has everything to do with electromagnetic interference, something no amount of gold plating can fix. If you hear a low-end buzz, it is likely a ground loop, which is the reason your subwoofer makes a humming sound when nothing is playing. Focus on the physics of the signal path, not the price tag of the accessories.
How do I keep my high-end audio gear sounding new for years?
Maintaining gear isn’t just about wiping off dust; it’s about preventing chemical and mechanical breakdown before it ruins your investment. For instance, that annoying static you hear when turning a knob is usually oxidation on the internal contacts. I swear by a quick blast of DeoxIT D5; it’s the industry standard for fixing the crackling noise when you turn your amp volume. If you are into vinyl, you already know that a dirty needle is the enemy of high fidelity. Learning the best way to clean a turntable stylus without breaking it is a skill that saves you hundreds in replacement costs. Also, don’t ignore the soft parts. Sweat and skin oils are acidic; they will eventually eat through synthetic leather, which is why your headphone pads are peeling. Swapping them out is one of the easiest ways to refresh your kit, and knowing how to replace the foam pads on your favorite headphones can make an old pair feel brand new instantly.
Stop Guessing and Start Measuring Your Room
If you really want to scale your sound, you need to stop using your ears as the only diagnostic tool. Our brains are incredibly good at ‘correcting’ bad audio, which means we get used to flaws over time. To break this cycle, I started using Room EQ Wizard (REW) and a MiniDSP UMIK-1 measurement microphone. According to the technical documentation by John Mulcahy, the developer of REW, using a logarithmic sine sweep to map your room identifies ‘nulls’ and ‘peaks’ that no amount of expensive gear can overcome. This data is what helped me realize the best way to position your subwoofer for clearer lows wasn’t in the corner where it looked nice, but halfway along the side wall to avoid standing waves. If you aren’t measuring, you are just throwing money at a problem that requires simple geometry. 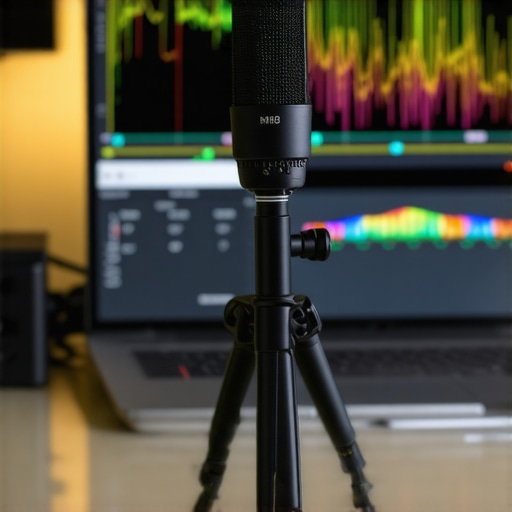
The Future of Your Listening Room is Artificial Intelligence
I predict that within the next five years, manual room treatment will become a niche hobby for purists. We are already seeing why your smart speaker is actually listening to your room acoustics—they are using ‘computational audio’ to adjust their output in real-time. Soon, even entry-level amplifiers will ship with sophisticated AI-driven DSP that maps your room in seconds. But until that technology is perfected, your best bet is still physical care and cable management. Store your wires properly to prevent internal breakage; I’ve found the best ways to store your headphones to prevent cable fraying involve simple over-under winding rather than tight coils. If you have a vintage piece, keep an eye on the internals; learning how to tell if your vintage amplifier needs new capacitors can prevent a catastrophic failure that takes your speakers down with it. My challenge to you: download a free SPL meter app today and check if your left and right channels are actually hitting your ears at the same volume. You might be shocked at how unbalanced your ‘perfect’ setup actually is.
What My Early Mixing Failures Taught Me About Real World Audio
After years of frustration, I realized that the gear doesn’t make the music; the interaction between the gear and the room does. I used to blame my monitors for being ‘cheap’ when the reality was my room was just an acoustic echo chamber. I learned the hard way that you should use the simple rug trick that instantly improves your room acoustics before spending a dime on new speakers. It is also crucial to remember that symmetry matters; if you are struggling with your stereo imaging, knowing how to balance the left and right speakers in your car or home can reveal if your room is physically pushing the sound to one side and ruining your perception of the center.
Tools That Actually Earned a Permanent Spot on My Desk
I have wasted plenty of money on gimmicks, but a few items have become non-negotiable for my daily listening. First, a measurement microphone is the only way to see what your room is actually doing to the low end. Second, physical isolation is king. #IMAGE_PLACEHOLDER_E# If you have ever wondered why your vinyl records skip when you walk near the turntable, you know that mechanical vibrations are the enemy of clarity. Finally, if you’re taking your audio obsession on the road, understanding why your cars subwoofer sounds better with the back seats down can help you translate your studio mixes to the real world with much more confidence.
The Secret to Great Sound is Already in Your Hands
You do not need a massive budget or a degree in physics to get professional results. The most important tool you have is your own willingness to experiment with the space you already own. Move your desk, adjust your chair height, and keep your gear clean. Great audio is about removing the obstacles between you and the music. Once you stop fighting your room and start working with it, that frustrating ‘boxy’ sound will become a distant memory. Have you ever moved a piece of furniture and suddenly heard your music in a whole new way? Let me know your favorite ‘free’ audio fix in the comments.