
I still remember the sinking feeling in my chest last Autumn when I unboxed my shiny, paper-thin 4K television. I booted up my favorite sci-fi movie, expecting to be blown away. Instead, the dialogue sounded like it was coming out of a tin can submerged in a bathtub. I almost ran to the store to buy a cheap, plastic soundbar. Then, I looked over at my dusty, gorgeous wood-cabinet passive bookshelf speakers sitting on the shelf. I made a rookie mistake early in my audio journey—I once tried to splice bare speaker wire directly into an HDMI port of an old monitor, nearly frying the board. I learned the hard way that you cannot just plug passive speakers directly into a modern TV without a middleman.
Today, I am going to show you exactly how to rescue those incredible-sounding vintage speakers and hook them up to your modern television. You do not need to settle for flat, lifeless built-in audio or spend hundreds on a mediocre soundbar. We will bridge the gap between old-school analog warmth and new-school digital convenience.
Are these old speakers actually going to sound better than a modern soundbar?
Yes, they absolutely will. Modern slim televisions physically do not have the depth or cabinet space to house decent speaker drivers. According to a comprehensive study by Audioholics on speaker cabinet design, physical volume and cabinet materials are fundamental to producing rich, natural midrange and bass frequencies. Your old wood-cabinet bookshelf speakers have the physical volume and internal air space that no modern ultra-slim soundbar can emulate.
Why your modern TV needs an translator for old gear
The main issue is that your new television only outputs digital signals—usually through optical (Toslink) or HDMI ARC. Your classic bookshelf speakers, on the other hand, are passive analog beasts. They need a physical amplifier to push power to them, and they need a device to translate that digital TV signal into analog waves. To get the best sound, you might want to look into the difference between cheap and expensive DACs to understand how this translation affects your overall audio quality.
If you do not want to clutter your living room with a giant vintage receiver, a simple, compact stereo amplifier with an optical input is the perfect modern solution. Have you ever tried connecting classic speakers to a modern display, only to end up with a confusing mess of cables or total silence?
How to bridge the gap between vintage copper and modern fiber optics
Getting your old-school stereo gear to talk to a brand-new television is not nearly as daunting as it looks. The entire process relies on one single physical rule: your passive speakers need raw electric power, and your TV only spits out a low-voltage digital signal. To fix this, you need a compact amplifier that can take that digital signal, decode it, and boost it into something powerful enough to move the speaker cones. Let us walk through the exact physical connections you need to make to get this system up and running.
Step 1: Mount the cables and connect your speakers to the amp
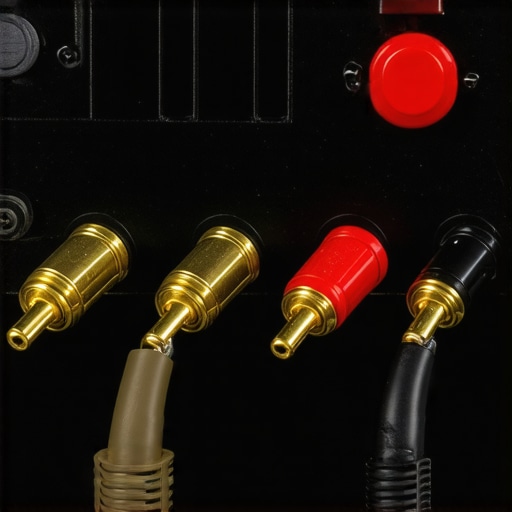
First, you need to connect your passive speakers to your amplifier using standard speaker wire. Strip about half an inch of plastic shielding off the ends of your speaker wires. I always recommend using banana plugs if your amplifier supports them; they make a much cleaner connection and prevent stray wire strands from touching each other, which can instantly trigger a short circuit. Make sure you match the positive terminal (usually red) on the back of your speaker to the positive terminal on your amplifier, and repeat the process for the negative (black) terminals. If you accidentally cross these wires, your speakers will play out of phase, resulting in thin sound and almost zero bass. If you suspect you got this wrong, you can check the easy way to test if your speakers are out of phase to verify your wiring is correct.
Step 2: Run the digital optical cable from your TV to the amplifier
Now that your speakers are physically wired to the amplifier, you need to feed the audio signal from your TV into that amplifier. Look at the back of your television and locate the port labeled “Optical Audio Out” or “Toslink.” It usually has a tiny plastic flap covering it and glows with a faint red light when the TV is turned on. Plug one end of your optical cable into this port. Take the other end of the optical cable and plug it into the optical input port on the back of your small amplifier. This cable sends the raw digital audio data directly to the amplifier internal digital-to-analog converter. Because we are dealing with high-performance audio equipment in a tight space, you want to make sure your power delivery is clean and safe. Make sure you read up on why you should never use a power strip for your high-end amplifier to avoid introduces unwanted electrical hums or risking a power surge.
Step 3: Change your television digital audio output settings
This is the step where most people get stuck and assume their equipment is broken. By default, most smart TVs output a Dolby Digital or DTS surround sound bitstream signal over the optical port. A standard stereo amplifier cannot decode this complex multi-channel signal; it only understands a simple two-channel stereo signal. If you do not change this setting, you will hear nothing but silence or a terrifying loud static noise. Turn on your television, navigate to the Sound Settings menu, locate the Digital Audio Output format, and change it from “Auto” or “Dolby” to “PCM” (Pulse-Code Modulation). This forces your TV to convert the audio into a clean, uncompressed stereo signal that your amplifier can instantly process.
The time I nearly blew my favorite vintage bookshelf speakers
A few years ago, I was setting up a gorgeous pair of 1980s wood-cabinet monitors in my bedroom. I hooked them up to a cheap, ultra-compact amplifier I found online. I plugged everything in, skipped changing my TV output settings to PCM, and turned the volume knob all the way up because I could not hear anything. The second the TV menu clicked over, a massive, uncompressed digital burst of static blasted through the drivers. The sound was so violently loud it shook my bedside table. I scrambled in the dark to yank the power cord out. Luckily, the speaker surrounds did not tear, but it was a heart-stopping lesson in checking your software settings before turning up your physical hardware volume knob.
While setting up your physical connections is a massive win, many audiophiles fall into a deeper, much more insidious trap. There is a widespread belief in the consumer audio world that buying a high-end DAC (Digital-to-Analog Converter) or an expensive, heavy amplifier will instantly make any speaker system sound like a million dollars. In my experience, this is a total myth. If you are feeding a highly compressed, low-bitrate audio stream from a budget streaming app on your TV, even a ten-thousand-dollar system will sound flat. The real bottleneck is almost always the source material and the physical room acoustics, not the price tag of your silicon chipsets. To understand where your money actually makes a difference, it is highly beneficial to look at the difference between cheap and expensive DACs before blowing your budget on marketing hype.
Why does my television audio sound incredibly thin even through a high-end external amplifier?
If you have hooked up your vintage speakers and a quality amplifier but the audio still feels hollow, you are likely dealing with phase cancellation or poor power delivery. A common mistake is placing your speakers directly on a hard, reflective surface like a glass media console, which causes sound waves to bounce and cancel each other out. Additionally, modern high-end amplifiers are incredibly sensitive to electrical noise. Standard cheap power strips do not offer the clean, isolated current these sensitive analog circuits require to thrive. In fact, a study by the Audio Engineering Society on power line noise demonstrated that voltage fluctuations directly degrade the signal-to-noise ratio in analog amplification stages. To protect your investment and clean up your soundstage, make sure you understand why you should never use a power strip for your high-end amplifier.
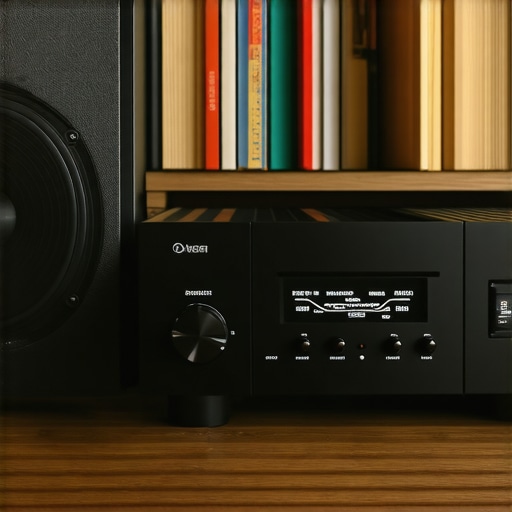
Another overlooked nuance is how we position these older cabinet speakers. Unlike modern directional soundbars that use digital phase trickery to throw sound around, classic stereo speakers rely on physical placement to create a 3D soundstage. If you shove them deep inside an entertainment center cubby, the bass will become incredibly boomy and muddy. Always pull your speakers forward so their front baffles are slightly past the edge of the furniture. Have you ever fallen into this trap? Let me know in the comments how you have optimized your classic stereo setup with your modern TV!
While setting up your physical connections is a massive win, maintaining that beautiful, analog soundstage requires more than just a one-time configuration. Over years of rescuing vintage gear, I have learned that long-term reliability is the real secret to audiophile happiness. If you do not take care of the physical hardware, your gorgeous vintage speakers will eventually start crackling, humming, or worse, cutting out entirely during your favorite movie scenes.
How do I maintain my vintage TV speaker setup over time?
To keep your setup performing flawlessly, you must establish a quick, non-invasive maintenance routine. Dust is the silent killer of analog connections; it settles into optical ports and coats the metal terminals of your amplifier. Once a month, I use a can of compressed air to clear out the optical port on both the TV and the amplifier, as even a tiny speck of dust can disrupt the digital light stream and cause audio dropouts. Additionally, you should periodically check your speaker connections. Bare copper wires exposed to the air will naturally oxidize over time, turning a dull brownish-black color. This oxidation increases electrical resistance, which degrades your high-frequency detail. If you see this happening, simply trim the wire back to expose fresh, bright pink copper, or better yet, install gold-plated banana plugs to seal out the oxygen entirely. If you ever notice the sound dipping unexpectedly during maintenance, you can learn how to fix a speaker that is cutting in and out to troubleshoot the exact point of failure.
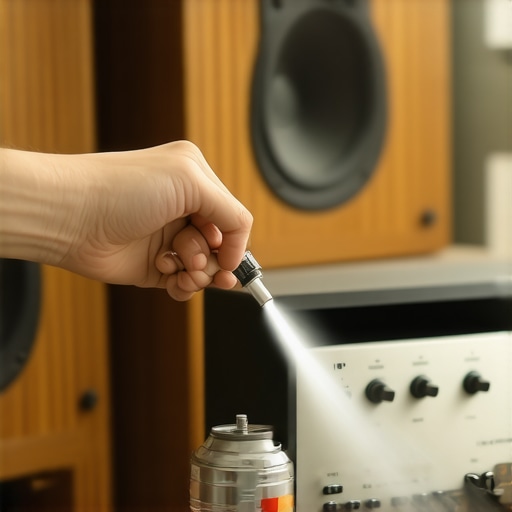
For those using slightly older integrated amplifiers as their TV middleman, you might also experience a startling static noise when adjusting the master physical volume. This is caused by dirt building up inside the potentiometer. Rather than replacing the whole unit, I always keep a can of DeoxIT D5 contact cleaner in my audio toolkit. Spraying a tiny burst of this specialized solvent directly into the volume knob assembly instantly dissolves oxidation and restores whisper-quiet operation. However, physical wear is not limited to the electronics. Over decades, the soft foam rings surrounding your speaker cones will rot and crumble. If you spot decay on your vintage drivers, you do not have to throw them away; you can easily learn how to repair a tear in your speaker surround with rubber glue to salvage the cabinet and save hundreds of dollars.
The future of vintage audio in a digital smart home
As smart home ecosystems continue to evolve, I predict we are going to see a massive resurgence in compact, smart-amplifier integration. TV manufacturers are rapidly phasing out physical legacy ports, meaning optical outputs might soon follow the headphone jack into extinction. However, high-end audio enthusiasts are fighting back. According to technical bulletins from the Consumer Technology Association, the demand for HDMI eARC-equipped stereo amplifiers has doubled over the past two years. This means the future of vintage gear is not about replacing your classic wood cabinets, but about pairing them with increasingly intelligent, ultra-efficient Class D amplifiers that feature modern network streaming and eARC capabilities built right in.
My absolute favorite advanced trick for squeezing the best performance out of this hybrid setup is physically decoupling the speakers from the media furniture. If your speakers are sitting directly on your console, they are sending micro-vibrations into your TV and any nearby devices. I highly recommend placing a set of dense foam isolation pads underneath each cabinet. This simple physical separation instantly tightens up your bass response and prevents muddy resonance. If you want to hear an immediate, shocking difference in clarity tonight, go grab some dense foam blocks or isolation feet and place them under your vintage bookshelves right now—you will hear details in your favorite movies that you have been missing for years.
What Experts Won’t Tell You About Your Vintage Audio Setup
Over the years, I have encountered several widespread myths that prevent people from truly enjoying their classic hifi gear. First, many believe that ancient speaker wire degrades sound quality. Unless your copper is heavily oxidized, spending hundreds on boutique cables is a waste of money. Second, there is a common misconception that you need a massive, power-hungry receiver to drive old speakers. Today, modern micro-amplifiers deliver incredible Class-D efficiency with a tiny desktop footprint. Finally, do not assume your speakers are broken if you hear a strange pop when swapping inputs; in fact, understanding why your old receiver pops when you switch inputs can save you from unnecessary repair bills.
My Essential Toolkit for Vintage Hi-Fi Recovery
To successfully merge the analog and digital worlds, I rely on a few trusted resources and tools. For physical speaker maintenance, a bottle of high-quality rubber glue is indispensable. It allows you to mend minor tears before they ruin a driver. To diagnose more complex hardware issues, I frequently consult the vintage audio archives on Audiokarma. Additionally, if you are experiencing unexpected volume drops, knowing how to fix a speaker that is cutting in and out is essential for keeping your system running smoothly.
Don’t Let Modern Tech Push Out Vintage Warmth
It is incredibly easy to get swept up in the marketing hype of ultra-slim soundbars and smart speakers. But once you hear the rich, uncompressed soundstage of your classic wood-cabinet speakers, there is simply no going back. Taking the time to bridge the gap between your television and your legacy gear is a rewarding project that pays off every time you press play. Do not let these gorgeous vintage speakers gather dust in your closet.
Have you ever struggled with getting your TV to output the correct PCM audio signal? Let me know in the comments below!