
If you’ve ever spun your favorite vinyl only to be greeted by an annoying hum that refuses to go away, you’re not alone. I remember the moment I realized my beloved record player was the culprit, casting a persistent buzz that almost made me want to give up on analog sound entirely. That lightbulb moment was frustrating but also illuminating—literally. Because the solution was surprisingly simple, yet I had been overlooking it for months.
Let’s Talk about That Hum
Have you ever hesitated to enjoy your records because of the constant background noise?
Believe me, I’ve been there. I spent hours fiddling with connections, replacing cables, and even upgrading my turntable, all to no avail. The hum persisted, dragging down the entire listening experience. That’s when I learned that grounding issues are often the sneaky culprits behind this racket. And here’s the kicker: fixing it doesn’t require expensive equipment or technical mastery. It’s a simple grounding hack that can make all the difference.
Early on, I made the mistake of assuming that my setup was fine because my system sounded great otherwise. But that hum? It was sabotaging every track. According to audiophile experts, grounding problems are one of the most common sources of unwanted noise in turntables—yet they’re also one of the easiest to fix (source: Audio Advisor).
So, if you’re tired of fighting that constant buzz, stick around. Today, I’ll share exactly how I tackled the grounding issue and how you can do it too. No more excuses, no more distractions—just pure, clean sound to truly enjoy your vinyl collection.
Start with the Basic Grounding Connection
My first attempt was to check the grounding wire on my turntable, which is often a simple clip or screw to a metal chassis. I disconnected and reconnected it, making sure it was securely fastened. During my previous setup, I overlooked a loose connection that caused the persistent hum. Securely attaching this wire ensures minimal interference and lays the foundation for clearer sound.
Identify and Locate Your Grounding Point
Where should you connect the ground wire?
Typically, the grounding terminal is on your amplifier or receiver. I found mine near the input section, labeled ‘ground’ or similar. If you’re unsure, consult your device’s manual or look for a screw terminal with a green or copper-colored screw. Connecting the turntable’s ground wire to this point helps establish a common reference, preventing ground loops that cause hum.
Use a Loop of Copper Wire to Bridge Uncertain Connections
In one messy case, the existing grounding point was corroded, leading to unreliable contact. I replaced it temporarily with a short piece of copper wire, looping one end to the turntable’s ground and the other to the receiver’s ground terminal. This quick fix often reduces or eliminates hum by resolving potential ground loops without invasive modifications.
Check for External Interference Sources
Sometimes, environmental electromagnetic interference is the culprit. I moved my setup away from fluorescent lights and Wi-Fi routers. I also ensured power cables weren’t running parallel to audio cables, which can induce noise. By minimizing external interference, you create a cleaner, hum-free listening experience.
Test Different Outlets and Power Strips
I experimented with plugging the entire audio system into different power outlets and avoiding shared power strips that connect to appliances with motors or dimmers. Using a dedicated outlet for your turntable and amplifier can drastically reduce hum caused by ground potential differences. If hum persists, consider installing a ground loop isolator, which breaks the circuit loop while letting audio pass through cleanly. These are affordable and easy to integrate, providing immediate relief from hum issues.
Verify and Replace Cables When Necessary
Worn or low-quality cables can introduce noise. I replaced my RCA cables with well-shielded, high-quality variants, which made a noticeable difference. Ensure connectors are tight and free of corrosion. Sometimes, the simplest cable swap can resolve hum that’s been plaguing your listening sessions for months.
Inspect Your Turntable’s Internal Components
If all external fixes fail, the internal wiring or grounding within the turntable itself might be compromised. In my case, a loose ground wire inside the plinth was causing intermittent hum. Opening the turntable and securing internal grounding points or replacing damaged cables often restores clarity. For complex repairs, consulting a specialist might be the best move.
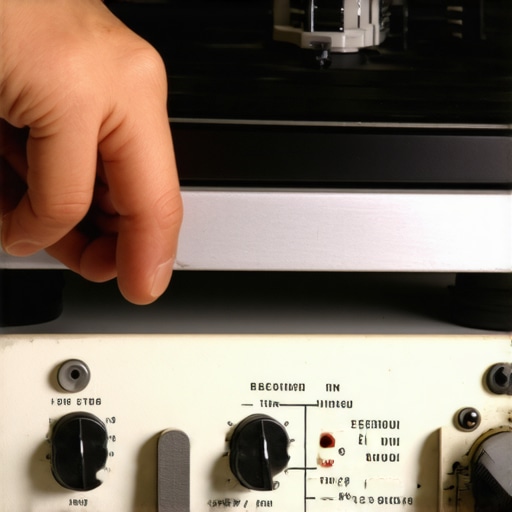
Remember, grounding issues are often the sneakiest source of unwanted noise. Systematically checking each connection, ensuring solid contacts, and minimizing external interference can save you hours of frustration and improve your overall audio enjoyment. For more on optimizing your sound setup, check out this guide on home audio deals.
When it comes to home audio gear, many enthusiasts and casual listeners alike are influenced by myths and misconceptions that can hinder their sound experience. A prevalent mistake is assuming that upgrading to more expensive or feature-rich products will automatically guarantee superior sound quality. For instance, some believe that high price equates to better audio, but in reality, factors like speaker placement, room acoustics, and proper calibration play more significant roles. As audio engineer Ethan Winer points out, even modest speakers can outperform high-end setups if they are correctly configured and optimized within the listening environment.
Another common misconception involves soundbars. Many assume that a soundbar can replicate the depth and richness of a dedicated surround sound system. While soundbars are convenient and improve TV audio clarity, they often fall short in providing immersive experience unless paired with additional rear speakers or a subwoofer. Interestingly, some users fall into the trap of purchasing a low-quality soundbar, expecting it to transform their home theater. Instead, they end up with thin, hollow sound, which can be mitigated by choosing models with dedicated woofers and proper spatial audio processing—check out the latest soundbars designed for large rooms.
When considering amplifiers, many think that more wattage guarantees louder and clearer sound. This is misleading. An overpowered amplifier can actually cause distortion if the speakers aren’t rated to handle high current or if the gain settings are improper. The secret lies in matching amplifier power with the speaker’s rated impedance and sensitivity, ensuring clean, undistorted output at desired volume levels. For example, exploring high-current amps capable of driving 2-ohm speakers without overheating can prevent needless damage and optimize performance.
Many overlook the importance of proper speaker placement and room acoustics, often blaming hardware for poor sound. Placement errors—like placing speakers too close to walls or in corners—can cause bass booms or muddiness. To get the most out of your setup, experiment with angles and distances, and consider adding acoustic panels for reflective surfaces. For advanced setups, consider noise silencing solutions that preserve bass integrity.
Lastly, a crucial pitfall is falling for marketing hype about ‘deals’ that promise extraordinary improvement at a low cost. Many deals sound tempting but hide hidden caveats like poor build quality or incompatibility. Always research the specifications and reviews thoroughly, and focus on proven performance rather than logos. For example, exploring the latest home audio deals under $300 can help you find value without sacrificing quality.
Have you ever fallen into this trap? Let me know in the comments. Remember, understanding the nuance behind home audio choices ensures you avoid costly mistakes and truly enjoy superior sound experience.
Maintain Your Sound System Without Guesswork
Ensuring your home audio gear continues delivering crisp, clear sound requires more than just initial setup. Regular maintenance and having the right tools on hand can significantly extend the lifespan of your equipment and keep performance optimal. Over the years, I’ve found that investing in specific tools and adopting straightforward routines make a drastic difference in avoiding costly repairs or replacements.
One indispensable tool I rely on is a digital multimeter. This device allows me to check continuity and voltage levels across various connections, helping identify potential issues like loose wiring or faulty power supplies before they escalate. For example, regularly testing the speaker wires with a multimeter ensures that no corrosion or breaks are hampering your audio quality. Additionally, a quality cable tester (not just a basic continuity tester) helps quickly verify your RCA, HDMI, or speaker cables for internal damage that might cause audio dropouts or hums, preventing them from causing headaches later.
Beyond hardware testing, maintaining your equipment’s firmware and software is vital. Manufacturers often release updates that fix bugs, improve performance, or introduce new features. Set a reminder every few months to check for updates, especially for your AV receiver or soundbars. A simple USB or Ethernet connection makes this process smooth. Staying current with firmware not only safeguards you against bugs but can also unlock increased stability and feature enhancements—think of it as giving your gear a wellness check.
If you’re serious about long-term performance, consider a dedicated cleaning kit. Dust and debris can accumulate in vents, ports, and internal components over time, leading to overheating or degraded audio signals. I recommend a compressed air canister and anti-static brushes to gently remove dust from delicate circuits, controlling heat buildup and ensuring signal clarity. Regular cleaning routines akin to brushing your teeth prevent the buildup of dirt that might otherwise cause hardware failure down the road.
Where do I keep my gear functioning smoothly over the years?
In terms of preservation, housing your gear in a controlled environment with stable temperature and humidity is crucial. Extreme variations can warp or degrade components. For instance, using a dehumidifier in a basement setup can prevent corrosion of internal circuits. Additionally, I invest in shielded extension cords to avoid electromagnetic interference that can cause static or dropouts—a surprisingly common issue that many overlook.
Looking ahead, the trend is toward smarter, self-diagnosing systems with integrated diagnostic tools. These advancements will simplify maintenance further, making it possible to identify issues before they impact listening sessions. I predict a shift toward wireless and app-controlled monitoring, which could become standard in premium home audio setups.
So, I challenge you to try my favorite tip: regularly run a multimeter check on your speaker connections and cables. It’s a simple step that many neglect, but it can preempt avoidable problems and ensure your system performs just as beautifully as the day you set it up. Keeping your equipment in top shape doesn’t have to be complicated—just consistent and deliberate. Your ears—and wallet—will thank you.
Over the years, I’ve come to realize that the journey to audiophile bliss isn’t just about chasing the latest gadgets or the highest wattages. It’s about understanding the subtle nuances and learning from my own missteps, which often hold the deepest insights. In this final reflection, I want to share some personal lessons that reshaped my approach to home audio, lessons that you might find helpful in your own pursuit of great sound.
The Unexpected Power of Simple Fixes
One of my biggest lightbulb moments was discovering that a minor grounding adjustment could eliminate persistent hums I thought were just part of the package. It taught me that not everything requires a costly upgrade; sometimes, the smallest tweaks make the biggest difference. This mindset shift encouraged me to troubleshoot more methodically, leading to more satisfying performance without breaking the bank.
Myth Busting: Price Doesn’t Always Equal Quality
I used to believe that expensive gear automatically meant better sound. However, experience showed me that room acoustics, placement, and proper calibration wield far more influence. This realization freed me from the chase for the ‘perfect’ high-end setup and instead focused on optimizing what I already had, which significantly improved my listening experience.
Patience Is a Virtue in Audio Tinkering
Fast fixes can be tempting, but true mastery requires patience and a willingness to experiment. Moving cables, trying different outlets, or adjusting speaker angles often yielded surprises. Patience allowed me to discover configurations that truly suited my space, transforming casual listening into immersive enjoyment. Remember, sometimes a gentle, deliberate approach unlocks hidden potential.
Every Ear Is Unique, So Trust Your Instincts
What sounds perfect to one person may not resonate with another. I learned to trust my ears more than reviews or marketing hype. This personal calibration became my secret weapon, helping me craft a system that truly reflects my tastes and environment. Your ear is the best guide—listen closely and make adjustments accordingly.
Where I Turn When I Need Reliable Guidance
On my journey, I’ve relied on trusted resources to deepen my understanding. Books like those about bookshelf speakers helped demystify complex topics, while community forums provided practical tips. I also frequent deals pages that I trust for affordable upgrades. These sources keep me aligned with real-world performance and expert insights.
Believe in Your Sound Journey
Ultimately, the most valuable lesson I’ve learned is to enjoy the process. Home audio is personal, and there’s no single blueprint for perfection. Every tweak, every upgrade, is a step toward creating an environment that brings joy and clarity to your listening. Embrace the challenge, stay curious, and remember that the true reward lies in your own evolving ear and understanding.
What’s a small fix or insight that dramatically changed your setup? Let me know below—I’d love to hear your experiences and tips!
Comments are closed.