
It was a frustrating morning. I had just spent hours fine-tuning my home audio setup, excited to finally indulge in some music. But the moment I pressed play, I noticed something odd—my bookshelf speakers, placed perfectly close to the wall, sounded thin, muddy, and lacked the punch I was craving. No matter how much I tweaked the treble or bass controls, the sound just didn’t sit right. I was about ready to give up, thinking maybe I had bought the wrong speakers. Then, a sudden realization hit me like a splash of cold water: maybe the wall placement was hurting my sound.
Uncovering the Wall Conundrum in Your Listening Space
Early in my audio journey, I made a common mistake: I assumed that placing my speakers flush against the wall would give me a more immersive experience. Trust me, it didn’t. Instead, I ended up with a muddy, cluttered soundstage that made it hard to distinguish details in songs or dialogues. For months, I believed high-end speakers should sound good no matter where I placed them—that was until I started experimenting with pulling them away from the walls. The difference was profound. Clearer vocals, tighter bass, and a more natural, open sound—just by repositioning my speakers.
But here’s the thing—if you’re skeptical (and I get it), you might think there’s no way a few inches here or there could have such an impact. Or perhaps you’re worried about sacrificing space or aesthetics. Maybe you’ve read online that speakers are better pressed against the wall for ‘more bass,’ and you’re hesitant to try otherwise. That’s a valid concern. Let’s address that head-on shortly.
Before we dive into the practical steps, it’s worth noting that improper placement isn’t just a matter of listening pleasure—it can also affect your equipment’s longevity. Excessive boundary reflection can lead to overdriving your amp or speakers, which isn’t ideal in the long run. For more insights into how environment impacts sound, check out this article on [the reason your subwoofer feels delayed](https://premiumsounddeals.com/why-your-subwoofer-feels-like-its-lagging-behind-your-speakers), which explores similar boundary issues.
Now that we’ve established the importance of proper placement, let’s explore how you can redesign your speaker setup to unlock their true potential.
Start by Measuring and Marking Your Space
Use a tape measure to find the ideal distance from your walls—around 2 to 3 feet is a good starting point. Mark these spots on your floor or walls to visualize where your speakers will sit. I once struggled with placing my bookshelf speakers too close to the wall, which muddied the sound. When I finally measured and marked their ideal spots, I noticed an immediate improvement in clarity and bass response.
Experiment with Your Speaker Angles
Angle your speakers slightly inward, aiming toward your listening position—this is called toe-in. A common mistake is placing speakers straight ahead, resulting in a less focused stereo image. During my setup, I propped my speakers with books at small angles, which surprisingly created a more immersive soundstage. Think of your speakers like a pair of binoculars—aim them at your ears for the best experience.
Adjust the Height for Optimal Listening
Position the tweeters (high-frequency drivers) at ear level when seated. If your speakers are too high or low, you’ll miss out on details. I initially set my speakers on stands too low, which caused muffled vocals. Raising them to ear level with sturdy stands brought clarity and brought vocals right into the center of my soundstage. Use this guide to get the perfect height for your setup.
Manage Boundary Interactions Carefully
Keep your speakers at least 1.5 to 2 feet away from walls and corners to prevent boomy bass and muddiness. When I initially pressed my speakers against the wall to save space, the bass became boomy, and the stereo image collapsed. Moving them just a few inches away drastically improved sound clarity. Think of boundaries like echo chambers—limit their interaction for better sound.
Test and Fine-Tune with Your Favorite Tracks
Play familiar music and move your speakers slightly while listening. Notice how the soundstage widens and bass tightens as you adjust. I spent an evening shifting my speakers in small increments, and the final position yielded the clearest vocals and most natural bass I’ve ever heard—comparable to high-end setups.
Address Horizontal and Vertical Positioning
Ensure your speakers are aligned horizontally—parallel to the listening position—and not tilted or uneven. For tall, floor-standing models, make sure they are stabilized to prevent vibrations. During my setup, adjusting the tilt slightly upward from the stands enhanced voice clarity, making movie dialogues more intelligible and music more vibrant.
Reflect on Room Acoustics and Add Treatments
Hard surfaces reflect sound, causing echoes. Use rugs, curtains, or acoustic panels to absorb excess reflections—improving clarity significantly. When I added a thick rug and some wall panels, my sound became crisper and more natural, almost like a dedicated listening room.
When it comes to home audio gear, many enthusiasts and casual listeners alike fall prey to misconceptions that hinder their listening experience. One common myth is that newer, high-spec equipment always guarantees superior sound. However, in my experience, the setup and environment play a more crucial role than brand or specs alone. For example, even the most expensive soundbar can sound flat if it’s pointed directly at a wall or placed too close to corners, which causes acoustic reflections. Conversely, vintage amplifiers often outperform modern models in warmth and clarity when properly calibrated, as highlighted by audiophile expert Jim Smith in his book “Get Better Sound.”
Are Wireless Connections Truly Reliable for Serious Listening?
The answer is nuance. Many assume that Bluetooth or Wi-Fi streaming is flawless, but in reality, interference and range limitations can cause dropouts or latency issues that ruin critical listening sessions. For instance, Bluetooth 5.0 has improved stability, yet transmission can still falter with thick walls or crowded Wi-Fi networks. To address this, choosing gear that supports aptX Low Latency codecs and maintaining a clear line of sight can make a difference. For details on extending range and minimizing dropouts, check out how to extend your Bluetooth range. Tip: Don’t assume connectivity is foolproof; invest in components designed for high-fidelity wireless streaming to match your expectations.
Another overlooked aspect is the importance of speaker placement precision. Many treat home speakers as decorative furniture, but positioning can dramatically affect stereo imaging and bass response. Even slight misalignments—like angling speakers inward or elevating tweeters to ear level—can unlock hidden layers in your music. To avoid common pitfalls and optimize your setup, explore how to balance your left and right speakers for a perfect soundstage.
In terms of amplification, not all beginners realize that matching your amp’s power output to your speakers’ sensitivity is vital. Overdriving low-sensitivity speakers can lead to distortion and damage, while underpowering high-sensitivity models results in less dynamic range. For low-wattage tube amp fans, selecting high-sensitivity speakers is a game-changer, as seen in this selection of perfect matchups.
Beware of the trap of buying gear based solely on specifications. Instead, focus on the real-world interactions—room acoustics, placement, and calibration—that influence sound quality. For instance, a well-placed set of bookshelf speakers can outperform massive towers hidden in corners, as discussed in articles on bookshelf speaker placement.
Keep Your Gear in Top Shape with the Right Tools
Maintaining a high-quality home audio setup isn’t just about initial placement and calibration; it requires ongoing attention and the right tools to ensure longevity and consistent sound clarity. From specialized cleaning equipment to calibration software, the right arsenal makes all the difference. I personally swear by a few select items that have helped me uphold my system’s performance over years of use.
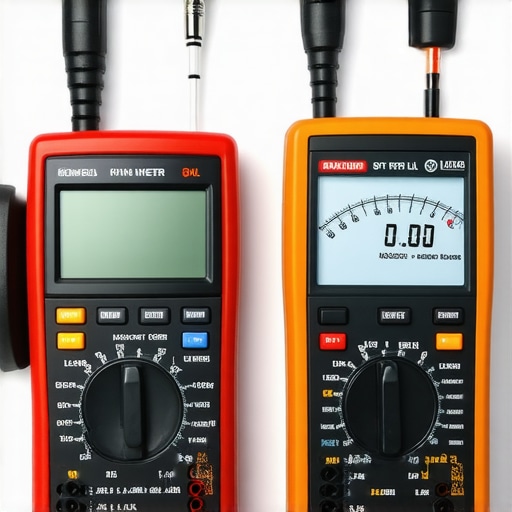
First, a digital multimeter is invaluable for troubleshooting connections and ensuring your amplifier and speaker terminals are correctly wired. I prefer models like the Fluke 115, which offers precision and durability. This allows me to detect issues like miswired speakers or grounding problems, preventing potential damage and unwanted hum, as detailed in this guide.
Next, investing in a calibrated SPL (Sound Pressure Level) meter helps me fine-tune my system’s volume levels and speaker balance, especially when I want to match volume across different sources or optimize for room acoustics. The Minidsp V3 SPL Meter is portable and easy to use, providing accurate readings that guide precise adjustments—something necessary for maintaining a balanced soundstage. Regular checks with this device can prevent overdriving your speakers, extending their lifespan.
Cleaning tools shouldn’t be overlooked—regular dusting of the drivers and the grille with a soft brush or microfiber cloth keeps the sound clean and prevents dust buildup from degrading sound quality over time. For more detailed cleaning instructions, see this article.
In addition, software for room calibration has become a game changer. I use REW (Room EQ Wizard), a free measurement software that allows me to analyze my room’s frequency response and identify problem areas like standing waves or dips. Pairing REW with a measurement microphone, such as the Dayton Audio EAA measure, helps me make data-driven decisions to adjust speaker placement or add acoustic treatments—leading to consistently high-fidelity sound.
What’s the Future of Home Audio Equipment Maintenance
Looking ahead, I predict a surge in smart calibration tools that automate room analysis and auto-adjust speaker settings via AI. These advancements will make maintaining and optimizing home audio less labor-intensive and more accessible for enthusiasts at all levels. Imagine walking into your room, and with the tap of an app, your system recalibrates itself for perfect sound—maybe even predicting your preferred settings based on listening habits.
How do I keep my sound system functioning flawlessly over time?
Regularly check and clean your equipment with specialized tools, use measurement and calibration software to fine-tune settings, and stay informed about updates or advancements in acoustic technology. Incorporating these practices ensures your gear remains in peak condition and your listening experience stays superb. Remember, a well-maintained system performs better, lasts longer, and keeps you immersed in your favorite tunes or movies without interruptions. So, make it a habit to leverage tools like a multimeter, SPL meter, and calibration software—these are small investments for big rewards in sound quality.
The Unexpected Cost of Neglecting Room Placement
One of the most overlooked aspects of achieving great sound is how your room interacts with your speakers. I learned this the hard way when I kept chasing better equipment, only to realize that poor placement and room reflections were sabotaging my efforts. It’s as if you can have the world’s best speakers, but if they sit in the wrong spot or your room is acoustically untreated, you’ll never hear their true potential. By investing just a little time in understanding and adjusting your positioning, you unlock a level of clarity and depth that rivals high-end commercial setups.
Insider Wisdom on Listening Habits That Elevate Sound
- Trust Your Ears Over Specs: I used to get swayed by specs like wattage and frequency response. Now, I focus on the sound myself. It’s a simple tip but a powerful one—your ears are your best judge, not marketing claims or number crunching.
- Small Changes, Big Impact: Slightly angling your speakers toward your listening position or elevating tweeters by an inch can drastically improve clarity. I discovered this secret from experimenting late into the night, and it forever changed my approach to setup.
- Patience Pays Off: Rushing your setup often leads to subpar results. Spend time fine-tuning positions, listening to familiar tracks, and making incremental adjustments. The reward is a soundstage so natural, it feels like the artist is performing right in your room.
Resources That Made a Difference in My Audio Journey
- The bookshelf speaker guide changed how I select and position my speakers, emphasizing practical room considerations over flashy specs.
- The grounding trick article taught me how simple ground loop fixes eliminate annoying hums, maintaining audio purity.
- Getting expert insights provided clarity beyond DIY tips, helping me understand the nuances of calibration and calibration tools.
Take Action and Elevate Your Listening Experience Today
When you start applying these lessons, from proper placement to choosing the right tools, you’re not just improving sound—you’re transforming your entire experience into one that’s immersive and emotionally resonant. The journey to exceptional home audio might seem daunting at first, but with curiosity and patience, you’ll discover a world of richness and detail that had previously been hidden. Don’t settle for mediocre sound—your ears deserve the best, and your room is the canvas. Ready to give your setup the attention it truly deserves? Start today and experience the difference.