
Ever cranked up your home audio system or headphones, only to be greeted by that irksome scratchy noise whenever you turn the volume? I remember the frustration all too well. One evening, I was enjoying my favorite playlist, and mid-song, I heard that dreaded gritty squeak. It was like nails on a chalkboard—sudden, distracting, and utterly ruining the vibe. I knew I wasn’t alone in this experience; many audiophiles and casual listeners face this pesky issue. That realization gave me a lightbulb moment: this problem isn’t just a nuisance—it’s a sign that something’s amiss, and it can often be fixed without replacing expensive gear.
Why That Shrill, Scratchy Sound Happens
When your volume knob starts making that gritty noise, it’s usually a sign of dirt, dust, or corrosion building up inside the potentiometer—the component responsible for controlling volume. Over time, exposure to air, humidity, and even skin oils can create a thin film that interferes with smooth electrical contact. This buildup causes intermittent contact, which manifests as crackles, pops, or that awful scratching sound. The good news? This isn’t an insurmountable problem. With a few simple tools and a dash of patience, you can often restore your volume control to silky-smooth operation.
Have You Faced This Snag Before?
It’s a common complaint, and honestly, I’ve been there myself. My early mistake was trying to fix it with a quick spray ofWD-40 or similar lubricant—an approach I now know can do more harm than good. It temporarily eased the sound, but often left behind a residue that attracted more dirt or even damaged the sensitive internals. Instead, I learned that proper cleaning techniques are key to a lasting fix. For more insights on maintaining audio gear, check out this guide on studio monitor maintenance. Now, let’s get into how you can banish that scratchy noise permanently.
Disassemble Your Equipment Carefully
Start by unplugging your device and removing any panels covering the volume potentiometer. Use a screwdriver suited for your device to avoid stripping screws. During my first attempt, I used a small Phillips screwdriver to open my stereo’s casing, which revealed a dusty and slightly corroded potentiometer. That initial messy disassembly was a bit intimidating, but it set the stage for effective cleaning. Remember, keeping track of screws and components is crucial for proper reassembly.
Identify and Access the Potentiometer
Locate the volume knob’s potentiometer on the circuit board—it’s usually a small, round component with three terminals. Use a magnifying glass if necessary to see it clearly. Before proceeding, take a photo for reference. In my experience, making this visual note prevented confusion later. Gently disconnect any attached wires or connectors, using plastic tools if possible to avoid damage. This exposed the potentiometer, preparing it for cleaning.
Clean the Internals with Precision
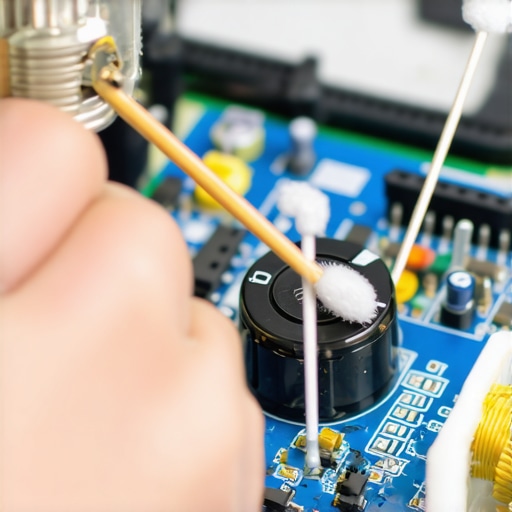
Apply a small amount of contact cleaner—preferably 99% isopropyl alcohol or a dedicated potentiometer cleaner—to the exposed metal shaft and internal contacts. Avoid over-saturating to prevent liquid from seeping into unintended areas. As I learned, a precision spray nozzle helps target the cleaning specific parts. Gently rotate the potentiometer knob back and forth to distribute the cleaner evenly, dislodging dirt and corrosion. Afterward, let it dry for a few minutes. For stubborn grime, repeat the process. This step is like giving your audio gear a spa day, restoring smooth operation.
Reassemble and Test the Unit
Once you’re confident the potentiometer is clean and dry, reattach any disconnected wires, and carefully reassemble your device in reverse order. Take your time to ensure screws are tight but not over-tightened, which could damage the casing. Plug your equipment back in and test the volume control. In my case, I was amazed at the sudden silence of crackles. If issues persist, recheck connections or consider replacing the potentiometer if it’s worn out. Regular maintenance with this method can prevent future noise problems.
Additional Tips for Long-Term Peace of Mind
To keep your audio gear functioning smoothly, perform this cleaning process every year or if you notice crackling noises returning. Using a dust cover on your gear can minimize debris buildup. Avoid using lubricants like WD-40 as they can attract dirt over time, complicating your repairs. For more advanced repairs or when dealing with complex electronics, consulting a professional is advisable. Remember, a little effort now saves you from costly replacements later, and restoring your gear to pristine condition can be surprisingly satisfying.
In the world of home audio, it’s easy to fall for common misconceptions that can hinder your listening experience. Many enthusiasts believe that increasing power wattage automatically results in louder, better sound—that’s a myth. In reality, wattage alone doesn’t guarantee superior audio quality. Instead, factors like speaker efficiency, impedance matching, and proper room acoustics play a more critical role. An often-overlooked nuance is that higher power can sometimes lead to distortion if your setup isn’t correctly calibrated, causing damage rather than delivering better sound.
Are Expensive Cables Worth It for Better Sound
Many believe that brand-name or gold-plated cables enhance audio fidelity significantly. But according to acoustic engineers, costlier cables rarely translate into noticeable improvements in sound quality. Instead, focus on quality shielding and proper connectors to prevent interference. An overlooked mistake is using overly long or thin cables, which can introduce signal loss. Remember, the power of careful wiring and proper connectors often outweighs the allure of high-priced cables.
Why Your Soundbar May Not Be Delivering the Clarity You Expect
Many users assume that upgrading to the latest soundbar automatically boosts their audio experience. However, placement makes all the difference. Placing your soundbar too close to walls or corners can color the sound, making dialogue hard to hear. For example, corner placement can cause bass resonance issues. Additionally, not all soundbars are designed to handle room acoustics equally. Selecting a device suited for your room’s size and shape—and understanding how placement affects sound—can dramatically improve clarity and immersion.
Invest in Quality Cleaning Supplies for Longevity
Regular maintenance begins with having the right tools. I personally swear by a high-quality contact cleaner like DeoxIT D5 for cleaning potentiometers and switches. Its proven ability to dissolve corrosion and grime without leaving residues makes it indispensable. Additionally, soft microfiber cloths are perfect for wiping down surfaces without scratching delicate components. For deeper cleaning of headphone pads or speaker grills, a gentle fabric-safe cleaner paired with a soft brush helps preserve materials while removing dust and oils accumulated over time.
Utilize Precise Diagnostic Tools for Troubleshooting
When troubleshooting persistent issues, a reliable multimeter is essential. I use a Fluke 115 Multimeter because of its accuracy and durability. It allows me to check continuity, resistance, and voltage levels in audio circuits, helping identify faulty components quickly. For wireless audio devices, employing a Bluetooth tester can pinpoint connection problems, preventing unnecessary part replacements. These tools save time and money by targeting the exact source of technical hiccups before deeper repairs are necessary.
Embrace Software Solutions for Sound Calibration
Calibrating your system with software ensures optimal performance, especially as gear ages. I recommend REW (Room EQ Wizard), a free program that helps fine-tune speaker placement and equalization. It allows you to generate frequency response measurements and adjust settings accordingly. Using REW has significantly enhanced my listening experience, revealing nuances in sound that were previously masked. Combined with a measurement microphone like the UMIK-1, you can objectively optimize your setup for maximal clarity and imaging.
Plan for Long-Term Results with Preventative Measures
Preventative maintenance extends the lifespan of your equipment. Regularly inspecting and cleaning connections, updating firmware (for smart gear), and replacing worn-out parts like cables and pads are key steps. Keep your gear dust-free by covering it with breathable cloths, and avoid exposing it to extreme temperatures or humidity. These habits stabilize performance over years and reduce the likelihood of expensive repairs. For detailed guidance, check out https://premiumsounddeals.com/why-your-studio-monitors-sound-boring-compared-to-hi-fi-speakers, which explains the importance of proper upkeep in maintaining high-fidelity sound.
Scaling Up Your Home Audio System Gradually
As you expand your setup, investing in modular components and compatible accessories simplifies future upgrades. For example, choosing a receiver with multiple HDMI and optical inputs ensures seamless integration of new devices. Upgrading cables to higher-quality shielding reduces interference, as explained in https://premiumsounddeals.com/why-cheap-rca-cables-might-be-ruining-your-sound-stage. Additionally, careful planning of speaker placement—like following the advice in https://premiumsounddeals.com/why-your-portable-speaker-sounds-different-when-placed-in-a-corner—can dramatically improve soundstage and clarity. Remember, gradual scaling allows you to assess each element’s impact, saving costs and avoiding overwhelming mismatched gear.
How do I maintain my home audio equipment over time?
Establish a routine of regular inspections and cleanings, using tools like contact cleaners and microfiber cloths. Keep firmware updated on smart components, and routinely check connections for corrosion or looseness. Incorporate calibration software like REW to ensure your system stays optimized. Lastly, store equipment in a dry, cool environment and cover it to prevent dust buildup. These practices establish a reliable, long-lasting setup that continues to deliver premium sound, minimizing breakdowns and costly repairs. Implementing just one of these advanced tips today can prolong your gear’s lifespan and preserve your listening enjoyment.
Lessons the Pros Don’t Usually Share About Fixing Your Sound System
- One of the biggest surprises I encountered was realizing that regular cleaning isn’t just maintenance; it’s the secret to unlocking truly pristine sound. Jumping into deep cleaning techniques transformed my setup from scratchy to sleigh-worthy.
- Early on, I assumed budget gear couldn’t deliver quality. I learned that carefully choosing the right components and understanding their interaction often trumps price tags, changing my entire outlook on upgrades and repairs.
- Patience and a gentle touch are essential. Rushing a fix or using harsh chemicals can make problems worse. Taking my time with proper tools ensured long-lasting results, a lesson I wish I’d embraced sooner.
- That annoying crackle? It’s more often a sign of internal grime than a faulty part. Regularly inspecting and caring for your gear saves money and keeps your favorite tunes flowing smoothly.
- The true magic lies in understanding your equipment’s quirks. When I delved into online forums and professional advice, my ability to troubleshoot and restore gear skyrocketed—saving me from costly replacements and frustration.
Tools and Resources I Swear By for Perfect Sound
- DeoxIT D5 Contact Cleaner — This is my go-to for reviving dirty potentiometers and switches without leaving residue. It’s reliable and gentle yet powerful enough to clear grime effectively.
- REW (Room EQ Wizard) — For serious calibration, this free software provides precise measurements that reveal the true frequency response of your setup, helping me achieve clarity I never thought possible.
- Fluke 115 Multimeter — Accurate diagnostics are the backbone of troubleshooting. This multimeter empowers me to identify issues at the component level, avoiding guesswork.
- Thrift Store Audio Gear — Believe it or not, you can find diamonds in the rough. With patience and a keen eye, I’ve sourced quality speakers and components that performed like new, at a fraction of the cost. Check out this guide for tips on sourcing used gear wisely.
Gear Up to Elevate Your Listening Experience
Embarking on a journey to pristine sound is as much about mindset as it is about tools. Don’t shy away from trying new techniques, experimenting with placement, or learning from seasoned enthusiasts. The thrill of transforming your audio space—whether by fixing a scratch or fine-tuning acoustics—is incredibly rewarding. Remember, every tweak brings you closer to that perfect listening moment. Take action today and rediscover what your home audio setup can truly do!
What’s your biggest challenge with maintaining your home audio gear? Share your story below—I’d love to help troubleshoot or hear your tips!
,