
Ever tried to enjoy your favorite playlist or movie, only to be distracted by a tangled mess of speaker wires snaking across your rental apartment? I vividly remember the moment I realized my unsightly wires were ruining the sleek look of my setup. It was frustrating—almost embarrassing—and I knew there had to be a better way to keep things tidy without risking my deposit.
Transform Your Space Without Drilling or Damaging Walls
Has Concealing Wires Ever Felt Impossible in a Rental?
Initially, I thought about drilling holes or using permanent fixtures, but that was a strict no-go in my rental. I didn’t want to risk losing my deposit or violating my lease agreement. So I started searching for solutions that were both effective and rental-friendly—something I could implement without damaging walls or furniture.
It turns out, there are surprisingly simple methods to hide speaker wires that don’t involve any invasive installations. From clever adhesive clips to creative furniture arrangements, you can achieve a clean, professional look without risking your security deposit. Plus, with the right tools and tricks, the process can be quick and even a bit fun—like giving your space a mini makeover.
Why Hiding Your Speaker Wires Matters More Than You Think
Secure Your Wires with Adhesive Clips
One of the simplest methods is using **adhesive-backed cable clips**. I grabbed a pack from a hardware store and lined them along the back of my bookshelf, routing the wires neatly along the edges. Make sure the surface is clean before sticking; I wiped with alcohol to ensure good adhesion. This prevents wires from sagging or tangling, creating a cleaner look. For a more seamless approach, opt for transparent clips that blend with your furniture and walls.
Leverage Furniture and Décor for Concealment
Position Your Speakers Efficiently
Arrange your furniture so that wires naturally hide behind or under large pieces. For example, placing a console table or bookshelf in front of hidden wall sections helps mask the cables running behind them. I placed my subwoofer behind a large plant, which not only hid the cables but also absorbed some sound reflections, improving audio quality. Remember, strategic placement reduces the need for many clips or covers.
Use Cord Covers Without Drilling
If you need to run wires across open spaces, consider self-adhesive cord covers. I used flexible, peel-and-stick raceways along baseboards, securing the cables without damaging paint or drywall. These covers are paintable, so I matched them to the wall color for a discreet look. For tight corners or edges, flexible profiles bend easily to follow the contours.
Opt for Wireless Tech and Cordless Accessories
When possible, switch to **wireless speakers** or headphones**. I upgraded my old wired headphones to Bluetooth models, eliminating cable clutter altogether. For rear speakers, explore wireless kits that transmit audio via radio frequency or Wi-Fi—these often come with easy-to-install transmitters and receivers, needing no drilling or permanent mounting. This approach is especially handy in rentals, where wall modifications are restricted.
Hide Wires with Decorative Elements
Transform your cables into part of your décor by wrapping them with colorful tape, or coiling excess cord into decorative knots. I used fabric cord sleeves to create a unified, aesthetic look, especially around entertainment centers. Furthermore, some retailers offer cable sleeves that look like woven fabric or rubber, blending seamlessly with modern interiors. This adds personality and reduces visual clutter, making your setup both functional and stylish.
Consider Non-Invasive Mounting Options
When mounting speakers or components, use **strong adhesive strips or command hooks** designed for high weight loads. I mounted my soundbar using command strips that held firm during movies but came off easily when I moved out. Additionally, hanging cables along existing moldings or ceiling corners keeps them out of sight and prevents tripping hazards. Just ensure the adhesive is suitable for your wall type to avoid accidental damage.
Maintain Flexibility for Future Reconfigurations
Choose solutions that allow easy adjustments—like repositioning furniture or swapping out cables. I kept spare adhesive clips and cable ties handy, so I could reorganize quickly without rearranging everything. This flexibility ensures your setup remains tidy even as your preferences or equipment evolve over time.
When it comes to setting up a killer home audio system, many enthusiasts fall prey to misconceptions that hinder their progress. For example, a common belief is that upgrading to the most expensive amplifier guarantees superior sound quality. In reality, the quality of your source material and room acoustics often matter more than the amp’s price tag. Professionals like audio engineer Ethan Winer emphasize that room acoustics and speaker placement have a greater impact on sound clarity than just hardware specs.
Another widespread myth is that larger speakers always produce better bass. While bigger drivers can move more air, they don’t necessarily deliver cleaner or tighter low frequencies if not paired with proper enclosure design and room tuning. This misconception can lead users to invest in oversized speakers when a well-designed bookshelf model might serve their needs better.
Are High-End Headphones Worth the Price Tag or Just a Marketing Gimmick?
Many believe that paying thousands for headphones automatically results in world-class audio. However, studies, including those from the Stanford Listening Lab, show that individual ear shape and personal preference play critical roles. A headphone’s frequency response chart is merely a guide; actual listening experience depends on comfort and how the ear perceives sound. Sore or ill-fitting headphones can distort perception, regardless of their technical specifications. Therefore, it’s crucial to consider ergonomics and subjective fit as much as raw specs when choosing headphones.
It’s also important to avoid the trap of believing that all cables are equal. Cheap speaker wires, for example, can introduce resistance and degrade audio signals, especially over long runs. Yet, many overlook this aspect, opting for bargain wires that turn green over time or develop microfractures, leading to static or loss of clarity. Investing in quality, oxygen-free cables can prevent such issues, and this is supported by research from the AES (Audio Engineering Society) which highlights the importance of cable quality in high-fidelity systems. Learn more about common wiring pitfalls and how to avoid them by visiting this guide.
Many users also assume that digital processing always enhances sound quality. However, overuse of certain features like excessive equalizer boosts or virtual surround modes can introduce phase artifacts and listener fatigue. Experts recommend a ‘less is more’ approach—using minimal processing to preserve the natural soundstage. If you’re curious about how digital treatments affect your setup, check out this article that illustrates subtle tweaks for better clarity.
In conclusion, understanding these nuances can save you time, money, and frustration. Instead of chasing the latest gadget or an inflated spec sheet, focus on room acoustics, proper placement, and realistic expectations. Remember, sometimes the most expensive gear isn’t the best fit—it’s the fit that matters most. Have you ever fallen into this trap? Let me know in the comments, and share your experiences with home audio myths!
Keeping Your Equipment Running Smoothly with the Right Tools
Maintaining your home audio setup isn’t just about purchasing quality gear; it’s equally about regular upkeep and using the right tools to prolong its lifespan. Over the years, I’ve found that investing in specific equipment and software makes a significant difference in ensuring consistent performance. For example, a high-quality audio analyzer like the MiniDSP
(which I personally use to fine-tune my speakers) helps identify room modes, frequency imbalances, and phase issues that often go unnoticed. Regular calibration using such tools keeps sound quality at professional levels and prevents issues from compounding over time.
Another essential aspect is cable management and integrity. I recommend using oxygen-free speaker wires and quality connectors to prevent resistance loss and signal degradation. For long-term durability, I utilize cable testers like the Fluke Networks MicroScanner2, which confirms connection stability and insulation integrity. It’s a small investment with big payoffs—preventing unexpected failures and preserving audio clarity.
Automate and Optimize Your Setup
Software plays a vital role in the modern home audio ecosystem. Apps like REW (Room EQ Wizard) enable detailed room measurement and equalization, ensuring your components perform optimally over years. I run periodic scans before major listening sessions to catch any drift, such as speaker drift or hardware aging signs. As home audio technology advances, I predict smarter systems with integrated diagnostics will become standard, making maintenance even more user-friendly.
How do I maintain my sound system over time?
Preventative maintenance is key. Regularly check and clean your equipment with microfiber cloths, and keep firmware updated using manufacturer software. For speakers, applying a light layer of acoustic-grade damping material inside enclosures can dampen unwanted resonances that develop with age. If you’re dealing with ground loop hum or static, solutions like isolating transformers or ground loop injectors can help fix persistent issues without invasive procedures—more on that in this guide.
Looking ahead, I believe the trend toward AI-driven diagnostics and self-maintaining hardware will simplify upkeep even further. For now, though, using tools like dedicated analyzers and high-quality cables remains our best defense against degradation. So, take one advanced step today—try calibrating your system with REW or upgrading your cables with oxygen-free variants—and enjoy pristine sound for years to come!
Lessons the Pros Don’t Usually Share About Home Audio
- Listening to the same advice repeatedly made me believe that the most expensive gear always delivers the best sound, but I learned that room acoustics and correct placement matter more than price tags. Settling for good enough sometimes beats chasing after high-end gear that’s improperly positioned.
- I struggled with persistent ground loop hums until I found that proper grounding and using quality isolation tools can make a dramatic difference—an insight I wish I’d known earlier. It’s not always about more power; it’s about cleaner power.
- When I finally experimented with calibrating with tools like Room EQ Wizard, I realized that routine adjustments prevent subtle issues from snowballing into major sound quality losses, saving me both money and frustration in the long run.
My Toolbox for Hassle-Free Sound Adventures
- Oxygen-Free Speaker Wires: I trust these for durability and minimal resistance, backing up the importance of quality cables in maintaining pristine sound.
- Room EQ Wizard: This free software enables easy calibration, helping me fine-tune my setup and catch problems before they impact my listening experience.
- High-Quality Cable Management: Using cable sleeves and adhesive clips from reputable brands keeps my cables organized and protected, which prolongs their lifespan and maintains system integrity.
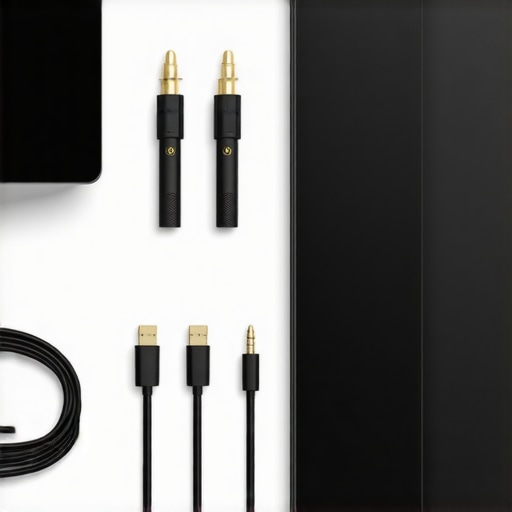
- Calibration Microphones: I recommend investing in a good calibration mic—it’s a game-changer for truly personalized sound tuning and ongoing maintenance.
Embrace the Journey and Lift Your Sound to New Heights
The future of home audio is bright, filled with opportunities to refine your setup with simple,effective strategies. Remember, a few thoughtful adjustments and reliable tools can unlock an incredible listening experience that lasts. Don’t be afraid to experiment—your ideal sound awaits just beyond your comfort zone. What’s one small change you’re ready to try today? Share your ideas below, and let’s elevate our audio game together!