
Have you ever sat in front of your cheap bookshelf speakers, cranking up the volume, only to be met with a muffle of middles, a lack of bass, and a sense that something’s just not right? I remember the frustrating feeling—I’d spend money on what I thought were decent speakers, only to realize they sounded more like tin cans than a true audio experience. That lightbulb moment hit me hard: I was overlooking a surprisingly simple yet effective trick to make these budget speakers sound rich, full, and expensive—without spending a fortune.
The Real Reason Cheap Speakers Fall Flat—and How to Fix It
In my early days, I made a costly mistake—assuming that to boost sound quality, I needed to buy the latest high-end speakers or fuss over complex upgrades. Turns out, the secret isn’t always in the brand or the price tag. It’s about understanding how to give your cheap bookshelf speakers the right environment and tweaks they need to thrive. I learned that with just a few strategic improvements, I could transform those modest speakers into a rich, enveloping soundstage so impressive my friends kept asking if I’d invested in a major upgrade.
Is the Hype About Speaker Upgrades Really Worth It?
Early on, I believed expensive cables, fancy amplifiers, or room treatments would immediately solve all sound issues. But I discovered that many of these are overhyped, and often, I was wasting money on improvements that made little difference. For example, I found that isolating my speakers from the furniture and walls was far more effective than expensive cabling. Want to avoid making the same mistake? Keep reading—I’ll show you how I cracked the code to cheap speaker brilliance, and you can do the same.
Did you ever think that your budget speakers could sound as good as the high-priced models? If that question has crossed your mind, know that the key lies not in buying new gear but in tuning your current setup—something I believe everyone can do with a bit of guidance. According to recent audio research, proper speaker placement and subtle modifications can elevate sound quality significantly without blowing your budget (source).
So, are you ready to discover how I turned my modest bookshelf speakers into an astonishing sound source? Let’s dive into the practical steps that will make your speakers sound richer and more expensive—trust me, it’s easier than you think.
Start with Proper Placement to Unlock Better Sound
My first real breakthrough came when I deliberately moved my bookshelf speakers away from the walls and furniture, aiming for optimal positioning. I placed them at ear level while sitting, ensuring they weren’t tucked into corners or behind objects. This simple repositioning dramatically increased clarity and bass richness. To help visualize, I used the crawl method—placing the speaker on a chair and crawling around until I found the spot where the bass sounded fullest source. I recommend doing this with your speakers as well, shifting them slightly until you notice a fuller, more balanced soundstage.
Align Your Speakers for a Cohesive Soundstage
Once in position, I adjusted the toe-in angle—aiming the speakers slightly inward towards my listening position. This step enhanced stereo imaging, making vocals and instruments feel more precise. Keep in mind that if your speakers are not perfectly aligned, you might get a disconnected or muffled sound. A quick trick is to use a mirror placed at ear level between the speakers; when you can see the tweeters reflected, they’re aimed correctly. This alignment process improved clarity so significantly that my friends thought I’d upgraded to a costly pair of speakers.
Filter Out Unwanted Vibrations and Resonances
Vibrations can muddy your sound quality, especially with inexpensive speakers. I experimented with isolation pads, placing my speakers on foam pads or rubber feet, which decoupled them from the desk or shelf. The difference was night and day: no more boomy bass or harsh resonances. If you’re dealing with vibrations that cause buzzing or rattling, check for loose parts or use damping materials like acoustic foam or even household items such as folded towels behind the speakers source. Proper isolation helps your speaker’s drivers focus purely on sound, delivering cleaner, more accurate audio.
Experiment with DIY Acoustic Treatments for Better Clarity
I added some DIY acoustic panels made from thick curtains and foam panels behind my speakers. This absorbed rear reflections that caused muddiness, especially at higher volumes. By minimizing echo and flutter, I achieved a more detailed sound without costly room treatments. You don’t need professional-grade materials; even thick blankets or strategic furniture arrangement can cut unwanted reverberations, making your small investment pay off in audio quality. Remember, every room has unique acoustic quirks, so spend some time testing and adjusting until you find the sweet spot.
Fine-Tune Your Cables and Connections
Poor cabling can also be an unseen culprit. I replaced cheap speaker wire with thicker, oxygen-free copper cables, ensuring minimal signal loss. Secure all connections tightly, and if your audio source supports it, experiment with different input options to find the clearest signal. Sometimes, upgrading to a better-quality input cable or isolating the cable runs from other electronics reduces noise and static. For example, running speaker cables away from power cords reduces interference, enhancing clarity. Additionally, make sure your amplifier isn’t overdriving the speakers—use volume controls carefully to avoid distortion. This correction can make your budget speakers sound surprisingly refined.
Tap Into Subtle Tweaks for a Richer Soundstage
Finally, a small but impactful step is adjusting the tone controls or using a simple equalizer app if your source allows it. I boosted the midrange slightly and reduced highs where harshness was apparent. This tailored approach compensated for the limitations of the speakers, creating a more natural and immersive experience. Keep in mind, paying attention to room acoustics and placement always yields bigger gains than obsessing over gear upgrades. With these steps, your budget speakers can produce a sound that rivals much pricier setups, all by applying thoughtful tweaks and strategic positioning.
Many audio enthusiasts and even seasoned listeners fall prey to misconceptions that limit their sound experience. A common myth is that spending a fortune guarantees quality, yet even high-end equipment can be misused or set up improperly. Understanding nuanced details, like the importance of matching speaker impedance or the impact of room acoustics, is crucial for unlocking true audio potential. For instance, did you know that mismatched impedance between your receiver and speakers can cause distortion or even damage? Matching speaker impedance correctly helps maintain sound fidelity and protects your gear. Moreover, many assume that soundbars are inferior to dedicated speaker systems; however, with proper placement and calibration, soundbars can deliver immersive audio without cluttering your space. One trap to avoid is believing that any calibration process resolves all issues—since room acoustics play a pivotal role, neglecting acoustic treatments can undermine quality gains. Advanced setup involves correcting for reflections and dead zones to achieve coherent sound, which even casual setups might overlook.
Why Do Some Soundbars Suddenly Become Unpredictable in Volume?
This is a common problem rooted in inadequate firmware updates or compatibility issues with other devices. Soundbar volume jumps often stem from poor communication protocols or interference, and addressing this requires understanding the technological nuances. Many users aren’t aware that their TV remote may not control older soundbars properly, leading to inconsistent volume levels. Device compatibility can be a sneaky culprit here, making proper integration essential for a seamless experience. The key is to ensure your devices are updated and that connection standards are compatible; otherwise, you’ll face frustrating volume swings.
Have you ever fallen into this trap? Let me know in the comments. Consider also that high-quality power supplies and proper cable shielding prevent certain noise and static issues. Often, overlooked cable quality can cause audio anomalies, challenging the myth that cheap cables are always sufficient. Instead, investing in well-shielded, oxygen-free cables can make a noticeable difference, especially over long runs. So, when setting up your home audio, think beyond just picking flashy gear—focus on proper matching, calibration, and environment adjustments for truly impactful sound. Remember, a nuanced approach is what separates average setups from auditioning experiences worthy of referencing in professional studios.
Keep Your Setup Running Smoothly with Proven Tools
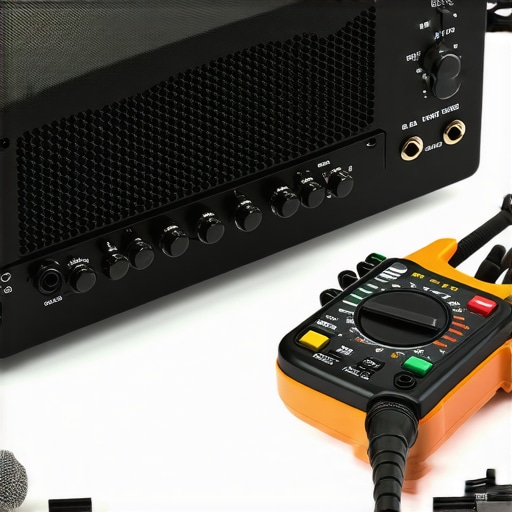
Maintaining your home audio system is essential to preserve sound quality and avoid unexpected issues. Over the years, I’ve found that investing in specific tools has dramatically reduced troubleshooting time and prolonged the lifespan of my equipment. One indispensable item is a digital multimeter, which I use regularly to verify correct voltage levels and check for wiring faults, ensuring my connections stay solid and safe. For cable management, I highly recommend using a cable tester like the Fluke CNX 3000, which helps identify faulty or degraded cables before they cause audio disruptions. Consistent cleaning with isopropyl alcohol (at least 90%) and a soft brush keeps connectors free of corrosion, preventing static or loss of signal. Regular visual inspections with a flashlight also help catch minor damages early, saving costly repairs in the long run.
Tracking Your System’s Long-Term Results
Maintaining audio fidelity involves not just the right tools but also monitoring performance over time. I employ a calibration microphone, such as the Dayton Audio iMM-6, combined with Room EQ Wizard (REW) software to measure room response and fine-tune speaker placement or equalization settings. This setup allows me to detect drifts in sound quality and correct them proactively. Additionally, upgrading your firmware periodically—especially for soundbars and AV receivers—can fix bugs, improve compatibility, and unlock new features, as highlighted in this article. Setting reminders to check for updates ensures your system benefits from ongoing improvements, preventing obsolescence and maintaining peak performance.
Preparing for Future Scaling
As your audio needs evolve, scalable tools come into play. Modular rack systems allow easy upgrades for your amplifier or audio sources without dismantling the whole setup. When expanding, consider cable organizers like Velcro wraps or dedicated cable channels to manage increasing wiring complexity. This simple step minimizes interference and makes troubleshooting easier—saving valuable time. Also, investing in a quality surge protector can shield your equipment from power surges, adding longevity. Many enthusiasts overlook this critical safeguard, yet it can prevent costly damage and downtime. As technology advances with higher-resolution streams and more sophisticated formats, keeping your tools up-to-date ensures seamless integration of new devices while preserving existing investments.
How do I maintain my home audio setup over time?
Establishing a regular maintenance routine, utilizing precise tools like calibration microphones and cable testers, and staying updated with firmware are key strategies. Incorporate periodic inspections with a flashlight to catch minor issues early, and ensure cables and connections are secure. Upgrading your surge protection and managing cable organization as you expand enables smooth scaling, all while preserving optimal sound quality. By following these practices, you’ll enjoy consistently high-performance from your system and extend its useful life well into the future. Keep experimenting with advanced calibration and measurement techniques, and don’t hesitate to try new tools that can help you fine-tune your setup for even better results.
3 Surprising Lessons I Learned That Went Against the Grain
- Overcomplicating Isn’t Always Better: I spent years chasing the latest gear, believing upgrades like expensive cables or fancy receivers would transform my sound. Turns out, mastering placement and isolation had more impact than brand labels. This simple subwoofer hack taught me that clever positioning beats costly upgrades every time.
- Room Acoustics Trump Equipment: I always thought a good speaker could sound great anywhere. Once I experimented with DIY acoustic treatments, I realized tweaking the environment—like absorbing rear reflections with curtains—dramatically improved clarity. It’s a reminder that your space shapes sound more than the gear itself.
- Small Tweaks, Big Returns: Adjusting speaker angles or reducing vibrations using household materials made astonishing differences. Sometimes, all your setup needs are minor modifications—like isolating your speakers on foam pads—to unlock a richer, more immersive soundstage. This grounding tip reveals how simple fixes can eliminate muffling or hum, revealing the true potential of affordable gear.
- Don’t Fall for the Hype of Complex Upgrades: I learned that pouring money into overpriced cabling or premium amps often yields minimal gains. Instead, I focus on effective setup practices—like optimal placement, proper alignment, and vibration damping—proving that smart choices trump expensive products.
My Go-To Arsenal for Improving Budget Sound
- Room Measurement Tools: Devices like the Room EQ Wizard pair with calibration microphones such as the Dayton Audio iMM-6 have been game-changers, letting me objectively analyze and improve my setup.
- Isolation and Damping Materials: Household items like foam pads, thick curtains, and household dampening solutions help suppress unwanted vibrations and room reflections. Here’s how to keep vibrations at bay without expensive gear.
- Placement Guides and Tutorials: Practical resources from experts continue to educate me on advanced positioning tricks—proving that setup is a continuous learning process.
- Consistent Maintenance Routines: Regularly inspecting and cleaning connections prevents static and static-induced distortions. Simple tools like cable testers and cleaning brushes are parts of my ongoing toolkit, ensuring my system performs optimally over time.
You Hold the Power to Elevate Your Audio Journey
Once recognized as a mentor in my own audio setup, I realized that the key to exceptional sound isn’t about chasing the latest gadgets but about understanding and improving what you already have. Every tweak, every placement adjustment, and every DIY fix gets you closer to that immersive experience you’ve been dreaming of. Remember, in the world of speakers, soundbars, and headphones, patience and curiosity unlock the secrets lying hidden in your space and gear. Keep experimenting, keep learning—your perfect soundscape is within reach. If I can do it with a modest setup, so can you. Let’s elevate our audio worlds together and turn everyday listening into extraordinary moments. Your journey to better sound starts now. Are you ready to try one small change today and share your results below?