
Ever been blissfully grooving to your favorite song when suddenly, the sound starts crackling or goes eerily quiet on one side? I remember the frustrating moment I discovered my beloved headphones had a blown driver, and honestly, it felt like losing a good friend. That lightbulb moment, right there, made me realize how crucial it is to know what’s normal and what’s not with our audio gear.
Spotting the Silence: Is Your Driver Actually Dead?
Your headphones might seem fine visually, but a changing sound pattern or complete silence can be a dead giveaway that something’s wrong inside. The driver, essentially the tiny speaker inside your headphones, is responsible for producing sound. When it blows, you’re left with distorted audio, or worse, silence. But don’t rush to replace them just yet. I’ll walk you through simple tests and signs to confirm if your driver has truly given up.
Common Signs You’re Facing a Blown Driver
Before diving into technical checks, pay attention to peculiarities: Are there unusual buzzing noises? Is one side significantly quieter? Do parts of your music sound muffled or distorted? If you’ve experienced any of these, your driver might be the culprit. Early in my journey, I made the mistake of ignoring these signs, hoping it was just a loose connection. Turns out, that was a costly error, and recognizing the signs early can save your headphones and wallet.
Understanding exactly what’s happening inside helps prevent unnecessary replacements. For example, if your Bluetooth headphones lose connectivity or your audiophile-grade speakers start rattling out of the blue, it could be due to a blown driver. To get a clearer picture, I recommend testing your headphones with a different device or using sound diagnostic apps. Want to learn more about why your wireless earbuds charge to 90% and then stop? Check out this helpful article.
Let’s Get to the Root of the Problem
Knowing how to identify a blown driver is just the beginning. The real question is, how do you confirm it beyond a doubt? And once confirmed, what’s next? Stay tuned, because I’ll share practical, easy-to-follow steps to diagnose your headphones, and tips on when it’s time to repair or replace. Sound good? Let’s start unraveling this mystery together!
Test With a Known Good Device
Start by plugging your headphones into a different device, like another phone or computer. If the sound remains distorted, it’s likely your headphones rather than the source. I once borrowed a friend’s mp3 player and played familiar tracks—muted bass and crackles confirmed my suspicion about the driver. This quick swap helps isolate the problem without costly equipment.
Perform a Visual Inspection
Next, examine your headphones closely. Look for obvious damage—tears in the cable, dents, or burnt smell. For in-ear models, check the ear tips and the housing for damage. I once found a crack in the housing after dropping my earbuds; that tiny fissure was enough to cause sound issues. Remember, sometimes a physical crack indicates an internal driver problem.
Conduct a Sound Test Using a Test Track or App
Use a familiar, bass-rich track played at a moderate volume. Listen carefully for muffled sounds or imbalance between channels. Alternatively, employ sound test apps that emit test signals across various frequencies. If one side sounds significantly quieter or distorted at specific frequencies, it suggests driver damage. I used a free frequency sweep app, and at certain points, the sound dropped entirely from one side, confirming my driver was dead.
Check for Mechanical Obstructions
Gently press on the driver area or ear cup—if your model allows. Sometimes debris or wax buildup blocks the driver, causing muffled sound. I had a pair of over-ears where cleaning the mesh improved sound and ruled out any internal failure. Regular cleaning can prevent unnecessary replacements, but if cleaning doesn’t help and the sound remains unbalanced, the driver may be blown.
Listen for Physical Signs of Malfunction
Significant rattling, buzzing noises, or a complete absence of sound point toward a blown driver. Feel the driver housing—if it vibrates or rattles independently of music, there’s likely internal damage. Once, I noticed a faint rattle during playback—opening the headphones revealed a dislodged driver magnet, a clear sign of internal failure.
Test with an Alternative Cable or Connection
If your headphones use detachable cables, swap them out to rule out a faulty wire. Sometimes, a damaged cable mimics driver failure. I replaced a frayed cable, which restored audio, confirming the issue was not internal. Also, test wireless models by removing potential interference—see if reconnecting after a reset improves sound.
Use a Multimeter to Check Internal Continuity
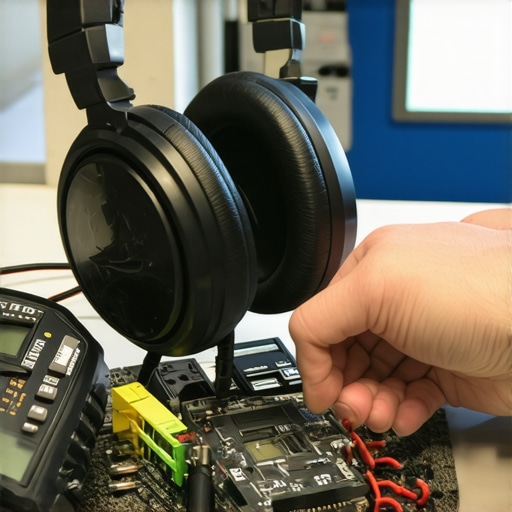
For technical users, a multimeter can verify if the driver coil has continuity. Disconnect the driver (if possible) and measure resistance. An open circuit indicates a blown coil. I once borrowed a multimeter and confirmed my driver coil was broken—saving me from unnecessary replacements.
Assess the Cost of Repair versus Replacement
If your driver’s blown, evaluate whether repairing is feasible. Replacement drivers are often available online, but consider the cost and effort. Sometimes, replacing the entire headphone or earbud makes more sense. I once repaired a worn-out driver in my vintage headphones, saving money. Use this method for precise diagnosis and informed decisions, especially when dealing with high-end gear.
Remember, regular maintenance like cleaning the mesh and avoiding excessive volume can prolong the lifespan of your drivers. If you’re unsure or uncomfortable performing these tests, consulting a professional technician or contacting the manufacturer can provide clarity.
When it comes to home audio, many enthusiasts and casual listeners alike tend to prioritize brands, flashy designs, or the latest buzzwords over nuanced understanding. However, even seasoned audiophiles can fall prey to misconceptions that hinder their listening experience. One common myth is that the most expensive equipment automatically guarantees the best sound quality. In reality, a high price tag doesn’t always equate to superior audio—it often involves branding and marketing strategies rather than actual performance gains. For example, some audiophile-grade cables, touted as essential, are actually a marketing trick designed to inflate costs without delivering meaningful improvements.
Why do we fall for these misconceptions?
It’s tempting to believe that more expensive equals better, especially when the marketing suggests so. Yet, current research indicates that the subjective perception of sound quality is heavily influenced by psychological factors. A study published in the Journal of the Audio Engineering Society shows that listeners’ expectations often shape their experience, sometimes more than the actual equipment performance. This phenomenon explains why some budget-friendly gear can outperform pricier counterparts in real-world scenarios, especially when paired with proper setup and room acoustics.
Watch Out for the Tailored Trap: The Room Matters More Than You Think
Many overlook how your listening environment impacts sound quality. For instance, placing speakers directly on the floor, even if they’re high-end, can drastically diminish their performance. In fact, avoiding speaker placement on the floor can make a notable difference in clarity and bass response. A frequent mistake is assuming that upgrading to a new amplifier or soundbar will solve acoustic issues when, in reality, room treatments, furniture placement, and speaker positioning have a far more significant impact.
Advanced question: How does phase alignment influence complex multi-channel audio setups?
Phase alignment can drastically alter perceived sound staging and clarity, especially in multi-channel surround sound systems. Misaligned phases between speakers cause frequencies to cancel out or reinforce improperly, leading to muddy or unbalanced sound. Precise calibration using tools like a phase meter or spectrometer can optimize these interactions. Experts suggest that even small phase discrepancies—less than 10 degrees—can be audible, making meticulous setup crucial for audiophiles aiming for pristine sound replication. For further reading, check out this guide on phase checking.
Ultimately, the most significant improvements often come from understanding and optimizing your environment rather than chasing the latest boutique gear. Proper speaker placement, room treatment, and calibration yield better results than simply upgrading to the newest models. Before making a purchase, consider whether your room setup might be limiting performance, and explore how small adjustments can lead to a more immersive listening experience. Sometimes, investing in a simple room setup or affordable acoustic panels can transform your home audio far more effectively than spending thousands on new hardware.
Have you ever fallen into this trap of believing that bigger or more expensive is better? Let me know in the comments!
Keep Your Sound Gear in Top Shape with Precision Tools
Maintaining your home audio system over time requires more than just regular listening—it’s about adopting the right tools and methods for diagnosis and upkeep. One device I can’t recommend enough is a quality multimeter. I use mine not only to check if your driver coils are still intact but also to verify wiring integrity and ground connections, ensuring your system remains safe and performs optimally. For instance, measuring driver coil continuity can preemptively reveal issues before they become audible disturbances, saving money and preserving sound quality. Additionally, invest in a calibrated sound level meter, which helps in fine-tuning speaker setups and room acoustics—crucial for achieving balanced sound as your environment evolves.
Beyond hardware, software solutions complement maintenance efforts beautifully. I rely on room calibration software like REW (Room EQ Wizard) that runs on my laptop. It’s invaluable for analyzing sound response and pinpointing problematic frequencies caused by room anomalies or speaker placement issues. This combination of hardware and software tools empowers you to keep your audio experience pristine over the years, adapting to changes in your space or preferences.
How do I maintain my home audio setup over time?
Regularly inspecting and cleaning your equipment is fundamental. For instance, cleaning speaker grills and driver meshes with a soft brush removes dust and debris that can muffle sound. Ensure your cables are secure and free of damage—damaged wiring can lead to signal loss or distortion. Also, routinely calibrate your system with a calibration microphone and software like REW, especially after rearranging furniture or adding new components. This habit prevents gradual performance degradation and keeps your speakers sounding their best for years.
Predicting future trends, I believe integrated smart calibration systems will become more prevalent, automating ongoing adjustments as your room acoustics subtly change. Companies like Dirac and Anthem are pioneering such solutions, which may soon make manual calibration less necessary—though understanding current tools remains essential for DIY enthusiasts.
If you’re serious about sound longevity, I recommend starting with a dedicated calibration microphone and software. Use it to analyze your system’s response and make incremental adjustments. This proactive approach ensures your investments pay off in consistent, high-quality audio. Ready to see how precise calibration can transform your listening? Try running a full-room analysis with REW and notice the improvements—your future self will thank you.
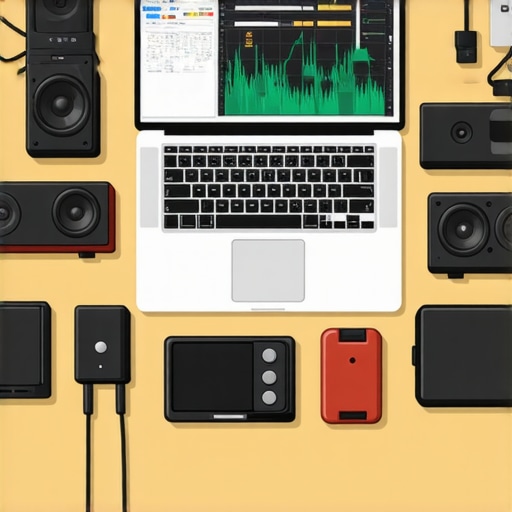
Image prompt: Illustration of various home audio tools—multimeter, calibration microphone, sound level meter—laid out on a desk alongside a laptop displaying audio analysis software. Alt text: Home audio maintenance tools and software for system calibration. Title: Essential Tools for Long-Term Audio System Care.
Three Insights I Wish I Had Known Sooner About Amplifiers and Speakers
One of the biggest lessons I learned was that even the most expensive gear isn’t infallible; proper setup and understanding your room’s acoustic properties make a world of difference. I once upgraded to a flagship amplifier, expecting a magic boost in sound, only to realize that poor speaker placement or room reflections were sabotaging my experience. That lightbulb moment taught me that technical knowledge and environment optimization trump price tags every time. Another revelation was the myth of costly cables necessarily delivering better audio—my experiments with budget-friendly interconnects proved that marketing often oversells without real gains. Most importantly, I discovered that patience and a willingness to learn troubleshooting techniques like using a multimeter and calibration tools can save you hundreds or thousands, transforming your listening experience from good to breathtaking.