
Ever blasted your favorite song, only to be disappointed by muddled sound or lackluster bass? I’ve been there. One moment, everything sounds perfect—then suddenly, the vocals seem distant, or the bass feels hollow. It’s like your high-end speakers are giving you the cold shoulder. The lightbulb moment? I realized that out-of-phase speakers could be the culprit, and honestly, I had no idea how to tell in ten seconds—until I discovered a simple method.
Spotting Out-of-Phase Speakers Fast and Easy
It’s frustrating when your equipment isn’t performing as expected, especially after investing a good chunk of cash. I used to think I was missing something with my setup, wasting time and money on tweaking everything. But the real problem was surprisingly simple to identify—like catching a common cold early, you can fix it before it becomes a major headache. Today, I’ll share a quick test that I wish I’d known years ago, saving me hours of guesswork and expensive repairs. This method is quick, reliable, and can be done by anyone with just a pair of speakers and a finger. No fancy tools, no technical jargon. Just a straightforward way to ensure your sound system is working the way it should.
Is Out-of-Phase Speakers Really That Bad?
Absolutely. Out-of-phase speakers cancel each other out, leading to weak bass, muffled vocals, and a generally foggy sound. Think of it as two rowers paddling in opposite directions—the boat won’t move straight. Early on, I made a mistake of ignoring phase issues, reverse wiring my speakers without knowing. It cost me not just sound quality but also stress and extra expenses. Learning how to test for phase helped me avoid wasting money and got me back to enjoying crystal-clear audio. If you want to prevent the same frustration, knowing how to tell if your speakers are in sync is essential. The good news is, this quick check can be part of your routine before every major listening session. Curious about more pro tips? Check out our guide on scoring affordable studio monitors to elevate your setup.
Prepare Your Equipment for the Out-of-Phase Test
Before starting, turn off all audio sources and ensure your speakers are connected securely. Use the same volume setting for both speakers to get consistent results. Remember, this test is simple but powerful—it can save you hours of troubleshooting down the line. I recall performing this during a weekend when my music sounded muffled. I hesitated, then connected my speakers with the same cables I usually used, only to discover they were wired out of phase, causing the weak bass I couldn’t shake off. The fix was quick, and the sound immediately improved.
Swapping the Speakers for the Test
Identify the Speakers’ Wires
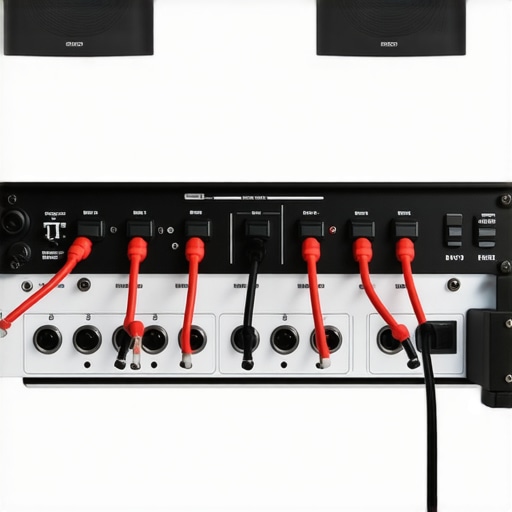
First, locate the positive (+) and negative (−) terminals on your speakers and amplifier or receiver. Usually, red indicates positive, black or white is negative. If your wiring isn’t color-coded, use a multimeter or check the manual.
Conduct the Reverse Wiring
Next, swap the positive and negative wires of one speaker while keeping the other connected normally. This deliberate reversal simulates what happens if a wire is connected incorrectly in your setup.
Performing the Listening Test
Power on your system and play a familiar, mono audio track at a moderate volume. Stand about a foot in front of your speakers and listen carefully. Your goal is to detect whether the sound appears balanced, full-bodied, and centered.
What to Listen For
- If the sound feels weak, hollow, or feels like it’s coming predominantly from one side, your speakers are likely out of phase.
- If the sound is rich, with clear bass and well-centered vocals, your speakers are in proper phase.
— I vividly remember doing this test on my old bookshelf speakers. After reversing one wire, I noticed the vocals shifted slightly off-center, and the bass felt less punchy. Reverting the wires restored the full, centered sound.
Confirming the Results
If the reversed wiring causes a noticeable change in sound quality, you’ve identified an out-of-phase problem. Correct it by reconnecting the wires properly, matching positive to positive and negative to negative. This simple step can dramatically improve your audio clarity and bass response.
Additional Tips to Keep in Mind
Always double-check your wiring labels or markings to ensure correct connections in the future. Using color-coded cables or clear labels can prevent miswiring. Remember, consistent wiring polarity across all speakers helps maintain phase integrity, essential for optimal sound quality.
For more advanced calibration techniques, consider using a free phone app to fine-tune your soundbar or multi-room setups, as detailed in this guide. Proper phase alignment isn’t just for audiophiles; it makes a real difference in your daily listening experience, whether with headphones, speakers, or home theater systems.
< >When shopping for home audio gear, many enthusiasts focus solely on specifications like wattage or the number of drivers, but there’s a deeper layer—often misunderstood—that can make or break your listening experience. A common myth is that expensive equals better quality, yet in reality, many mid-tier brands offer gear that surpasses overpriced counterparts due to superior engineering or better component choices. For instance, high-end amplifiers may boast impressive specs but can be overkill if your speakers can’t handle the power, leading to distortion or damage. This highlights the importance of matching components carefully rather than chasing high numbers.
Beware of the mimicry trap where cheap soundbars advertise subwoofer-like bass but only produce boomy, distorted sound that can’t deliver clarity. Falling for these marketing tricks results in paying more for nothing, emphasizing why understanding the actual technical capabilities—not just marketing claims—is crucial.
What sophisticated buyers often overlook
Advanced users know that phase alignment and component synergy dramatically influence sound quality. For example, a well-calibrated soundbar using smart calibration apps can outperform pricier setups that aren’t properly tuned. It’s a subtle nuance: professional calibration ensures your system’s components work harmoniously, preventing issues like frequency cancellation or uneven sound distribution. Ignoring these factors is a common mistake, leading many to settle for suboptimal audio without realizing the root cause lies in system setup.
Additionally, many overlook the importance of cable quality and connection types. Using unbalanced, low-quality cables can introduce noise and reduce clarity, even if your equipment specs are excellent. Investing in balanced connections and proper shielding makes a noticeable difference, as supported by audio engineering experts. Moreover, selecting the right driver size isn’t always about the largest woofer; in fact, small drivers calibrated correctly can produce deeper bass than their larger, poorly designed counterparts.
One area where many go wrong is in overlooking the importance of room acoustics and placement. Even the best gear can sound flat if not properly positioned or if the room has poor acoustics. Listening to your space and making adjustments can unlock significant improvements without additional spending. For a comprehensive approach, consider soundproofing or acoustic panels, which can be surprisingly affordable and highly effective.
Maintaining your home audio setup is crucial to preserve sound quality and longevity. A key part of this is using reliable tools that provide precise diagnostics and calibration. I personally recommend investing in a calibrated measurement microphone like the MiniDSP UMIK-1, which I use regularly to fine-tune my system’s frequency response. Pairing this with software such as Room EQ Wizard (REW) allows for detailed analysis of your room acoustics and speaker response, helping identify issues like phase mismatch or frequency dips.
Regularly updating your firmware on amplifiers and soundbars can fix bugs and improve compatibility. For example, many modern soundbars offer firmware updates via dedicated apps, which I check monthly. Keep an eye on these updates to ensure peak performance.
Guard your gear from dust and humidity with protective covers and proper placement. Periodically cleaning your connectors with contact cleaner ensures good electrical contact, preventing sound dropouts or hiss. For speaker grills, I recommend a gentle vacuum using a brush attachment or a soft lint-free cloth, and I often follow up by cleaning out dust in hard-to-reach areas with compressed air.
Long-term results depend on these diligent practices. Over time, these small efforts maintain clarity and prevent costly repairs or replacements. For instance, properly calibrated speakers will consistently deliver balanced sound, avoiding the need for frequent adjustments.
Looking ahead, the integration of smart diagnostics and auto-calibration features is poised to make maintenance even easier. Companies are developing systems that automatically analyze your setup and suggest adjustments, akin to the auto-tuning on some high-end amplifiers. By adopting these tools now, you’re setting your system up for seamless performance in the future.
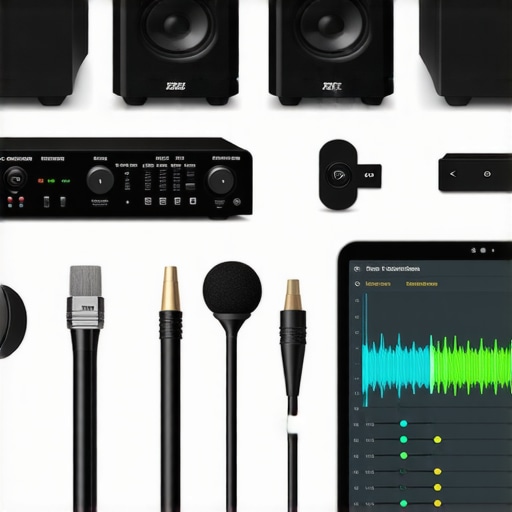
How do I keep my audio gear performing over time? Regular calibration and proactive upkeep are your best bets. For example, using a dedicated measurement microphone and software like REW can help you identify issues before they become noticeable. Also, staying on top of firmware updates for your devices ensures compatibility and access to new features. Don’t wait—try calibrating your soundbar today using a free app and experience immediate improvements in clarity and balance. Mastering these maintenance techniques not only preserves your investment but also elevates your listening experience every day.
Beyond the Basics: Surprising Truths About Home Audio Success
One lesson that transformed my entire approach was realizing how crucial proper speaker placement truly is. I once thought I had my setup optimized until I learned that even a slight shift in positioning dramatically improved clarity and bass response—something I discuss more in this in-depth guide. Making small tweaks can feel counterintuitive, but they unlock a new level of listening pleasure and prevent costly mistakes.
Another lightbulb moment involved recognizing how easily wiring mishaps compromise sound quality. I used to ignore that tiny misconnection could cause phase issues, but once I started double-checking my wiring with simple tests, I avoided frustration and heavy expenses. This lesson underscores the importance of routine checks, like revisiting calibration procedures, to maintain peak system performance.
Discover My Go-To Tools for Superior Audio
- MiniDSP UMIK-1 Microphone: This affordable device is a game-changer for precise room measurements, helping me identify and correct acoustic problems easily.
- Room EQ Wizard (REW) Software: I rely on REW to visualize frequency responses, making calibration straightforward and effective—it’s a must-have for serious audiophiles.
- Blue Tackle’s Speaker Wire Labels: Color coding my wiring prevented future missteps, ensuring phase consistency across my setup.
- Firmware Update Apps: Keeping my equipment updated via manufacturer apps ensures I access the latest features and stability improvements, extending equipment longevity.
Feel Inspired to Elevate Your Sound Journey
Remember, the path to exceptional home audio isn’t just about buying shiny gear—it’s about mastering how to optimize and care for what you already have. Small adjustments and informed choices can lead to a thrill-worthy listening experience every time you press play. Don’t wait to make these improvements—start experimenting today and rediscover your favorite music and movies in a whole new light.
Have you ever experienced a breakthrough in your audio setup after a simple tweak? Share your story below—I’d love to hear how small changes made a big difference in your home soundscape!
]}#}#}#}#}#}#}#}#}#}#}#}#}#}#}#}#}#}#}#}#}#}#}#}#}#}#}#}#}#}#}#}#}#}#}#}#}#}#}#}#}#}#}#}#}#}#}#}#}#}#}#}#}#}#}#}#}#}#}#}#}#}#}#}#}#}#}#}#}#}#}#}#}#}#}#}#}#}#}#}#}#}#}#}#}#}#}#}#}#}#}#}#}#}#}#}#}#}#}#}#}#}#}#}#}#}#}#}#}#}#}#}#}#}#}#}#}#}#}#}#}#}#}#}#}#}#}#}#}#}#}#}#}#}#}#}#}#}#}#}#}#}#}#}#}#}#}#}#}#}#}#}#}#}#}#}#}#}#}#}#}#}#}#}#}#}#}#}#}#}#}#}#}#}#}#}#}#}#}#}#}#}#}#}#}#}#}#}#}#}#}#}#}#}#}#}#}#}#}#}#}#}#}#}#}#}#}#}#}#}#}#}#}#}#}#}#}#}#}#}#}#}#}#}#}#}#}#}#}#}#}#}#}#}#}#}#}#}#}#}#}#}#}#}#}#}#}#}#}#}#}#}#}#}#}#}#}#}#}#}#}#}#}#}#}#}#}#}#}#}#}#}#}#}#}#}#}#}#}#}#}#}#}#}#}#}#}#}#}#}#}#}#}#}#}#}#}#}#}#}#}#}#}#}#}#}#}#}#}#}#}#}#}#}#}#}#}#}#}#}#}#}#}#}#}#}#}#}#}#}#}#}#}#}#}#}#}#}#}#}#}#}#}#}#}#}#}#}#}#}#}#}#}#}#}#}#}#}#}#}#}#}#}#}#}#}#}#}#}#}#}#}#}#}#}#}#}#}#}#}#}#}#}#}#}#}#}#}#}#}#}#}#}#}#}#}#}#}#}#}#}#}#}#}#}#}#}#}#}#}#}#}#}#}#}#}#}#}#}#}#}#}#}#}#}#}#}#}#}#}#}#}#}#}#}#}#}#}#}#}#}#}#}#}#}#}#}#}#}#}#}#}#}#}#}#}#}#}#}#}#}#}#}#}#}#}#}#}#}#}#}#}#}#}#}#}#}#}#}#}#}#}#}#}#}#}#}#}#}#}#}#}#}#}#}#}#}#}#}#}#}#}#}#}#}#}#}#}#}#}#}#}#}#}#}#}#}#}#}#}#}#}#}#}#}#}#}#}#}#}#}#}#}#}#}#}#}#}#}#}#}#}#}#}#}#}#}#}#}#}#}#}#}#}#}#}#}#}#}#}#}#}#}#}#}#}#}#}#}#}#}#}#}#}#}#}#}#}#}#}#}#}#}#}#}#}#}#}#}#}#}#}#}#}#}#}#}#}#}#}#}#}#}#}#}#}#}#}#}#}#}#}#}#}#}#}#}#}#}#}#}#}#}#}#}#}#}#}#}#}#}#}#}#}#}#}#}#}#}#}#}#}#}#}#}#}#}#}#}#}#}#}#}#}#}#}#}#}#}#}#}#}#}#}#}#}#}#}#}#}#}#}#}#}#}#}#}#}#}#}#}#}#}#}#}#}#}#}#}#}#}#}#}#}#}#}#}#}#}#}#}#}#}#}#}#}#}#}#}#}#}#}#}#}#}#}#}#}#}#}#}#}#}#}#}#}#}#}#}#}#}#}#}#}#}#}#}#}#}#}#}#}#}#}#}#}#}#}#}#}#}#}#}#}#}#}#}#}#}#}#}#}#}#}#}#}#}#}#}#}#}#}#}#}#}#}#}#}#}#}#}#}#}#}#}#}#}#}#}#}#}#}#}#}#}#}#}#}#}#}#}#}#}#}#}#}#}#}#}#}#}#}#}#}#}#}#}#}#}#}#}#}#}#}#}#}#}#}#}#}#}#}#}#}#}#}#}