
I still remember the smell of ozone and burning dust that filled my living room three years ago. I’d just come home from a swap meet, clutching a ‘pristine’ 1970s Pioneer receiver like it was the Holy Grail. The seller promised me it worked perfectly, but within ten minutes of spinning my favorite record, the left channel died with a sickening pop and a wisp of gray smoke. I was out a hundred bucks and a lot of pride. That failure was a turning point for me. I realized that in the world of used gear, hope is not a strategy. Whether you are hunting for [home audio deals](https://premiumsounddeals.com/how-to-find-high-end-audio-gear-at-thrift-stores-before-anyone-else) at a garage sale or meeting a stranger from a classified ad, you need a repeatable, ruthless testing process. Today, I’m going to share the exact ‘parking lot test’ I use to ensure I never buy another expensive paperweight again. We aren’t just looking for power; we are looking for stability, cleanliness, and longevity.
Don’t Trust a Seller Who Says It Worked Last Time
The biggest mistake I made early on was taking a seller’s word as gospel. When someone says ‘it worked fine the last time I used it,’ they often mean ‘it worked fine when I put it in the attic during the Clinton administration.’ Electronic components, specifically electrolytic capacitors, have a finite lifespan. According to technical data from major manufacturers like Panasonic and Nichicon, these components are often rated for about 2,000 to 10,000 hours of use, but they also degrade simply by sitting unused for decades. If you don’t know [how to tell if your vintage amplifier needs new capacitors](https://premiumsounddeals.com/how-to-tell-if-your-vintage-amplifier-needs-new-capacitors), you are essentially gambling with your wallet. I’ve learned to look for the [hidden costs of buying a vintage receiver on the internet](https://premiumsounddeals.com/the-hidden-costs-of-buying-a-vintage-receiver-on-the-internet) before I even pull my car out of the driveway. Have you ever been burned by a ‘perfect’ piece of gear that failed the moment you got it home? It’s a common rite of passage, but it’s one you only want to experience once.
Is This Old Gear Actually Worth the Risk?
Many newcomers wonder if it’s better to just buy a modern Class-D amp and call it a day. While new tech is reliable, the build quality and warmth of vintage iron are hard to beat—provided the guts are still good. To avoid the heartbreak I suffered, you need to bring your own testing kit. I never leave home without a 3.5mm-to-RCA cable, a sacrificial pair of speakers, and a set of headphones. You want to [fix the crackling noise when you turn your amp volume](https://premiumsounddeals.com/how-to-fix-the-crackling-noise-when-you-turn-your-amp-volume) before you pay, not after. Testing the potentiometers (the knobs) is the easiest way to see how much ‘miles’ are on the unit. If every turn of the treble knob sounds like someone stepping on dry leaves, you have leverage to negotiate—or a reason to walk away. This preliminary check is about protecting your investment and ensuring that your ‘new’ old receiver doesn’t end up as a fire hazard.
The Visual and Physical Triage Before You Plug It In
Before I ever risk my sacrificial speakers, I play detective. I once met a guy at a gas station for a Marantz unit that looked immaculate. When I picked it up, something rattled. It sounded like a loose screw, but it turned out to be a shattered ceramic resistor. If I hadn’t shaken it, that piece of debris could have bridged two traces and turned the whole board into a fireworks display. Inspect the power cord first; if it’s brittle or cracked, walk away. Then, check the terminals. If they are loose, knowing how to repair a loose speaker terminal in under five minutes is a great skill, but it’s also a sign the unit was treated like luggage rather than a precision instrument.
Feel the Resistance in the Knobs
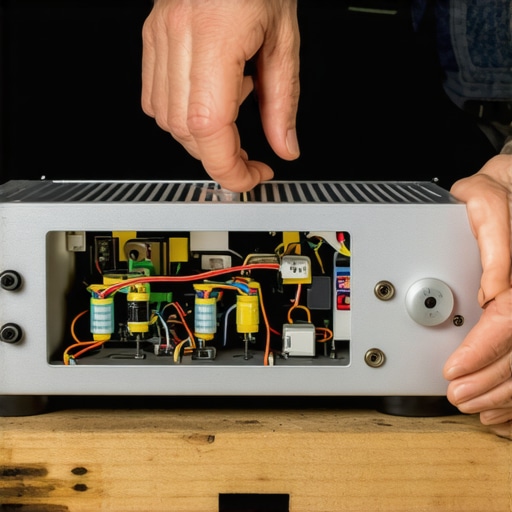
Knobs should feel like they are moving through honey, not sand. If a volume slider moves too freely or feels ‘gritty,’ the internal carbon tracks are likely oxidized or physically worn down. While you can often use contact cleaner to find the easy way to fix a scratchy volume slider on your radio, a slider that physically hitches might be beyond saving. I’ve found that a ‘dry’ feeling knob usually means the factory grease has turned into wax. This isn’t a dealbreaker, but it’s a great way to talk the price down on home audio deals that others might overlook because of a little static.
Firing Up Without the Smoke
This is the moment of truth. Plug it in, but don’t connect speakers yet. Watch for a ‘Protect’ light or listen for a mechanical click—the relay. If it stays in protect mode, it’s a project, not a player. If it clicks over, it’s time to check the outputs. Think of the relay like a bouncer at a club; if he doesn’t let the music through, there’s usually a fight happening inside the circuitry.
Use the Headphones as a Safety Net
I always plug in a cheap pair of headphones first. If there is a massive DC offset—essentially raw electricity leaking where it shouldn’t—I’d rather fry a $10 pair of earbuds than my vintage bookshelf speakers. Listen for a loud hum or a hiss. A constant hum usually points to a grounding issue, and you’ll want to ensure you know how to properly ground your turntable to stop that buzzing noise if you plan on using the phono stage. If the sound is clear through the phones, you’re 80% of the way to a win.
The Speaker Terminal Torture Test
Now, hook up those sacrificial speakers. Crank the volume with no music playing and listen for ‘pop’ sounds. You need to understand why your amplifier makes a popping sound when you turn it on because it could be a simple relay issue or a sign of failing output transistors. Once music is playing, push the ‘Source Direct’ or ‘Loudness’ buttons. These switches are notorious for cutting out a channel. I once spent twenty minutes at a flea market toggling a tape monitor switch until the right channel finally roared to life—it was just a dirty contact, but the seller thought the amp was dead and sold it for twenty bucks.
Everyone tells you to look for the highest wattage number on the back of a receiver, but in my years of hunting for home audio deals, I have learned that wattage is the most manipulated stat in the industry. Most buyers think ‘more power equals better sound,’ but this is a classic beginner trap. Manufacturers often use ‘Peak Power’ to inflate numbers, while the real metric that matters is RMS power delivered with low distortion across the entire frequency range. I have seen a 30-watt vintage Marantz completely embarrass a modern 100-watt plastic receiver because it had a beefier power supply and higher current delivery. In fact, the Federal Trade Commission (FTC) established the ‘Amplifier Rule’ in 1974 specifically to combat these deceptive marketing tactics, yet many consumer-grade brands still find ways to hide mediocre performance behind big numbers.
The High-Wattage Lie You Need to Stop Believing
If you are obsessing over gold-plated inputs, you might be falling for another marketing gimmick. While gold resists corrosion, the truth about gold-plated audio connectors for home stereos is that they do not actually improve sound quality on their own. It is the same story with wire; why expensive speaker cables are mostly a marketing trick is one of the hardest pills for audiophiles to swallow. You are much better off spending that money on a better pair of speakers or a dedicated DAC than on oxygen-free copper that costs more than your car. I have seen people drop hundreds on ‘magic’ cables while their amp was literally cooking itself to death due to bad ventilation.
Why Your Amp Might Be Cooking Itself from the Inside
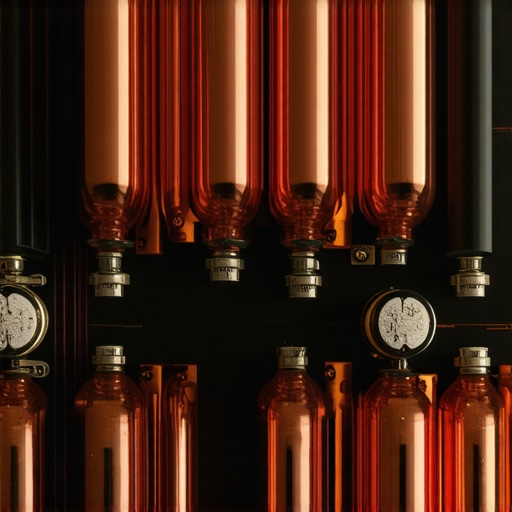
One of the deadliest ‘oops’ factors I have encountered is the ‘thermal runaway’ trap. If you are testing a unit and the top of the chassis feels like a stovetop within minutes, walk away. Understanding why your amplifier gets hot enough to burn your hand is vital; it usually points to a misadjusted bias or failing output transistors. This is especially true for vintage gear where the internal components have drifted out of spec. If you do not know how to tell if your vintage amplifier needs new capacitors, you risk a catastrophic failure that could take your speakers down with it. I once ignored a warm chassis on a ‘deal’ only to have it vent blue smoke and fry the tweeters in my favorite bookshelf pair.
Can Your Phone Actually Drive High-End Headphones?
Many advanced listeners think they can just plug a pair of 300-ohm Sennheisers into a smartphone and get the full experience. The truth about using your phone to power high-end headphones is that while you might get enough volume, you are completely losing the dynamic range and bass control that those headphones were designed to provide. Without a dedicated amplifier to provide the necessary voltage swing, those expensive drivers will sound thin and lifeless. Have you ever fallen into this trap of buying high-end gear but underpowering it? Let me know in the comments.
The Maintenance Toolkit That Actually Works
Once you’ve scored one of those rare home audio deals, the real work begins. I treat my audio rack like a vintage Porsche; it requires more than just a quick wipe-down. The cornerstone of my maintenance kit is a can of DeoxIT D5. I’ve seen well-meaning beginners use WD-40 to fix the crackling noise when you turn your amp volume, which is a catastrophic mistake. WD-40 is a penetrant that leaves a sticky residue, eventually turning into a glue that ruins the component. DeoxIT is a chemical deoxidizer that cleans and protects without damaging the delicate plastic parts inside your pots.
Stop Choking Your Components with Poor Airflow
One of the fastest ways to kill a beautiful piece of gear is to trap it in a cabinet. This is usually the culprit when you are trying to figure out why your new amplifier gets hot after only twenty minutes. I personally use a set of quiet, 120mm USB fans to pull air away from my heatsinks. According to a technical note by Vishay on aluminum electrolytic capacitors, every 10°C increase in temperature cuts the expected life of those components in half. If your amp is running at 50°C instead of 40°C, you are literally aging it twice as fast.
How do I maintain my vintage audio gear over time?
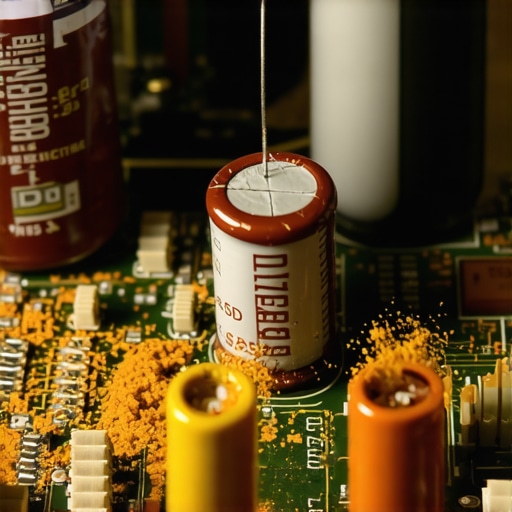
The best maintenance is preventative. Every six months, I pull my gear out for a deep clean. I use a soft-bristled paintbrush and a vacuum to remove dust from the internal circuit boards. Dust is an insulator; it holds heat against the resistors and transistors. While I have the hood open, I check for cap leak—a crusty residue at the base of the capacitors. Knowing how to tell if your vintage amplifier needs new capacitors allows you to swap them before they fail and take out an expensive output transistor.
If you are more of a mobile listener, don’t ignore your headphones. Frayed wires are the #1 killer of premium cans. I always follow the over-under cable wrapping technique because I’ve researched the best ways to store your headphones to prevent cable fraying. It keeps the internal copper strands from twisting and eventually snapping under the insulation. I believe the future of home audio will be self-healing. We are already seeing high-end Class-D amps with integrated DSP that can detect impedance shifts and warn the user of a failing speaker driver. Until we get there, we have to be the guardians of our own gear. I want you to try one thing this weekend: pick up a can of contact cleaner and spray the tape monitor or source selector switches on your amp. These are often the hidden causes of channel dropouts, and a ten-second spray can restore your soundstage instantly.
Hard Lessons from My Most Expensive Failures
Over the years, I have realized that the best deals are usually the ones others were afraid to touch. I used to think a dead channel meant a dead amplifier, but after spending years digging through home audio deals, I learned that a simple dirty switch is the culprit 90% of the time. The biggest takeaway? Never trust your eyes alone. A faceplate can be perfect while the internals are a mess of leaked electrolytes and brittle wires. I now prioritize units that smell ‘neutral’ and feel heavy for their size, as a massive transformer is a great indicator of high current delivery and real-world performance. I also learned to be wary of the the hidden costs of buying a vintage receiver on the internet, especially shipping damage which can bend a chassis and ruin the alignment of delicate tuning capacitors.
The Only Testing Kit You Truly Need
You do not need a laboratory of oscilloscopes to avoid getting ripped off. My mobile ‘rescue kit’ is simple and fits in a small bag. I carry a digital multimeter to check for DC offset at the speaker terminals; if I see more than 50mV, I know I will need to learn how to tell if your vintage amplifier needs new capacitors before it is safe to use. I also carry a set of sacrificial speakers and a bottle of DeoxIT. Sometimes, the 5 dollar thrift store find that fixed my muddy guitar amp is all the inspiration you need to realize that most ‘broken’ gear just needs a little bit of chemical cleaning and a lot of patience. I trust sites like AudioKarma and HiFi Engine for service manuals, as they provide the original schematics that reveal exactly how a unit was meant to perform before forty years of dust settled in.
#IMAGE_PLACEHOLDER_E#
Start Your Own Audio Rescue Mission Today
Rescuing a piece of high-end gear from a dusty garage and bringing it back to its former glory is one of the most rewarding parts of this hobby. It connects you to a time when things were built to be serviced, not thrown away. Don’t let the technical jargon or the fear of a little static stop you from hunting for your next great set of home audio deals. Every expert was once a beginner with a scratchy volume knob and a dream. Take the process slow, use your senses, and never be afraid to walk away from a deal that feels too risky. Have you ever found a legendary piece of audio gear at a yard sale for next to nothing, or did your latest ‘bargain’ turn out to be a total dud? Let me know in the comments below!