
I sat there on my worn-out leather sofa, staring at my brand-new monitors. I’d spent weeks researching, eventually deciding that why your bookshelf speakers need more power than you think was the gospel truth, only to realize the foundation was crumbling—literally. Every time the bass kicked in, my stylish metal stands would “ping” like a tuning fork. It was heartbreaking. I thought I had a defective speaker, but the culprit was the hollow air trapped inside those tubes. That was my “aha!” moment. If you’ve ever felt like your high-end gear sounds thin or lacks that “punch” you hear in professional showrooms, you aren’t alone. Today, we are going to fix that hollow, ringing resonance once and for all by turning those light metal poles into solid, inert anchors.
Stop Your Stands from Singing Along with the Music
The problem with most affordable stands—and even some expensive ones—is that they are essentially wind instruments. When your speaker driver moves, it creates energy. That energy travels down the cabinet and into the stand. If that stand is hollow, it’s going to vibrate at its own natural frequency. I made the classic rookie mistake of thinking a bit of Blu-Tack would solve it. It didn’t. You need mass. By filling the pillars with kiln-dried sand, you shift the resonant frequency so low that it effectively disappears. This is one of those 3 budget upgrades that make cheap speakers sound expensive because it focuses the energy back into the air where it belongs, rather than wasting it on rattling your floorboards.
Is Adding All This Weight Actually Worth the Mess?
I get it. The idea of pouring bags of sand into furniture inside your house sounds like a recipe for a vacuuming nightmare. You might be wondering if this is just “audiophile snake oil” designed to make you work harder for no reason. But physics doesn’t lie. According to research published through the Audio Engineering Society, mechanical resonance in speaker supports can significantly color the sound, adding audible distortion that smears the stereo image. Once you add that dead weight, the bass tightens up instantly. Have you ever noticed your speakers sounding “muddy” even after you’ve spent hours trying to find the sweet spot for your speakers in a rectangular room? If so, the stand is likely the ghost in the machine.
The Science of Inertia and Your Ears
A speaker works on the principle of action and reaction. If the speaker cone moves forward, the cabinet wants to move backward. If your stand is light, the whole assembly wobbles ever so slightly. It’s microscopic, but it ruins the “attack” of a drum hit or the “crispness” of a vocal. When I finally dragged a bag of playground sand into my den and filled my DIY setup—much like those you’d see if you build your own speaker stands for under twenty dollars—the transformation was immediate. The soundstage opened up. The “thump” became a “thwack.” It’s about making the speaker the only thing moving in the room. Have you noticed a ringing sound when you tap your speaker stands? Let me show you how to damp it effectively.First, you need the right kind of ballast. Don’t just grab wet sand from a sandbox or the beach. You need kiln-dried sand, often sold as ‘jointing sand’ or ‘pool filter sand.’ Regular sand contains moisture that will eventually rust your metal stands from the inside out. I learned this the hard way with a pair of vintage steel pillars. Six months later, I noticed a brown streak at the base—oxidation had set in because the sand was damp. If you ever see green crust on your equipment, you’re likely dealing with a similar moisture issue, which is why knowing how to clean green oxidization off your copper speaker terminals is a lifesaver.
Prep Your Workspace and Seal the Leaks
Before you even crack open the bag, tape up any wire-management holes at the bottom of the stand. I once poured half a pound of sand directly onto my carpet because I forgot there was a small gap for cables. It was a nightmare to vacuum. Use high-quality electrical tape or even a bit of silicone sealant. This is also a great time to check for other structural issues; if your setup still sounds off, you might want to try the simple paper test for finding air leaks in your speaker cabinet to ensure the stand isn’t the only thing vibrating. 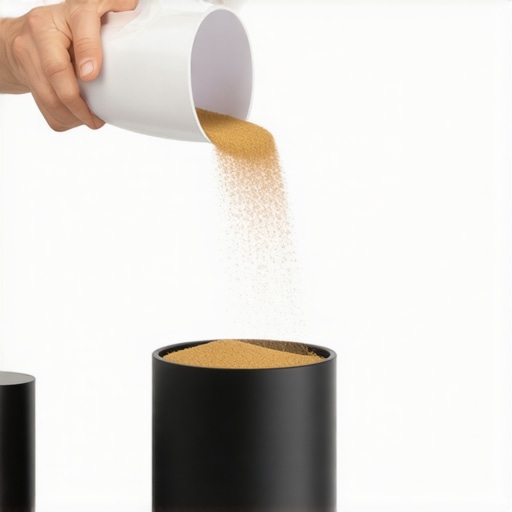
Use a Funnel and Pour with Patience
Grab a plastic kitchen funnel. If the sand is fine enough, it flows like water, but if it’s even slightly clumped, it’ll bridge and clog. I found that tapping the side of the stand with a rubber mallet—or even a wooden spoon—while pouring helps the sand settle and removes air pockets. This process of adding mass is similar to how you’d treat a vibrating room to fix the annoying echo in your minimalist home theater; you are effectively ‘deadening’ the environment so only the music remains.
How High Should You Fill the Pillars?
There is a debate in the audiophile community about whether to fill to the brim or stop at two-thirds. In my experience, filling it about 75% of the way is the ‘goldilocks’ zone. Filling it to the very top can sometimes make the stand top-heavy, which is a recipe for disaster if you have pets or kids. If you find your speakers are still buzzing even after the sand treatment, you might actually be dealing with a loose component, so check out the easiest way to fix a rattling speaker grill for good.
The Finishing Touches and Re-Leveling
Once the stands are weighted, their center of gravity has changed completely. You need to re-adjust the floor spikes or rubber feet. If the stand isn’t perfectly level, all that new mass will actually work against you, causing the stand to lean and potentially tip. It’s the same logic as when you find the sweet spot for your speakers in a rectangular room—precision in placement is just as important as the gear itself. When I finally sat back down on my sofa, the difference was staggering. The ‘ping’ was gone, replaced by a silence so deep it made the first note of the track feel like a physical presence in the room.But here is where most people stop, and it’s actually where the real trouble begins. The common belief in the hi-fi world is that if a little weight is good, a massive amount must be better. I’ve seen enthusiasts fill their stands with lead shot until they weigh nearly a hundred pounds, thinking they’ve achieved the ultimate foundation. In my experience, this is a trap. While you want to eliminate the ‘ringing’ of the metal, you don’t want to create a giant heat sink for your speaker’s energy. If the stand is too heavy and coupled too tightly to the speaker, you can actually drain the life out of the lower-midrange frequencies.
Don’t Just Make it Heavy, Make it Dead
The goal isn’t just weight; it’s damping. There is a nuanced difference between mass-loading and decoupling that many beginners overlook. Mass-loading (the sand) lowers the resonant frequency of the stand so it doesn’t vibrate in the audible range. However, that energy still has to go somewhere. If your stand is bolted to a plywood subfloor, you’ve essentially turned your entire floor into a giant, muddy-sounding speaker. This is why even the most stable stands need isolation. Using something like Sorbothane pads or high-quality floor spikes breaks that mechanical bridge. It is a similar principle to why your expensive headphones sound thin on a basic smartphone; if the interface isn’t optimized for the energy being transferred, the result is always a loss of detail. 
Stop Thinking Like a Builder and Start Thinking Like a Scientist
One of the biggest mistakes I see is the ‘anchor effect.’ People believe that by anchoring the speaker to the ground, they are helping it. But according to Dr. Floyd Toole in his seminal work ‘Sound Reproduction,’ the interaction between a speaker’s cabinet and its support system can create secondary radiations that interfere with the primary sound wave. If you don’t decouple the speaker from the stand, the stand becomes an extension of the speaker cabinet. This is the ‘Oops’ factor: you’ve spent money on a high-end cabinet designed for low resonance, only to bypass it by coupling it to a steel pipe. If you are still struggling with clarity, you might need to check other parts of the chain. For instance, knowing how to tell if your amplifier has enough headroom for your speakers is just as important as the physical setup; a clipping amp will sound muddy regardless of how much sand you use.
Is it possible to actually kill the sound by over-damping?
Yes, absolutely. If you fill a stand 100% to the brim with a high-density material like lead, you can sometimes make the sound feel ‘choked’ or ‘clinical.’ The music loses its natural decay. I prefer a mix of 70% kiln-dried sand and 30% air or a lighter damping material. This allows the stand to remain inert without becoming a bottomless pit for every micro-vibration the speaker produces. While you are refining your system, keep an eye on your electronics too. If your speakers are perfectly placed but you notice the real reason your amp is getting hot to the touch is poor ventilation, your sound quality will degrade as the components heat up. For those running high-end setups, you might also find the real performance benefit of using balanced XLR cables helps keep the signal path as quiet as your newly damped stands. Have you ever fallen into this trap of thinking weight equals quality? Let me know in the comments.If you’ve already commented about your own heavy-lifting experiments, you’re likely ready for the next phase: long-term preservation. Once you’ve reached that perfect level of damping, the focus shifts to ensuring that the mechanical components don’t degrade under the very weight you’ve added.
Stop the Rot Before Your Surrounds Crumble
It’s a heartbreak every audiophile eventually faces—the material that connects your speaker cone to the frame starts to perish. If you notice a tacky or tacky-white residue, you need to know how to clean sticky speaker surrounds without damaging the rubber. Vance Dickason, author of the ‘Loudspeaker Design Cookbook’, points out that mechanical compliance in a driver’s suspension can shift dramatically due to heat and humidity, which ultimately changes the resonant frequency of the system. I’ve seen $2,000 drivers ruined because someone used a household degreaser on them. For those with pets, the trick to removing dog hair from speaker grilles safely is more than just about looks; it keeps your acoustic transparency high.
How do I maintain my speaker system’s performance over several years?
Regular inspections are your best defense. Every six months, I pull my cables out entirely. You’d be surprised at the atmospheric gunk that builds up. Knowing how to clean green oxidization off your copper speaker terminals is the difference between a pristine signal and a fuzzy, distorted mess. This applies to your ears, too; why your headphone pads are flaking and how to prevent it is often a matter of managing skin oils that eat away at the protein leather. 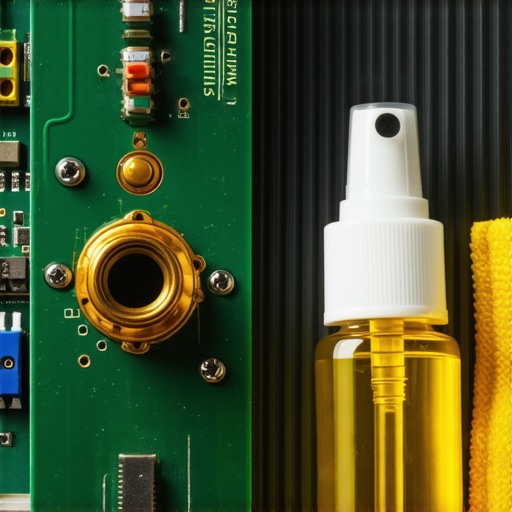
The Secret Toolkit for Every Serious Listener
You don’t need a lab to keep things running, but you do need a few unconventional items. One of my favorite ‘hacks’ is keeping a simple 9V battery in my gear drawer. If you ever swap wires and suspect a phase issue, you should learn how to use a 9v battery to check your speaker polarity. It’s a two-second test that can save you hours of troubleshooting. Likewise, keep some archival-grade PVA glue handy; if you catch it early, you can often learn how to fix a small rip in a speaker surround with glue before the tear spreads across the entire cone. Looking ahead, I suspect the next decade will see speaker stands integrated with active vibration-canceling sensors, much like the tech found in noise-canceling headphones, making the ‘sand-filled’ era look like a vintage relic. My best advice for right now? Grab a soft-bristled paintbrush and clear the dust out of your terminal cups this weekend. It’s the most satisfying five minutes you’ll spend on your system.
The Hardest Lesson I Learned About Chasing the Perfect Bass
When I first started tweaking my setup, I thought adding weight was a set-it-and-forget-it solution. It is not. Here is what I wish someone had whispered in my ear before I bought my first bag of sand: mass is not a substitute for build quality. If the welds on your stands are poor, sand won’t fix a rattle; it might actually make it worse by stressing the joints. I also learned the hard way that the ‘Ring Test’ is your best friend. Tap the stand at different heights as you fill it; the sound should transition from a metallic clink to a dead, satisfying thud. Finally, remember that humidity is a silent killer. If you live in a coastal area, even kiln-dried sand can trap salt air. Using a small packet of silica gel at the top of the pillar before sealing can save your steel from internal rust and keep your bookshelf speakers performing at their peak.
The Tools I Never Leave the Listening Room Without
You do not need a massive budget to maintain your gear, but you do need a few specific items to keep your home audio system sounding like it did on day one. I always keep a bottle of high-quality contact cleaner in my drawer. If you notice a drop in clarity, it is often just atmospheric grime, so knowing how to clean green oxidization off your copper speaker terminals is essential maintenance. I also highly recommend keeping a basic digital multimeter and a copy of Floyd Toole’s research on acoustics nearby; it explains the ‘why’ behind the physics we are fighting. For physical upkeep, I trust archival-grade cleaning supplies and have mastered how to clean sticky speaker surrounds without damaging the rubber to prevent the long-term mechanical failure that plagues vintage drivers.
Take the Leap and Trust Your Ears
At the end of the day, all the sand and science in the world serve one purpose: making you feel the music. Do not be afraid to experiment with different fill levels or isolation pads until the soundstage finally clicks into place. Tuning your speaker stands is a rite of passage that turns a generic audio system into a bespoke listening experience. You have put in the hard work of prepping, filling, and leveling—now it is time to reap the rewards of a truly inert foundation. Have you ever tried using lead shot instead of sand, or did you stick to the classic kiln-dried approach? Let me know your results in the comments below!