
I was certain I’d wasted three months of my life and a few hundred bucks. I had just finished my first custom cabinet build, but the low end felt completely hollow. My first instinct was to blame the electronics. I thought maybe my bookshelf speakers needed more power than I was giving them, or perhaps I’d messed up the wiring. I even went as far as using a 9V battery to check the polarity, thinking I’d simply wired the woofers out of phase. But the truth was much dumber. There was a tiny, invisible gap in my glue seam near the terminal cup. Every time the woofer kicked, air whistled out, killing the internal pressure and making the whole thing sound like a wheezing accordion.
The Secret Enemy of Tight Bass
A sealed speaker cabinet is supposed to be, well, sealed. When your woofer moves back and forth, it relies on that trapped air to act as a spring. If air is escaping through a loose screw or a poorly fitted joint, that “spring” loses its tension. You end up with “flabby” sound and a driver that over-exerts itself for no reason. I’ve seen people throw away perfectly good gear because they thought they had blown a tweeter or a crossover, when in reality, their enclosure was just leaking like a sieve. Today, I’m going to show you how to find every single one of those pesky leaks using nothing but a strip of tissue or a receipt.
Can a Piece of Paper Actually Beat High-Tech Sensors?
It sounds like “old-timer” voodoo, doesn’t it? In an era where we have apps for everything, the idea of holding a piece of paper up to a wooden box feels primitive. But here’s the reality: air movement is physical. If you have a leak, air is moving at high velocity through a small gap. According to technical documentation from the Audio Engineering Society (AES), even a leak the size of a pinhole can measurably shift the tuning frequency of a ported box or ruin the Q-factor of a sealed one. The paper test isn’t just a “hack”—it’s a visual confirmation of fluid dynamics in action. If that paper moves, you have a problem.
Why You Shouldn’t Just Start Slapping Caulk Everywhere
My biggest mistake early on was the “shotgun approach.” I figured if there was a leak, I’d just smear silicone over every internal joint. Big mistake. I ended up with a sticky mess, and I still hadn’t fixed the actual problem, which turned out to be a rattling speaker grill masking the sound of the air escape. You need to be surgical. You need to know exactly where the pressure is failing so you can apply the right fix, whether that’s tightening a loose terminal or using a tiny bit of wood glue. Have you ever spent hours chasing a “buzz” or a “hiss” only to find out it was something as simple as a loose screw? Let me know in the comments if you’ve been down that rabbit hole before. Before we get our hands dirty, you need to understand that this test works best with a specific type of audio signal—and no, your favorite bass-heavy track isn’t actually the best choice. [IMAGE_PLACEHOLDER]
Ditch the Music and Grab a Sine Wave
To find an air leak, you need a constant, steady pressure, not the frantic jumping of a drum kit. When you play a standard song, the woofer moves too sporadically to create a consistent stream of air through a small hole. Instead, you need a sine wave generator—there are dozens of free apps for this. Set your tone to somewhere between 30Hz and 50Hz. This frequency is low enough to move the woofer like a heavy piston without creating so much audible noise that you can’t hear the ‘hiss’ of the escaping air. I remember testing a vintage set of floorstanders once; I played my favorite rock track and heard nothing wrong, but the moment I hit them with a 40Hz sine wave, I heard a whistling sound that was loud enough to be heard in the next room. It sounded like a tiny jet engine was living inside my cabinet.
Drape the Tissue for Maximum Visuals
Grab a single ply of toilet paper or a very thin strip of a grocery store receipt. The goal is to create a ‘flag’ that responds to even the slightest breath of wind. Turn your amplifier up until the woofer is visibly moving—usually about a quarter-inch of ‘throw’ is plenty. Hold the paper about a half-inch away from every seam, screw hole, and terminal plate. If that paper flutters or gets sucked toward the box, you’ve found a leak. If you have to remove the back of a sealed speaker cabinet safely to inspect the internal bracing, do so carefully, as an internal leak can be just as damaging as an external one. 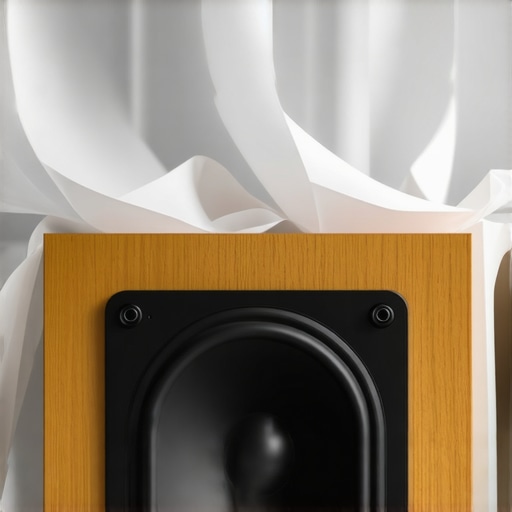
Where to Point the Paper for the Best Results
Don’t just wave the paper around randomly. You need to be methodical. Start with the ‘soft’ parts. Check the perimeter where the woofer meets the wooden baffle. If the gasket has dried out over time, air will push right past the frame. If you notice the paper jumping near the edge of the cone, you may need to fix a small rip in a speaker surround with glue before the problem gets worse. Next, move to the terminal cup on the back. This is the most common failure point. Manufacturers often use cheap foam gaskets that compress and fail after a few years. While you’re back there checking for air, it’s the perfect opportunity to clean green oxidization off your copper speaker terminals to ensure your signal is as clean as your cabinet is tight.
Common Culprits That Steal Your Low End
Think of your speaker cabinet like a high-pressure tire. A tiny pinhole doesn’t just let out a little air; it compromises the entire structural integrity of the ‘air spring’ inside. Much like how car door vibration is ruining your mid-bass performance by letting energy escape into the metal panels, a leaking home speaker box wastes the energy your amplifier is working hard to provide. If you’ve already tried to fix a buzzing sound in your portable speaker at high volumes, you know that mechanical noise can ruin the listening experience. In a larger cabinet, that ‘buzz’ is often just air vibrating against a loose screw or a poorly fitted terminal. Once you’ve identified these spots with your paper strip, you’ll know exactly where to apply your wood glue or new gaskets.Now that we’ve plugged the physical holes in your cabinet with the paper test, let’s talk about the ‘electrical’ leaks—specifically, the power specs that lead most DIYers astray. Everyone says you need more watts for more bass, but in my experience, the number on the box is almost always a marketing fairy tale. I’ve seen vintage 30-watt amplifiers absolutely embarrass modern 200-watt receivers when it comes to low-end grip. The reason? Most people focus on peak power rather than how an amp handles the demanding impedance swings of a woofer. If you want to understand why your gear isn’t hitting hard, you need to know the difference between peak and rms power explained simply before you spend another dime on upgrades.
Stop Obsessing Over the Wattage Number
The industry has a bad habit of inflating numbers. You’ll see a soundbar or a cheap receiver claiming ‘1000 Watts of Room-Shaking Power,’ yet it weighs less than a toaster. In reality, that number is likely a peak measurement taken for a millisecond before the power supply collapses. Professional studies by experts like Dr. Floyd Toole have shown that loudspeaker sensitivity and room gain play a much larger role in perceived volume than raw wattage does. When you’re chasing that tight, punchy low end, you aren’t looking for ‘loud’; you’re looking for control. This is why why your bookshelf speakers need more power than the spec sheet suggests—not for volume, but for the ‘headroom’ required to move that heavy woofer cone without distorting. 
How Much Headroom Do You Actually Need?
A sophisticated listener doesn’t ask ‘how loud can it go?’ but rather ‘how cleanly can it handle a sudden bass transient?’ Think of headroom like the engine in a car; you don’t drive at 120mph all the time, but you want the power available when you need to pass someone. If your amp is constantly struggling at its limit, you lose the ‘snap’ of the kick drum. You can learn how to tell if your amplifier has enough headroom for your speakers by listening for compression during loud passages. If the soundstage seems to shrink when the bass kicks in, your power supply is gasping for air.
The Extension Cord Trap You Must Avoid
Here is the ‘oops’ factor that ruins many high-end systems: the power delivery from the wall. I’ve seen people spend $2,000 on a power amp and then plug it into a flimsy $5 orange extension cord they found in the garage. This creates a massive bottleneck. High-current amplifiers need to pull quick bursts of energy from your home’s wiring. A thin cord adds resistance, dropping the voltage right when the amp needs it most. This is exactly why you should avoid using an extension cord for your power amp if you want to keep your dynamics intact. While we’re talking about power, don’t get distracted by shiny marketing; for instance, many people wonder is gold plated hardware really worth the extra cash, but a solid copper connection to a dedicated wall outlet will do far more for your bass than a gold-plated plug on a weak circuit. Have you ever fallen into the trap of buying gear based on a big wattage sticker only to find it sounded ‘thin’? Let me know in the comments below.Once you’ve sorted out the power bottlenecks and sealed those cabinet leaks, the real work begins: keeping it that way. I’ve seen $5,000 systems sound like garbage because the owner let the environment rot the hardware. One tool I never travel without is a can of DeoxIT D5. It’s not just a cleaner; it’s a chemical restorer. If you see that dull, crusty layer on your wires, you need to clean green oxidization off your copper speaker terminals immediately. A single micro-ohm of resistance at the connector can kill the damping factor of your amp, turning that tight bass we worked for back into mud. Technical documentation from the Audio Engineering Society (AES Paper 1709) highlights that contact resistance isn’t just about volume loss—it actually introduces non-linear distortion that can be measured in the signal path.
Use DeoxIT Instead of Sandpaper
I used to think I could just scrape off corrosion with a bit of sandpaper, but that just creates microscopic grooves that invite more air and moisture in. Use a dedicated contact cleaner and a lint-free swab. This is especially true for portable gear. If your music sounds scratchy, you should clean dust out of your headphone jack without damaging pins before assuming the internal DAC is failing. While you’re at it, check the physical integrity of your drivers. If you live in a humid climate, you’ll eventually need to know how to clean sticky speaker surrounds without damaging the rubber, as that tackiness is often the first sign of chemical breakdown. 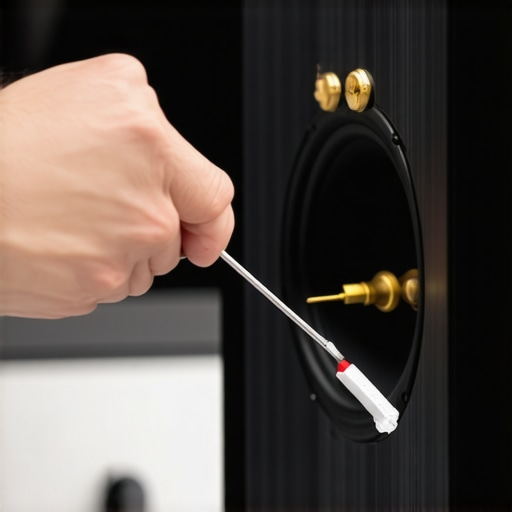
How can I maintain my audio setup over the long haul?
Maintenance is about being proactive rather than reactive. Every six months, I do a ‘tightness check’ where I re-torque the mounting screws on my woofers. Wood expands and contracts with the seasons, and those screws will vibrate loose over time. If you notice a tiny gap forming, you might need to fix a small rip in a speaker surround with glue before it unzips into a full-blown tear. For headphone users, sweat is the enemy. It seeps into the foam and dissolves the faux-leather. Learning why your headphone pads are flaking and how to prevent it can save you $50 a year in replacement parts alone. Looking forward, I predict we are going to see a shift toward ‘smart’ amplifiers that can run diagnostic sweeps every time they power up, alerting you to impedance shifts before you ever hear a crackle. For now, we have to rely on our ears and a few simple tools. If you’re using high-end cans on a budget, look for the $50 amp that drives high-impedance cans without a struggle to keep your gear from being under-driven and stressed. My advanced tip for today: go grab a 9V battery and perform a quick ‘pop test’ on your speakers. If the cone moves inward instead of outward, your polarity is swapped somewhere, and you’re missing out on half your bass impact.
What I Learned After Chasing Ghost Hisses for a Decade
The biggest takeaway from my years behind the soldering iron is that high-end audio isn’t about how much you spend; it’s about how well you maintain the physical environment. A cabinet that isn’t perfectly airtight will always sound thin, no matter how expensive the crossover components are. If you notice the rubber aging on your drivers, knowing how to fix a small rip in a speaker surround with glue is a lifesaver that prevents a tiny hole from becoming a total replacement. I also stopped obsessing over the shiny stuff—you should really ask yourself is gold plated hardware really worth the extra cash before you let a salesperson talk you into cables that cost more than your speakers. True performance comes from tight seals and clean paths, not expensive plating.
Gear That Actually Earns a Spot on My Workbench
I don’t believe in buying every gadget on the market, but three things are non-negotiable for my speaker cabinet work. First, a dedicated sine wave generator app for finding those mechanical vibrations. Second, always keep a 9V battery handy because checking your speaker polarity is the fastest way to diagnose a ‘hollow’ sound stage without tearing the box apart. Finally, if you are working with headphones alongside your home speakers, I highly recommend checking out the $50 amp that drives high-impedance cans without a struggle. It is a rare example of a budget tool that actually outperforms its price tag when you need raw power delivery.
[IMAGE_PLACEHOLDER]
Trust Your Ears Over the Marketing Labels
At the end of the day, your audio journey should be about the music, not the technical specs on the back of the box. There is a specific trick to making vintage speakers sound modern again, and it usually involves the simple maintenance we’ve discussed today rather than a total rebuild. Once you seal those leaks and ensure your power is consistent, your gear will finally be able to breathe—literally. Don’t be afraid to poke around your cabinets with a piece of paper or a battery; those simple physical tests are often more revealing than a thousand-dollar measurement mic. Have you ever discovered a tiny air leak or a loose screw that was completely ruining your bass performance? Let me know in the comments below.