
There I was, sitting in a quiet coffee shop, finally ready to disappear into a new album. I plugged my favorite cans into my phone, but instead of the warm, rich bass I expected, I got a thin, scratchy ghost of a sound. I panicked. I thought my cable had finally given up the ghost or, worse, that I had a blown driver. I spent ten minutes twisting the wire and blowing into the port like an old Nintendo cartridge, convinced the internal copper had snapped. It wasn’t until I got home and looked under a bright desk lamp that I saw it: a tiny, compressed wall of denim lint and cat hair packed into the very bottom of the jack. In my desperation, I grabbed the nearest sharp object—a metal safety pin. I started digging. Scratch. Scrape. I felt a sickening, metallic resistance. That was the moment I almost turned my three-hundred-dollar device into a paperweight. I was lucky I didn’t snap a contact pin, but you shouldn’t have to rely on luck. Today, I’m going to show you how to evict that pocket gunk without a trip to the repair shop.
Your Pocket is a Death Trap for Audio Jacks
It is a slow, frustrating creep. One day your music sounds perfect, the next you’re noticing why your headphones sound slightly different in each ear, and by the end of the week, you are holding the cable at a precarious 45-degree angle just to hear the vocals. We have all been there. We blame the manufacturer, we blame the cable, and we blame ‘planned obsolescence.’ However, more often than not, the culprit is simply the fuzzy remains of your favorite sweater. Just as you might focus on cleaning your ear tips for better noise isolation, keeping the jack clear is essential maintenance for anyone who values high-fidelity sound. When debris builds up, it prevents the plug from seating fully, which ruins the electrical connection and leaves you wondering why your expensive headphones sound thin or distorted. Have you ever looked into your port with a flashlight and been genuinely horrified by what was staring back at you? Drop a comment below if you have ever tried to ‘fix’ a connection issue with a toothpick in a moment of madness!
Can I actually ruin my phone by being too thorough?
This is the big fear, and honestly, it is a valid one. I made a massive mistake early on by using a damp Q-tip, thinking I was being extra ‘clean.’ Instead, I introduced moisture into a sensitive electrical housing and watched in horror as my screen flickered for five minutes. Beyond moisture, the real danger is the physical contact pins. These tiny gold-plated springs are designed to exert just enough pressure to maintain a signal, but they are incredibly easy to bend or snap if you go charging in with a metal tool. According to a technical repair guide from iFixit, using compressed air can actually be counterproductive; if you aren’t careful, the high pressure can jam debris deeper into the corners of the housing or even damage the delicate internal diaphragm of nearby microphones. To do this right, we need to use a gentle, ‘grab-and-pull’ method rather than a ‘push-and-scrape’ approach. Let’s get into the toolkit you actually need to get this done safely.
Gather Your Non-Conductive Toolkit
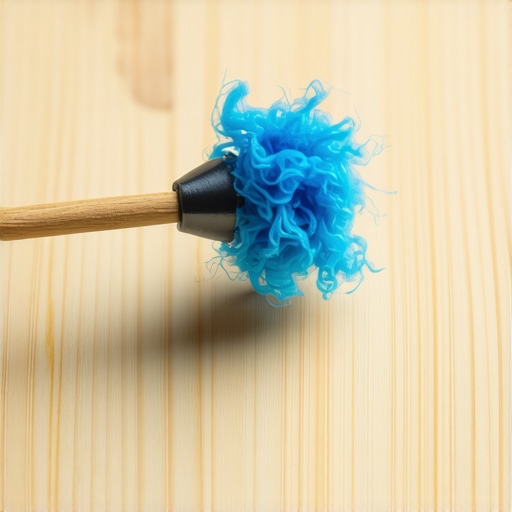
Before you even touch your device, you need to set aside the metal objects. I once tried to use a bent staple on an old iPod Video, thinking I was being surgical. I felt a tiny spark, heard a pop in my ears, and the device instantly rebooted. I had shorted the internal pins. To avoid my mistake, your primary tool should be a wooden or plastic toothpick. These are soft enough to give way before they damage the internal gold contacts. You will also need a bright flashlight—your phone’s flash usually isn’t enough because you need to see past the tool while you are working. If the debris is particularly stubborn, a tiny strip of clear adhesive tape wrapped around the end of the toothpick with the sticky side out can act as a lint magnet.
Master the Scoop and Pull Method
The goal is to avoid pushing. If you jam a tool straight down, you are just compacting the lint into a solid puck at the bottom. Instead, slide your toothpick along the side wall of the jack until you reach the very back. Once you feel the ‘cushion’ of the debris, gently hook the tip and pull it upward against the wall. It’s exactly like cleaning under your fingernails. I remember doing this on a friend’s phone that they thought was broken; after three ‘scoops,’ a piece of denim lint the size of a pea fell out, and the audio instantly regained its clarity. If you’ve been wondering why your expensive headphones sound thin, a physical barrier like this is often the culprit rather than the phone’s internal DAC.
Use the Tacky Tape Trick for Fine Particles
Sometimes the lint is too fine for a toothpick to grab. This is where the tape comes in. Take a small piece of scotch tape and wrap it tightly around the tip of your toothpick so that the sticky side faces out. Carefully insert it into the jack and gently press it against the bottom and sides. Don’t wiggle it aggressively; just ‘dab’ the area. You will be surprised at the microscopic dust and skin cells that come out. This level of detail is just as important as knowing the best way to store your iems to prevent driver damage. A clean connection is the first step in the signal chain, and even a tiny layer of oxidation or dust can degrade the experience.
Why Metal Tools are a Disaster Waiting to Happen
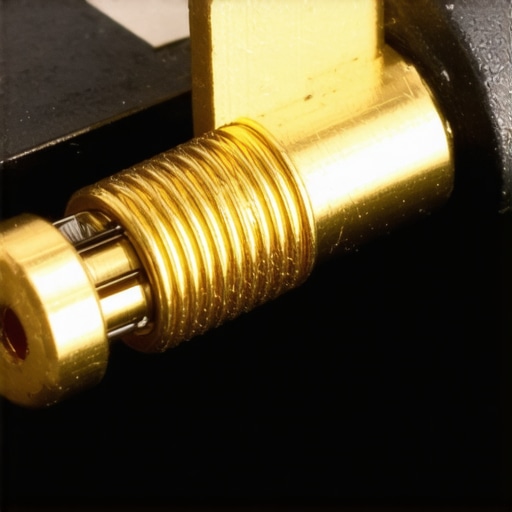
It is tempting to use a needle, but the internal architecture of a 3.5mm jack is incredibly fragile. Inside, there are several spring-loaded metal leaves. These leaves are designed to snap into the grooves of your headphone plug. If you bend one of these outward with a metal needle, the jack will never ‘grip’ the plug again, leading to a loose connection that cuts out whenever you move. This is a far more expensive fix than a simple cleaning. Some people argue about gold-plated audio connectors and their benefits, but no amount of premium plating will save you if the physical spring tension in the jack is destroyed by a safety pin.
How to Handle Chemical Cleaning Safely
If you have removed the lint but the sound still crackles, you might have oxidation on the contacts. This is common if you live in a humid environment or use your phone while working out. Take a toothpick, wrap a tiny, single layer of cotton from a Q-tip around the end, and dampen it with 99% isopropyl alcohol. It must be damp, not dripping. Spin it inside the jack gently. This dissolves the oils and grime that cause static, much like how you would fix the crackling noise when you turn your amp volume on a vintage receiver. Always let the port dry for at least ten minutes before plugging anything back in.
Even when you think the port is spotless, there is a hidden layer of nuance that most casual listeners ignore. We are often told that gold-plated connections are the holy grail of audio, but let’s be real: is gold-plated hardware really worth the extra cash? In most mobile devices, that gold plating is only a few microns thick. If you have been over-cleaning your port with abrasive tools, you might have actually stripped the conductive layer away. My contrarian take? A slightly dirty copper contact is often more conductive than a ‘polished’ jack that’s had its plating ruined. Most people obsess over the debris they can see, but they ignore the microscopic pitting caused by repeated insertions. Have you ever fallen into this trap of over-cleaning? Let me know in the comments.
Why does a perfectly clean jack still crackle?
If you have scooped the lint and wiped the oxidation but the audio still cuts out, the problem is likely mechanical fatigue rather than hygiene. Inside the jack, there are tiny spring-loaded copper ‘leaves’ that pinch the plug to complete the circuit. Over time, these lose their tension and ‘memory.’ According to technical research by connectivity manufacturers like Amphenol, the ‘insertion force’ of a standard 3.5mm jack can drop by as much as 30% after just a few thousand cycles. This is why you might feel your plug is ‘loose’ even if there is no dirt inside. Before you assume the hardware is dead, make sure you know how to tell if your headphones have a blown driver or if the cable itself is failing, as these symptoms often mimic a bad port.
Beware of the Contact Cleaner Trap
Here is the ‘oops’ factor that kills more devices than lint ever will: using the wrong chemicals. I have seen people spray standard WD-40 or heavy-duty electronics cleaner directly into their smartphone port. This is a nightmare. These sprays often contain lubricants that stay wet and act as a magnet for every piece of pocket fluff you encounter over the next week. Furthermore, certain aggressive solvents can melt the plastic housing of the internal jack, permanently fusing the contacts. If you are dealing with a desktop setup, you might fix the crackling noise when you turn your amp volume with a specialized deoxidizer, but for a phone, stick to 99% isopropyl alcohol on a precise, near-dry applicator. If you don’t, you’ll end up with a sticky, muffled mess that is worse than where you started. Many users also overlook the fact that why your headphone cable is always tangled can lead to lateral pressure, which physically bends those internal leaves outward, creating a gap that no amount of cleaning can bridge.
Once the initial shock of finding a lint-mountain in your phone wears off, the real work begins: prevention. I have found that the best two-dollar investment I ever made was a pack of silicone anti-dust plugs. They might look like a tiny gimmick, but they create a physical seal that stops denim fibers from ever entering the port. It is also important to realize that port health is tied to how you handle your gear. For instance, understanding why your headphone cable is always tangled is actually a maintenance step; the more you fight a messy cable, the more lateral pressure you put on the internal jack pins, eventually loosening the connection.
How can I keep my audio ports pristine for years?
The secret is a combination of the right environment and routine inspections. I keep my high-end portable DACs and headphones in dedicated hard cases when they aren’t in use. This isn’t just about the jack; it is also the best way to store your iems to prevent driver damage from moisture and impact. Every six months, I perform a ‘dry sweep’ using an interdental brush—those tiny brushes meant for braces. They are perfectly sized to catch dust without applying enough pressure to bend the gold-plated leaves inside the jack. According to technical white papers from Caig Laboratories, atmospheric contaminants like sulfur and ozone are constantly attacking your metal contacts, creating a microscopic layer of non-conductive sulfide. This is the same chemical culprit that requires you to fix the crackling noise when you turn your amp volume on vintage receivers. For modern devices, a tiny dab of a specialized contact enhancer like DeoxIT Gold on a wooden toothpick once a year can keep your signal path incredibly clean. 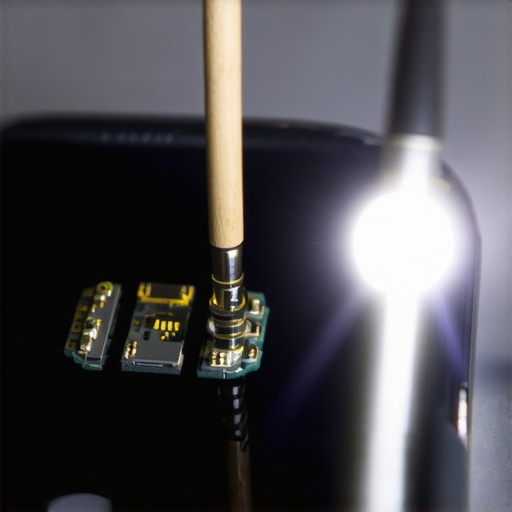 Looking ahead, I suspect we are nearing the total extinction of the analog jack in favor of more robust, sealed USB-C connections. However, these newer ports are not immune to trouble. In fact, learning how to fix the loose charging port on your bluetooth speaker is becoming a more frequent necessity than cleaning a 3.5mm jack. We are moving toward a future where ports are either entirely inductive or heavily reinforced, but until your gear is 100% wireless, you are the guardian of that physical connection. I challenge you to grab a flashlight right now and look deep into your device’s port. If you see even a hint of grey fuzz, perform one gentle ‘scoop’ with a wooden toothpick today and feel the immediate difference in how your plug seats.
The Brutal Lessons I Learned from My Port Repair Fails
After years of tinkering with audio gear, I’ve realized that the biggest threat to your sound quality isn’t just the dirt; it’s often your own impatience. One thing I learned the hard way is to ask: is gold-plated hardware really worth the extra cash if you’re just going to scratch it off with a safety pin? I also discovered that half the time I thought my port was dying, it was actually just cable strain. If you aren’t careful, you might spend hours cleaning a port when the real issue is that why your headphone cable is always tangled has caused an internal break in the wire. Lastly, don’t confuse a dirty port with actual hardware failure. Sometimes, people clean until they’re blue in the face, not realizing how to tell if your headphones have a blown driver is the real knowledge they need to diagnose the ‘thin’ sound they’re hearing.
Everything You Need in Your Maintenance Bag
You don’t need a professional laboratory to keep your gear in top shape, but you do need specialized tools. My ‘go-to’ kit is remarkably cheap but effective. First, grab a pack of interdental brushes; they are far safer than toothpicks for deep cleaning because they trap fibers in their bristles. Second, I always keep a small bottle of 99% isopropyl alcohol nearby for when I need to how to clean green oxidization off your copper speaker terminals or phone ports. Third, if you use a portable setup, invest in a hard shell case—it’s the best way to store your iems to prevent driver damage and keeps pocket lint out in the first place. Finally, a high-powered LED penlight is non-negotiable for seeing what you’re actually doing inside that tiny dark hole.
#IMAGE_PLACEHOLDER_E#
Protect Your Connection to the Music
At the end of the day, a 3.5mm jack is a simple piece of mechanical engineering that asks for very little but gives a lot in return. In a world where we are constantly upgrading to the latest tech, taking five minutes to perform routine maintenance to clean a headphone jack is an act of defiance against disposable culture. Whether you are trying to how to fix the loose charging port on your bluetooth speaker or just getting a clearer signal from your phone, that extra effort pays off in every note you hear. Don’t wait for the sound to cut out completely before you act. Have you ever pulled out a piece of lint that was so big you couldn’t believe your headphones were even working? Let me know in the comments below!