
I was sitting in my favorite worn-out leather chair, ready to melt into a high-res master of Pink Floyd, when it happened. David Gilmour’s guitar solo started, but it felt… off. The left side was crisp, but the right side felt like it was playing from behind a heavy curtain. I shook my head, thinking maybe I was just tired. I even swapped the headphones around—left cup on right ear—and the problem followed the hardware. It is a maddening sensation that makes you question your sanity and your bank account. If you have ever felt like your favorite pair of cans is gaslighting you, you aren’t alone. Today, we are going to stop the guesswork and get your stereo image centered exactly where it belongs.
The Day I Thought My Left Ear Was Retiring Early
I will be honest: my first instinct was to panic. I have spent years building a collection of home audio gear, and the thought of a blown driver in my flagship set was enough to make my stomach drop. I actually went out and bought a new DAC, convinced the channel balance on my old unit had drifted. It was a $400 mistake. It turns out, the fix was much simpler, and I felt like a total amateur when I realized it. We often jump to the most expensive conclusion first, but usually, the culprit is much more mundane. Whether you are dealing with one headphone side being louder than the other due to a software glitch or a physical blockage, there is always a logical path to the solution.
Is it possible my gear is actually broken?
This is the fear that keeps audiophiles up at night. You start wondering if you have finally pushed your equipment too far. While it is rare for modern electronics to just fade in one channel, it is not impossible. Before you start mourning, you need to learn how to tell if your headphones have a blown driver versus just a dirty connection. Most of the time, it is not the internal wiring but something external. For instance, have you checked your ear pads lately? It sounds ridiculous, but uneven wear can completely shift the acoustic seal. I have seen cases where simply learning how to replace the foam pads restored the balance instantly because the old ones had compressed differently on each side. According to the World Health Organization, asymmetrical hearing issues can also be physiological, as over 1 billion young adults are at risk of hearing loss from loud environments, so it is always worth checking your own onboard microphones too.
Check the Fit Before You Check the Warranty
Sometimes the issue is literally how the gear sits on your head. I once spent an hour troubleshooting a quiet right ear only to realize my glasses were breaking the seal on just one side. If the clamp force is uneven, the bass response will drop off on the side with the leak. If your set feels wonky, you might need to stretch those tight headphones to ensure an even seal across both ears. Have you ever found yourself obsessively clicking the Mono toggle on your phone just to prove your ears are not broken? Tell me I am not the only one who does this!
Stop Chasing Ghosts and Check Your Software First
Before you start tearing apart cables, you have to look at the digital brain of your system. I once spent three frustrated hours trying to ‘repair’ a pair of high-end Sennheisers, only to realize my Windows balance slider had mysteriously shifted to 40/60. It happened right after a video call where the software tried to ‘optimize’ my audio. If you are using a computer, deep-dive into your sound control panel. Sometimes, the issue isn’t even the hardware; it is the way the OS handles the stream. If you find your audio stuttering along with the balance shift, you might actually be looking for the 5-minute fix for crackling bluetooth signals on your laptop rather than a physical repair.
The Dirty Secret Behind Scratchy Volume Controls
If the imbalance happens specifically when you turn the volume up or down, the culprit is almost certainly oxidation. Inside your amp or your headphone’s inline remote, there is a small component called a potentiometer. Think of it like a circular track that a metal wiper moves across. Over time, dust and ‘gunk’ build up on that track. I remember an old integrated amp I found at a yard sale that sounded like it was filled with gravel every time I touched the dial. Fixing it was incredibly satisfying. You can often use the same logic as the easy way to fix a scratchy volume slider on your radio to clean those contacts. A quick blast of electronic contact cleaner and about fifty rapid turns of the knob usually clears the debris and brings the dead channel back to life. If you are hearing static through a desk setup, you should also learn how to fix the crackling noise when you turn your amp volume before you assume the speakers are blown.
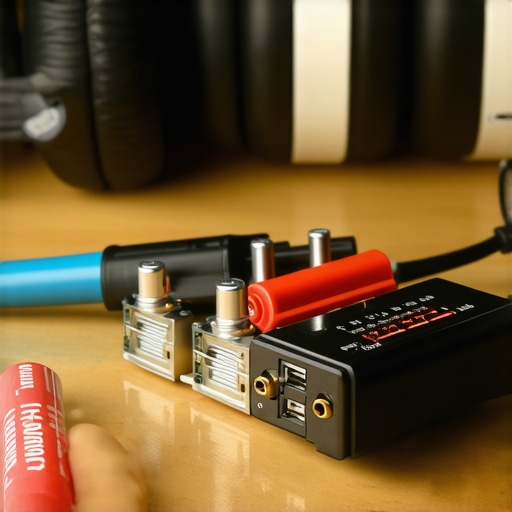
How I Used a 9V Battery to Save a Speaker
When you are dealing with passive speakers or even some DIY headphone projects, you might run into an issue where the sound feels ‘hollow’ rather than just quiet on one side. This is often a polarity issue—one speaker is pushing while the other is pulling, effectively canceling out the bass. I once rewired an entire home theater system only to realize I had one wire flipped. A pro trick to see if a driver is even alive is to learn how to use a 9v battery to check your speaker polarity. By briefly touching the terminals to the battery, you can see if the cone moves forward or backward. It is a quick, dirty, and effective way to ensure your hardware is physically capable of moving air. This is much safer than pushing your gear until your amplifier gets hot enough to burn your hand while trying to force a signal through a dead connection.
Inspect the Jack for Hidden Obstructions
We carry our gear in pockets and bags, which are basically lint factories. A tiny piece of denim fluff stuck in the bottom of a 3.5mm jack can prevent the plug from seating fully. This usually kills the ‘ring’ or ‘sleeve’ connection, leading to a dropped channel or that weird ‘underwater’ vocal sound. I use a wooden toothpick—never metal—to gently fish around in the port. You would be shocked at the amount of compacted lint that can hide in there. It is the audio equivalent of a clogged pipe; if the ‘water’ can’t flow through the connection, the performance will always be lopsided.
You might think that once the lint is gone and the balance slider is centered, you are in the clear. But here is the hard truth: many audiophiles fall into the trap of ‘upgrading’ their way out of a problem that doesn’t actually exist in the hardware. I see it every day in forums where people swear that a five-hundred-dollar silver-plated cable fixed their channel imbalance. Let me be the bearer of bad news: why expensive speaker cables are mostly a marketing trick is a lesson we all learn eventually. Unless your original cable was literally frayed to a single copper strand, a new wire isn’t going to fix a volume shift. It is a placebo that costs as much as a new pair of headphones.
Can a simple firmware update really fix a hardware-sounding buzz?
In the age of smart audio, the answer is a resounding yes. I once spent a weekend trying to ground an ‘analog’ hum in a soundbar, only to find out the manufacturer had released a patch for the digital signal processor. If you are using modern kit, understanding why your soundbar needs a firmware update to fix audio drops or channel imbalance is often more relevant than the physical wiring. A study by the Audio Engineering Society (AES) has highlighted that as signal processing becomes more complex, software-level gain staging errors are increasingly mistaken for physical component failure. If your gear has a USB port or a Wi-Fi connection, check for an update before you reach for the screwdriver.
There is also the ‘Gold Standard’ myth to contend with. We have been conditioned to believe that gold-plated everything equals better sound. While gold is excellent for preventing corrosion, it isn’t actually the best conductor—silver and copper beat it out in raw conductivity. In many cases, why gold-plated connectors aren’t always better comes down to the fact that unless the mating surfaces are also gold, you can actually create a galvanic reaction that leads to more noise over time. It is a classic case of marketing overriding metallurgy.
One of the most common ‘oops’ moments I see involves people trying to drive massive, high-impedance headphones directly from a mobile device. You might get sound, but it will be thin, lopsided, and lacking any dynamic range because the internal amp is clipping. If you are struggling with poor performance, the truth about using your phone to power high-end headphones is that you are likely starving the drivers of the voltage they need to function properly. Have you ever fallen into this trap of buying a ‘fix’ that did absolutely nothing? Let me know in the comments!
The Long Game of Audio Preservation
Once you have solved the mystery of the disappearing right channel, you have to talk about longevity. I used to be the guy who just threw his gear into a drawer and expected it to work forever. Then I pulled out a pair of vintage Grados and the foam disintegrated into black dust the moment I touched them. It was a wake-up call. If you are starting to see black flakes on your ears, it is time to look into why your headphone pads are peeling and how to replace them before the degradation reaches the driver housing. Skin oils are acidic, and over time, they eat through synthetic protein leather like a slow-motion fire. I now wipe down my gear after every long session with a damp microfiber cloth to neutralize those oils before they set.
How do I maintain my home audio gear over time?
Maintenance is not just about cleaning; it is about environment. I keep a bottle of DeoxIT D5 and a specialized stylus brush on my desk at all times. If you are a vinyl enthusiast, you absolutely must master the best way to clean a turntable stylus without breaking it. A microscopic piece of debris on that diamond tip acts like a sandpaper lathe on your precious records. For digital gear, the threats are more internal. Heat is the number one killer of electronics. If you find why your surround sound receiver keeps clicking into protect mode, it is often a cry for help regarding ventilation or a stray wire strand. According to technical documentation from companies like McIntosh, maintaining a 2-inch clearance on all sides of an amplifier is not a suggestion; it is a thermal necessity for capacitor health. Every year, I do a ‘deep clean’ where I unplug everything and use the best way to clean your ear tips for better noise isolation, ensuring that wax buildup hasn’t compromised the acoustic mesh.
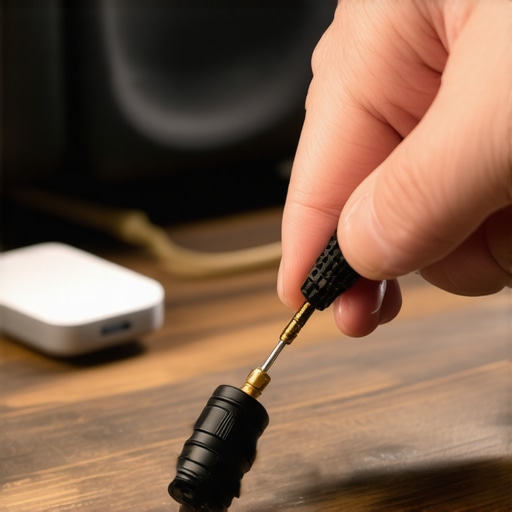
Tools That Have Saved Me Thousands
I have a ‘Go-Bag’ for my audio gear that stays in my studio. It contains a wooden toothpick, a can of compressed air, and a small digital multimeter. You do not need to be an electrical engineer, but knowing how to check for a short can save you from frying a new amp. If you use portable gear, you should prioritize the best way to store your iems to prevent driver damage. Throwing them loose in a pocket leads to ‘cable memory’ and eventual internal fractures. I also recommend a set of precision screwdrivers. Being able to tighten a chassis screw or knowing how to fix the loose charging port on your bluetooth speaker yourself is incredibly empowering. Why pay a repair shop $80 for a five-minute soldering job? I also keep a few silica gel packets in my headphone cases to manage humidity, which is the silent killer of planar magnetic drivers.
Where This is All Heading
I predict that in the next few years, ‘self-healing’ audio will become the industry standard. We are already seeing Advanced Digital Signal Processing (DSP) that can detect a failing driver or an impedance shift and adjust the crossover in real-time to prevent further damage. Until that tech becomes affordable, we are the first line of defense for our equipment. If you want to level up your setup right now, go grab a can of electronic contact cleaner and hit every input on your amp. It is the single most effective maintenance tip I have ever used. Try it this weekend and see if that ‘imaginary’ channel imbalance finally disappears for good.
The Hard Truth About My Audiophile Mistakes
Looking back at decades of tinkering, I realized that my biggest errors weren’t caused by a lack of money, but by a lack of patience. I once spent a small fortune on a balanced XLR cable only to find out that physical earwax was the primary reason for my lopsided soundstage. It sounds gross, but it is the reality of the hobby. I also learned that 3 budget upgrades that make cheap speakers sound expensive are often more effective than chasing high-end marketing gimmicks. Sometimes, the best “upgrade” is just a thorough cleaning of your existing connections. I have also learned to trust my ears over my eyes; just because a unit looks pristine doesn’t mean the internal capacitors haven’t aged. If you are hunting for vintage gold, knowing how to test a used receiver before you buy it is the most valuable skill you can develop to avoid lopsided performance.
My Secret Toolkit for Sonic Perfection
You do not need a professional lab to keep your gear in top shape. Here is what I keep in my dedicated audio drawer: first, a high-quality electronic contact cleaner like DeoxIT D5. It is the only thing that actually cures the “crackles” permanently. Second, a simple digital multimeter—it is essential for figuring out how to repair a loose speaker terminal in under five minutes without guessing. Third, I highly recommend picking up a copy of Floyd Toole’s Sound Reproduction. It changed how I view room acoustics and speaker placement entirely. Finally, do not underestimate the power of a simple rug. Using the simple rug trick that instantly improves your room acoustics can do more for your stereo image than a new pair of headphones ever could.
Reclaim Your Listening Experience
At the end of the day, audio gear is a bridge between you and the artist. When that bridge is lopsided, the emotional connection breaks. Do not let a minor technical glitch like how to fix one headphone side being louder than the other keep you from the music you love. With a little bit of maintenance and the right diagnostic steps, you can bring your system back to its former glory. Whether you are working with a high-end stack or learning how to add an optical input to your old home stereo, the satisfaction of a DIY fix is half the fun. Go ahead, plug everything back in, and hit play. Have you ever spent hours troubleshooting only to find a loose plug or a simple software slider was the culprit? Tell me your most embarrassing audio “fix” in the comments below!