
Have you ever noticed that your favorite bookshelf speakers seem to come alive—more vibrant, more detailed—when you place them just a little off the traditional shelf? I used to think it was my imagination or maybe my ears playing tricks on me. But then I had a real lightbulb moment during a weekend tinkering session in my listening room. I realized that positioning these speakers differently made a world of difference in sound quality. It wasn’t about upgrading hardware or tweaking settings; it was about understanding the physics of sound and how placement impacts performance.
The Missing Link in Speaker Placement
Early in my audio journey, I made a critical mistake—lumping all speakers into the “place on the shelf” category without considering how their environment affects their sound. It sounds simple, right? But it’s surprisingly common. That shelf, often made of MDF or wood, can resonate and muddle the clarity of sound. Plus, the proximity to walls or surfaces can drastically change the tonal balance. I found that by slightly elevating or angling my speakers away from the bookshelf, I gained a clearer, more natural soundstage—almost as if my music had more room to breathe. If you’re frustrated with thin or muffled audio, I highly recommend reading about how speaker placement impacts sound. For deeper insights, check out this article on how room acoustics influence your stereo quality.
Start with Your Listening Environment
Before positioning your speakers, assess your room. Clear clutter, reduce reflective surfaces, and identify open areas where sound can breathe. Think of your room as an acoustic landscape—adjust it to favor clarity. For example, I once moved a rug into my listening space and noticed an immediate reduction in echo, making the music much clearer.
Choose the Right Speaker Height and Angle
Elevate your speakers so tweeters are roughly at ear level when seated. Use sturdy stands or stacking books if necessary. Tilt speakers slightly forward—about 15 degrees—to aim the sound directly at your listening position. This small tweak can eliminate muddiness, similar to how a photographer adjusts the lens to focus sharply. Reviving old rubber surrounds can also help if your speakers are damaged or aged.
Optimize Distance from Walls and Corners
Keep your speakers at least 1-2 feet away from walls to prevent bass boomy-ness and muddiness. Use a simple tape measure or a ruler to set consistent distances from side walls and the front. I once placed a subwoofer too close to the wall, causing rattling and distortion—moving it out a bit cleaned up the bass significantly. Open-back headphones near walls suffer similarly; space matters across the board.
Experiment with Toe-In angles
Angle each speaker inward towards your listening seat—about 10-15 degrees. This ‘toe-in’ improves stereo imaging and creates a more cohesive soundstage. It’s like pointing a flashlight directly at a specific spot; sound converges precisely where you want it. Micro-adjust and listen for improvements in sound clarity and stereo width. For a more detailed method, explore how to measure your room for ideal sound here.
Fine-Tune via Listening Tests
Use well-recorded music tracks with wide ambiance—jazz, classical, or live recordings—to evaluate changes. Play that track, then tweak speaker positions slightly and listen attentively. Note auditory cues: clarity of vocals, warmth of bass, width of the soundstage. This hands-on approach beats relying on measurements alone, as your ears are the ultimate judges. Remember, too much movement can be counterproductive—small adjustments yield the best results.
Address Speaker Isolation
Reduce vibrations transferring into furniture or shelves byadding isolation pads or rubber feet. This prevents resonance that can color the sound. For instance, I placed my speakers on isolation pads and immediately heard cleaner bass and clearer midrange. Such improvements are subtle but noticeable—a good reminder that every piece of the puzzle contributes to overall sound quality. When dealing with subwoofers or heavy speakers, ensure they are securely positioned and stable, especially on hard flooring.
Optimize for Your Unique Setup
Every room is different. Play around with placement, angles, and distances, and record your settings. Use test tones or simple pink noise to evaluate frequency response. If you’re dealing with uneven bass—like a boomy spot in your room—consider adding bass traps or diffusers. Remember, patience is key; small changes over time lead to significant improvements, turning your setup into a concert hall rather than a cluttered closet.
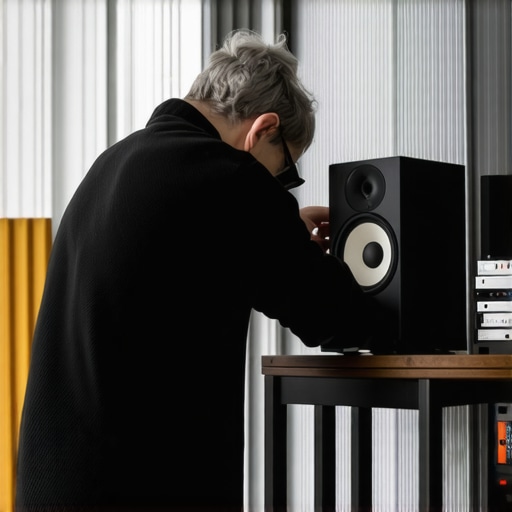
Many enthusiasts jump straight into upgrading hardware or chasing the latest gadgets, believing it will drastically improve their listening experience. But often, these efforts overlook nuanced pitfalls that can undermine even the most expensive equipment. For instance, a common misconception is that newer or more expensive gear automatically guarantees better sound quality. In reality, important factors like room acoustics and proper setup play a more significant role than brand or price tag.
Is Your Headphone Setup Causing More Harm Than Good? Explore the pitfalls of improper mounting and wiring that can lead to distortions or damage, as discussed by audio experts. It’s a subtle but critical detail that many overlook, leading to unnecessary frustration and expenditure.
Another widespread myth involves soundbars: many assume that adding more speakers or higher wattage will produce richer sound. However, without proper positioning and calibration, these systems often deliver muddled audio instead of immersive experience. Just like in speaker placement, optimizing positioning and understanding propagation nuances can make a world of difference.
Moreover, advanced setups involving amplifiers and home theater receivers often suffer from overlooked issues like impedance mismatches or cable interference. For example, using cheap Bluetooth adapters can introduce noise or reduce sound clarity, as highlighted in several audiophile forums and studies. Always prioritize quality connections over flashy features.
What happens when you ignore the intricacies of soundstage spatiality?
One advanced mistake is neglecting the phase relationship between multiple speakers. Improper phase alignment causes cancellations that diminish bass and stereo imaging. Ensuring speakers are wired correctly and calibrated with tools like a phase checker significantly improves clarity. This detail, though subtle, is often the difference between a good setup and a truly exceptional one—something audiophiles obsess over. You might find this particularly relevant if you’re building or fine-tuning a surround system or trying to get depth with headphones. Read more about how phase alignment impacts sound here.
In the realm of headphones, one common mistake is trusting low-quality models for long-term listening, often causing listener fatigue or damage to hearing. Investing in headphones with proper drivers and comfort features is more beneficial than chasing trendy brands blindly. And forget not the importance of proper cable management and positioning—wireless models suffer just as much from interference as wired setups if not configured correctly. For instance, Bluetooth interference from Wi-Fi networks or other devices can introduce latency and static, diminishing your listening pleasure. Properly positioning your devices and choosing suitable channels or codecs can mitigate these issues. Find tips on avoiding Bluetooth interference here.
Finally, many users overlook the importance of room treatments like bass traps and diffusers, assuming that these are only necessary for professional studios. The reality is that room acoustics affects every home audio system, whether small soundbar or high-end theater setup. Small adjustments like adding rugs or wall panels can drastically improve sound clarity and prevent problematic resonances. Don’t fall into the trap of thinking your hardware alone will perfect your sound. Remember, even the best gear sounds mediocre without proper environment management. Dive deeper into room treatment solutions here.
In summary, honing your home audio experience isn’t just about gear—it requires understanding and managing the subtler aspects that influence sound quality. By de-mystifying common myths, avoiding costly mistakes, and paying attention to detail, you’ll ensure your investment yields the best possible listening environment. Have you ever fallen into this trap? Let me know in the comments. Embrace the nuances, and your ears will thank you!
Keeping your home audio system performing at its best over time requires more than just initial setup; regular maintenance and the right tools are vital. I personally swear by a handful of specialized equipment and methods that have kept my gear sounding pristine for years. For instance, using a handheld digital multimeter allows me to verify impedance and ensure my amplifiers and speakers are functioning correctly, preventing costly damage. This tool is invaluable when troubleshooting wiring issues or confirming connections after adjustments.
Another essential item I recommend is a calibration microphone, such as the Dayton Audio UMM-6. I use mine in conjunction with room correction software like REW (Room EQ Wizard) to measure frequency response, identify problematic peaks or dips, and fine-tune my system’s equalization. Regular calibration, say every six months, ensures consistent sound quality especially as room conditions or equipment change.
How do I maintain my audio setup over time?
Routine cleaning is fundamental. Gently dust your speakers, amplifiers, and connections with a soft brush or microfiber cloth—avoiding harsh chemicals. Over time, dust buildup can subtly distort sound or cause overheating. I routinely check and tighten all cables and connectors, using high-quality shielded and gold-plated connectors to prevent corrosion and signal degradation. When it comes to software, keep your firmware and drivers updated through official manufacturer sites; I regularly visit the websites of brands like Yamaha or Denon to download the latest patches that enhance protection and compatibility.
In terms of physical maintenance, inspecting rubber surrounds or de-foam rings (if applicable) is crucial. For old speakers with stiff or cracked surrounds, reviving them might require a simple repair. I recommend this detailed guide for steps on restoring aged speaker parts, which can breathe new life into your setup without the expense of replacement.
Looking ahead, I predict that AI-powered calibration tools and smart home integration will simplify maintenance, making it easier for even novices to keep their systems performing optimally. For now, leveraging accurate measurement tools like calibration microphones paired with software remains the best approach to fine-tuning sound quality and troubleshooting.
Don’t hesitate to incorporate these practices into your routine. For example, try using a room correction microphone monthly to detect shifts in response. It’s a small effort that guarantees your audio stays majestic for years to come.
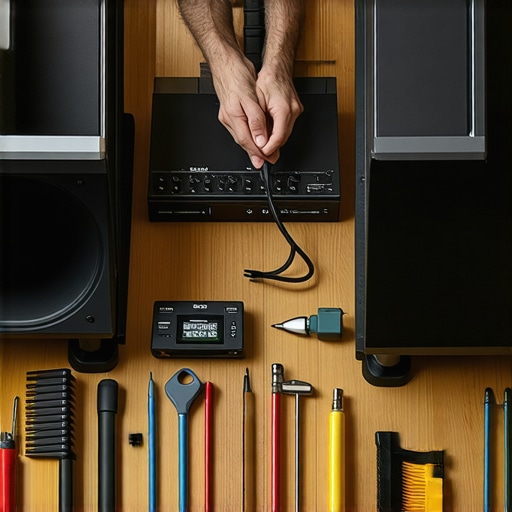
Proper cable management and routine inspections are often overlooked but critical to long-term sound quality. Using cable organizers, like zip ties or dedicated channels, prevents accidental disconnections and minimizes interference from tangled wires. Investing in well-shielded cables has saved me countless headaches related to static or signal loss—especially in complex setups where multiple components are interconnected. To prevent noise from external sources, keep power supplies and extension cords organized and away from your audio gear. A little proactive maintenance saves money and keeps your listening experience immersive and hassle-free.
After years of tinkering and countless listening sessions, I discovered that the real magic of great audio isn’t solely in expensive equipment but in the subtle art of positioning. It’s amazing how a slight shift—the tiniest tilt or a few inches of distance—can transform your listening experience from muddled to mesmerizing. This revelation changed my entire approach, turning my home into a personal concert hall.
The Surprising Power of Fine-Tuned Placement
What I learned is that your room’s acoustics and speaker placement are intertwined in a delicate dance. Small adjustments, like angling your speakers differently or elevating them to ear level, can dramatically enhance clarity and stereo imaging. These tweaks are often overlooked but have a profound impact, making your audio setup feel truly immersive. Don’t underestimate the importance of experimenting with positioning; it’s a cost-effective way to elevate your sound quality beyond hardware upgrades.
Building an Engineered Listening Environment
The journey begins with understanding your space. Decluttering, adding soft furnishings like rugs, and minimizing reflective surfaces create a welcoming acoustic landscape. Even minor changes—such as repositioning furniture or adding bass traps—can eliminate echo and resonances that muddy your sound. Think of your room as an extension of your speakers: optimizing it is like tuning an instrument for perfect harmony.
Perfecting Your Speakers’ Orientation and Distance
Positioning your speakers at ear level and angling them toward your listening seat creates a focused soundstage. Using sturdy stands or even stacking books can elevate your speakers. Consistent distances from walls prevent bass boomy-ness, and a few inches can make a difference. Play with toe-in angles to refine stereo imaging—it’s like pointing a flashlight at your favorite song, illuminating every detail. For detailed calibration techniques, check out how room acoustics influence your stereo quality.
Testing and Refining Your Setup
Move your speakers slightly and listen critically. Tracks with wide ambiance help reveal improvements in realism and spatial accuracy. Remember, patience is vital—small, incremental adjustments over time will yield the best results. Ultimately, your ears are the best judges, so trust them and fine-tune accordingly. And if you’re concerned about vibrations, simple solutions like isolation pads can make your recordings cleaner and louder without upgrading your gear.
Going Beyond Basics with Speaker Preservation
Maintaining your speakers involves more than placement. Regularly checking cables, cleaning dust from delicate components, and protecting rubber surrounds through simple repairs can extend their lifespan. Using calibration microphones and measurement software like Room EQ Wizard ensures your system remains balanced as your environment changes. Routine maintenance and a keen eye on component health keep your listening experience consistently outstanding—it’s about nurturing your investment.
Insider Wisdom: Lessons No One Tells You
- Don’t overlook room shapes and furniture placement: These influence sound reflections more than you might expect.
- Experiment with speaker angles: Slight toe-in adjustments can significantly improve stereo imaging.
- Be patient and keep detailed notes: Tracking your tweaks helps recreate the perfect setup later.
- Invest in quality stands and isolation pads: They prevent vibrations and enhance clarity beyond what hardware changes can achieve.
- Remember, acoustics evolve: Regularly reassessing your environment ensures sustained sound excellence.
My Go-To Tools for Audio Optimization
- Room EQ Wizard (REW): An indispensable software for measuring frequency response and adjusting EQ for a flat, balanced sound.
- Calibration Microphone: Devices like the Dayton Audio UMM-6 enable precise room measurements, making fine-tuning accessible even for novices.
- Vibration Isolation Pads: Simple pads or stands from brands I trust, such as IsoAcoustics, dramatically reduce unwanted resonance.
- High-Quality Speaker Cables: Investing in shielded, gold-plated cables ensures signal integrity and longevity.
Your Next Step Toward Audiophile Bliss
The realm of home audio isn’t just about buying the latest gadgets—it’s about understanding the nuances that turn mediocre sound into an immersive journey. By applying these placement techniques and adopting a curious, experimental mindset, you can unlock a level of sound quality that rivals professional studios. So, I challenge you: start with one tweak today, and listen to how your music transforms. Remember, every small step brings you closer to audio perfection.
What has been your most surprising discovery when optimizing your speaker placement? Share your insights below!